4-36 Service Manual
5025-2xx, 4xx
Fuser exit sensor removal
See “Fuser exit sensor” on page 7-7 for the part number.
1. Open the front cover.
2. Remove the right cover assembly. See “Right cover assembly removal” on page 4-12.
3. Remove the left cover. See “Left cover assembly removal” on page 4-6.
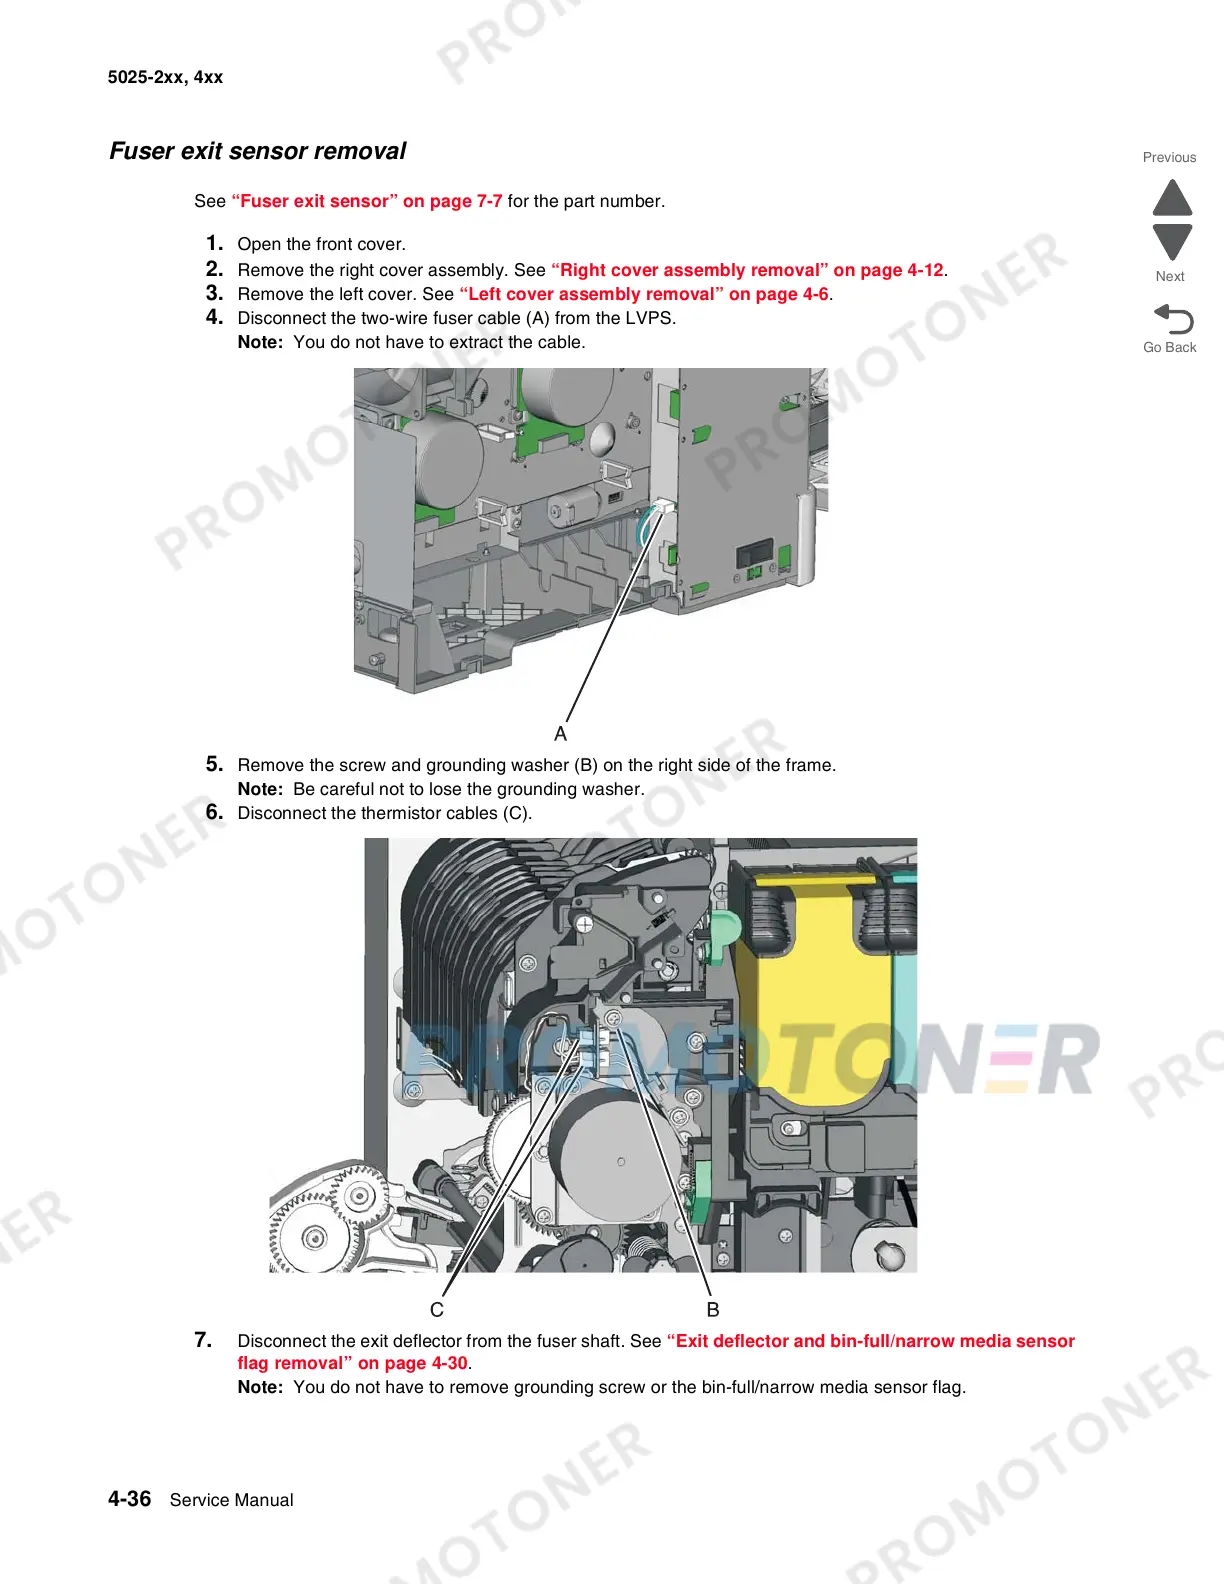
4. Disconnect the two-wire fuser cable (A) from the LVPS.
Note: You do not have to extract the cable.
5. Remove the screw and grounding washer (B) on the right side of the frame.
Note: Be careful not to lose the grounding washer.
6. Disconnect the thermistor cables (C).
7. Disconnect the exit deflector from the fuser shaft. See “Exit deflector and bin-full/narrow media sensor
flag removal” on page 4-30.
Note: You do not have to remove grounding screw or the bin-full/narrow media sensor flag.