4-62 Service Manual
5025-2xx, 4xx
15. Swing the rear of the lower frame away from the printer, and remove the right lower frame.
Note: There are parts in the right lower frame that are not included in the frame. The following instructions
show how to remove them.
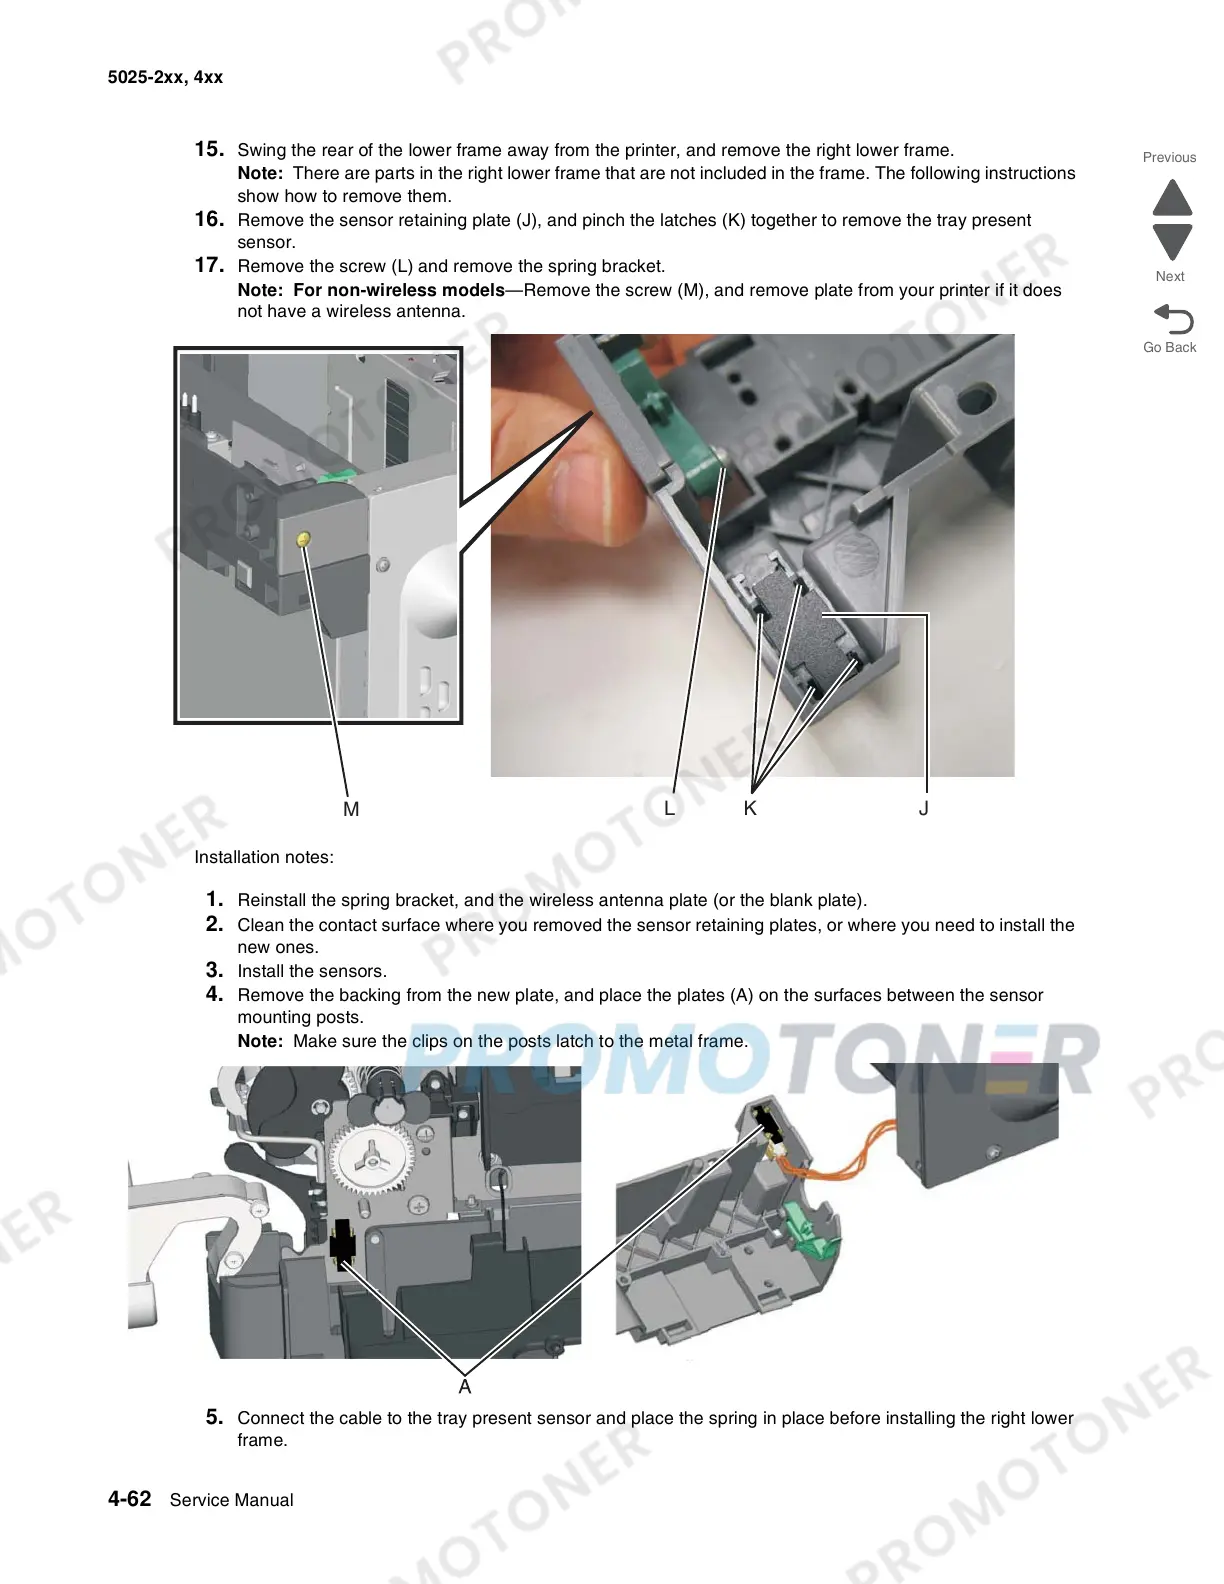
16. Remove the sensor retaining plate (J), and pinch the latches (K) together to remove the tray present
sensor.
17. Remove the screw (L) and remove the spring bracket.
Note: For non-wireless models—Remove the screw (M), and remove plate from your printer if it does
not have a wireless antenna.
Installation notes:
1. Reinstall the spring bracket, and the wireless antenna plate (or the blank plate).
2. Clean the contact surface where you removed the sensor retaining plates, or where you need to install the
new ones.
3. Install the sensors.
4. Remove the backing from the new plate, and place the plates (A) on the surfaces between the sensor
mounting posts.
Note: Make sure the clips on the posts latch to the metal frame.
5. Connect the cable to the tray present sensor and place the spring in place before installing the right lower
frame.