Lexmark MS31x/41x/510/610 & MX310/410/51x/61x Product Study Guide Rev 1.3
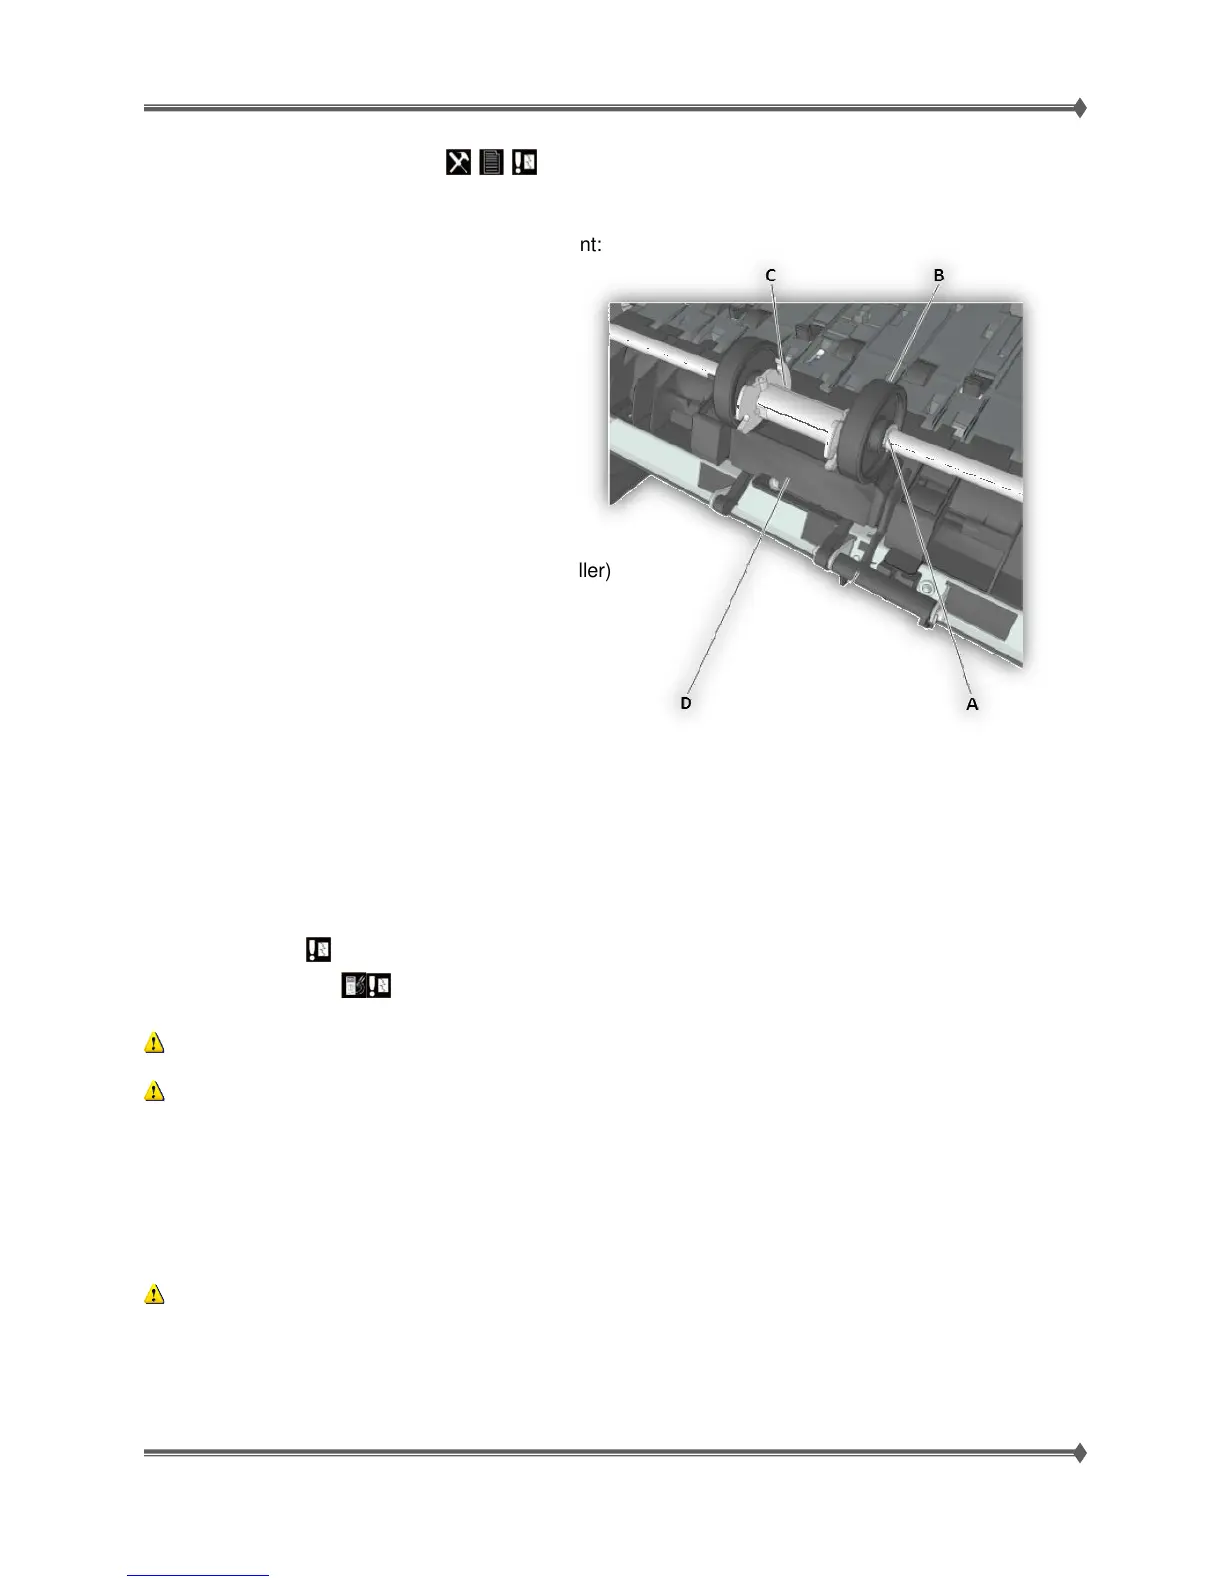
MPF Separator Pad
The replacement of the MPF Separator Pad is lengthy and complex. The following parts should be
carefully removed and installed during replacement:
1. Right Cover
2. Front Access Cover
3. MPF Pick Roller Cover (with bail)
4. MPF Pick Roller
5. Jam Access Cover
6. Right E-clip (A)
7. Right Restraint Roller (B)
8. MPF Pick Roller Hub (C)
9. Pin (right side of the left Restraint Roller)
10. Left Restraint Roller
11. Left E-clip
12. Shaft
13. MPF Separator Pad (D)
Note that some of the parts to be removed are really small, like the E-clips and restraint roller pin. It is
critical to make sure all those parts are re-installed properly after replacing the MPF separator pad. If a
single part is missing, the MPF will not work properly.
Mirrored NVRAM Components
Control Panel
Controller Board
Warning! Observe all ESD precautions while handling electronic parts.
Warning! When replacing any one of the NVRAM components:
• Only replace ONE component at a time – NEVER replace both at once.
• Perform a POR before replacing the second component. If this procedure is not followed,
the printer will be rendered inoperable.
• These components mirror the critical NVRAM settings for the printer. If you have not already
done so, complete the online course Mirrored NVRAM from Lexmark’s online learning site.
Warning! If you must use one of the components listed above as a method of troubleshooting, boot
the printer into Diagnostic mode only. This will prevent the NVRAM from copying to the new
component. If the printer is allowed to boot normally, however, the NVRAM will copy to the new
component and it cannot be used in another printer. It must be returned to the manufacturer.
For Training Purposes Only 81 4/21/2014