Basic Setup4
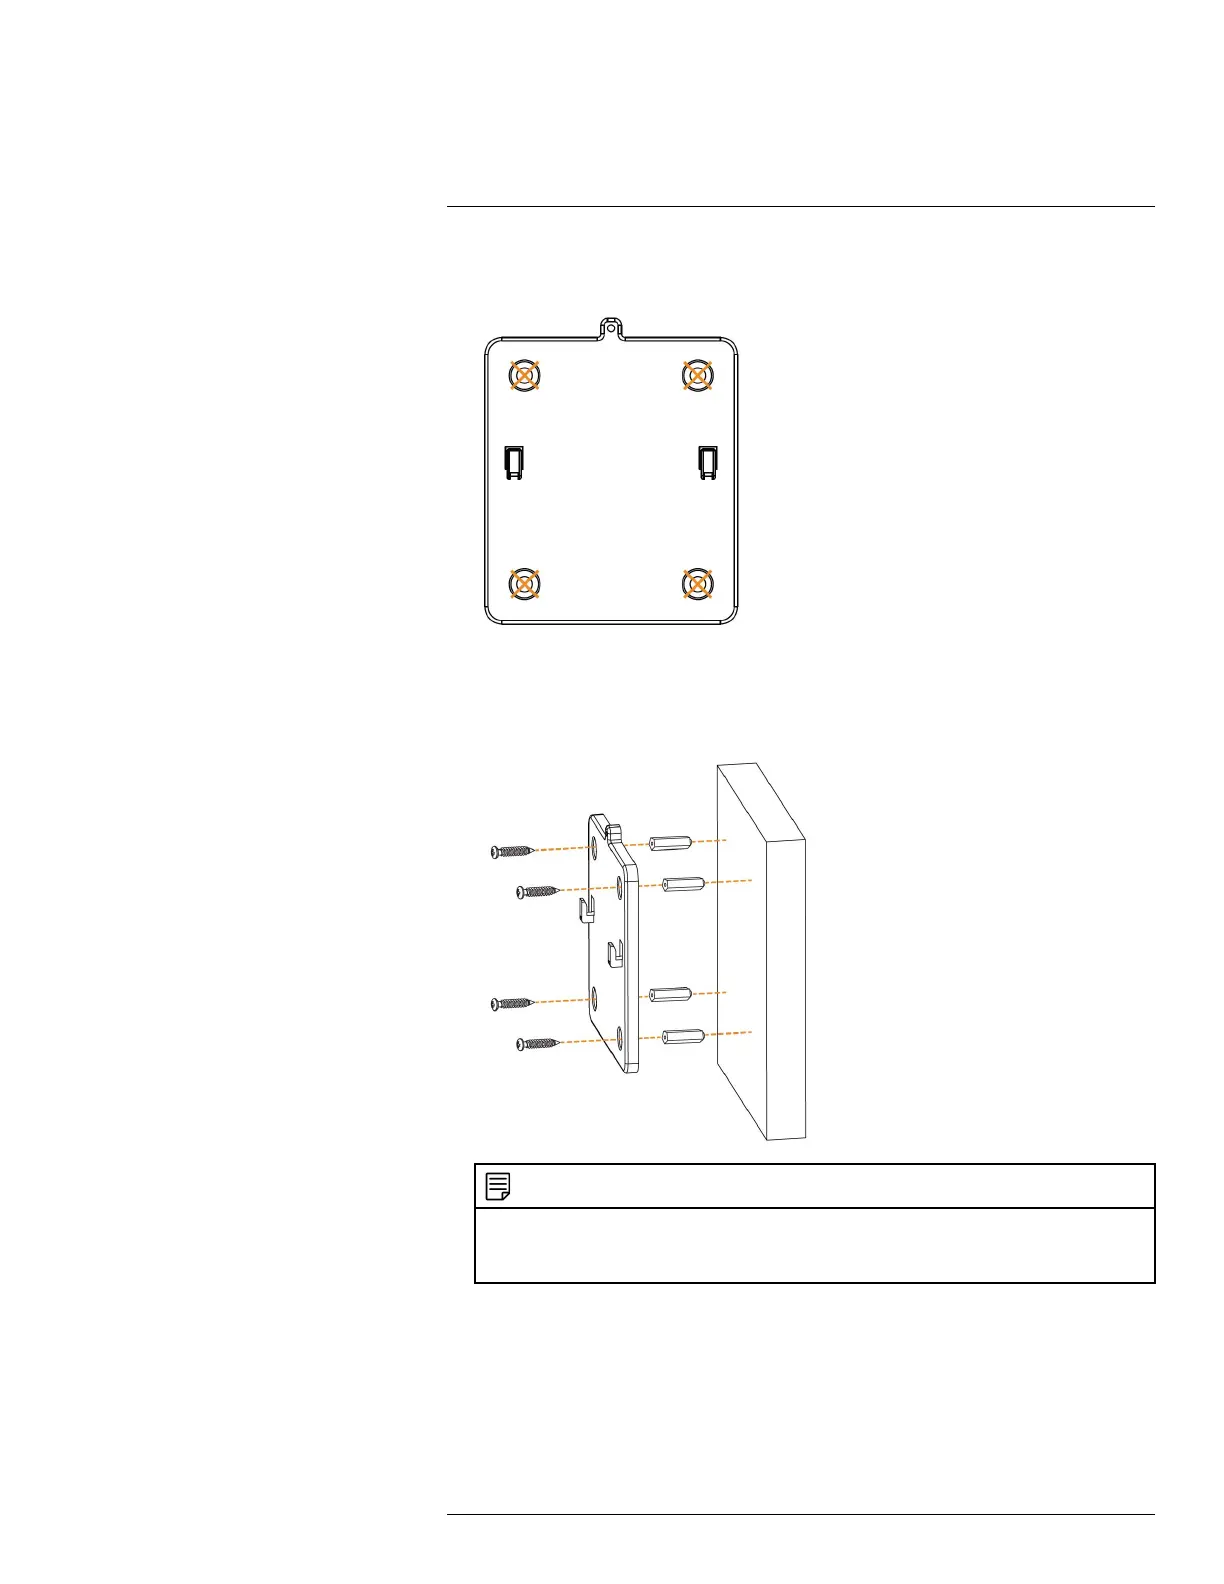
1. Set the mounting bracket in the desired mounting position. Mark holes through the mounting
bracket (shown as orange X’s below).
2. Drill holes where marked for the mounting screws using the included drill bit (item C in
toolkit).
3. Secure the bracket to the mounting surface with the included mounting screws (×4). Make sure
all screws are fastened tightly using the included screwdriver (item A+B in toolkit).
NOTE
• Insert the included drywall anchors if you are mounting the camera onto drywall.
• The hole at the top of the mounting bracket will be used in step 5, once the camera is attached to the
mounting plate.
#LX400109; r. 2.0/54857/55689; en-US 12

 Loading...


