Grove Published 7-23-2020, Control # 668-02 4-105
GRT9165 OPERATOR MANUAL OPERATING PROCEDURES
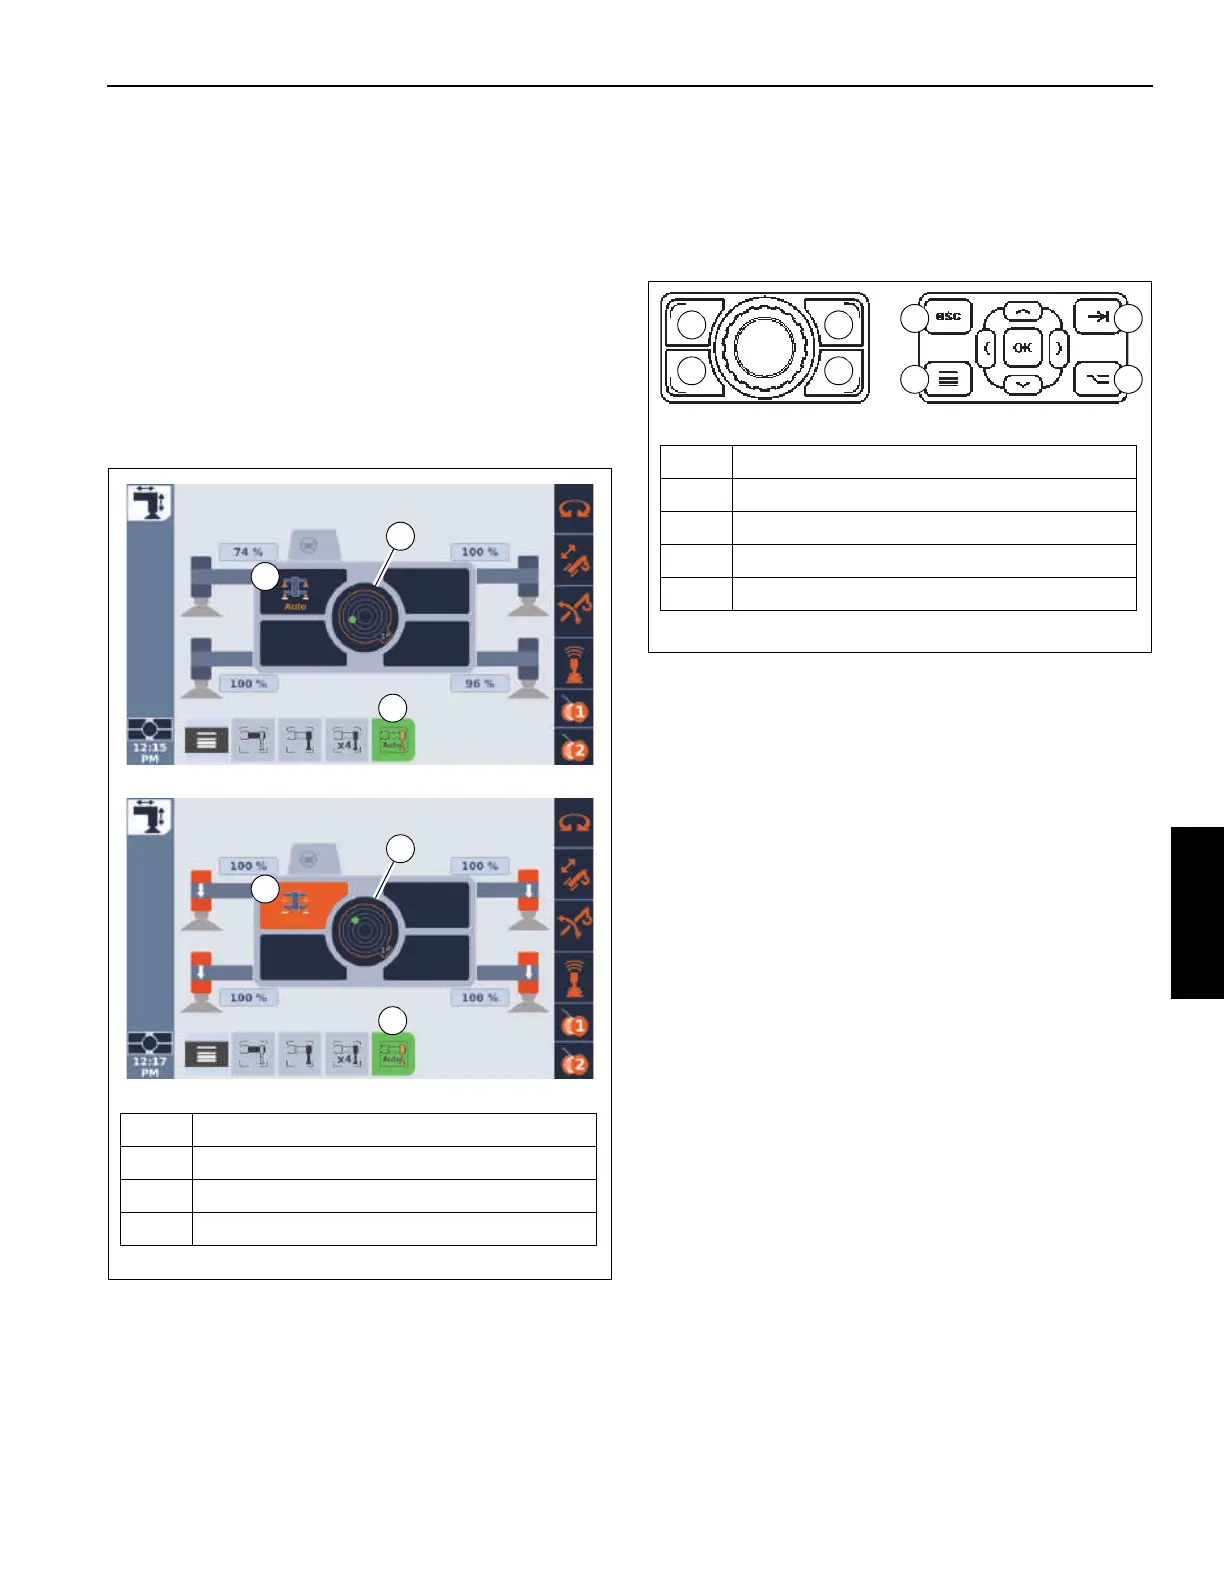
Leveling the Crane Using Auto-level
To level the crane using the auto-level function, perform the
following procedure:
1. Fully extend the four outrigger jacks.
2. Using the Jog Dial, or the Arrow Buttons at the
Navigation Control Pad, select the Auto-level icon
(3, Figure 4-104) (icon will turn orange when selected).
3. Press the Jog Dial, or the OK Button at the ODM, to
make the Auto-level icon active (icon will turn green
when active). The Outrigger Extend/Retract function
screen will also change to show the Auto-level indicator
(1, Figure 4-104).
4. To begin the auto-level function, position the Outrigger
Extend/Retract Switch (17, Figure 3-17) on the left
armrest to the extend or retract position, then press and
hold the button (1, Figure 4-105) at the Jog Dial or
Navigation Control Pad that corresponds to the
Auto-level Button on the screen.
With the two buttons pressed, the auto-level system will
adjust the height of the jacks automatically as it levels
the crane. Several adjustments may be necessary.
After an adjustment is made, the auto-level system will
pause for a short time as it does a levelness check of the
crane. The operator can watch the leveling process by
viewing the inclination indicator (2, Figure 4-104).
If crane is still not level, the system will continue to make
adjustments, with each adjustment followed by a pause
for a level check.
When crane is level within 0.15°, the Auto-level Indicator
(1, Figure 4-104) flashes. When this occurs, the
auto-level process is complete and no further
adjustments are made.
5. Release the Outrigger Extend/Retract Switch and the
button (1, Figure 4-105) at the Jog Dial or Navigation
Control Pad.
FIGURE 4-104
1
3
9902-11
2
1
3
2
9902-12
Item Description
1 Auto-level Indicator
2 Inclination Indicator
3 Auto-level Icon
FIGURE 4-105
Item Description
1 Left-Front Jack - Auto-level
2 Right-Front Jack
3 Left-Rear Jack
4 Right-Rear Jack
1 2
3 4
1
3
2
4

 Loading...


