Grove Published 7-23-2020, Control # 668-02 4-165
GRT9165 OPERATOR MANUAL OPERATING PROCEDURES
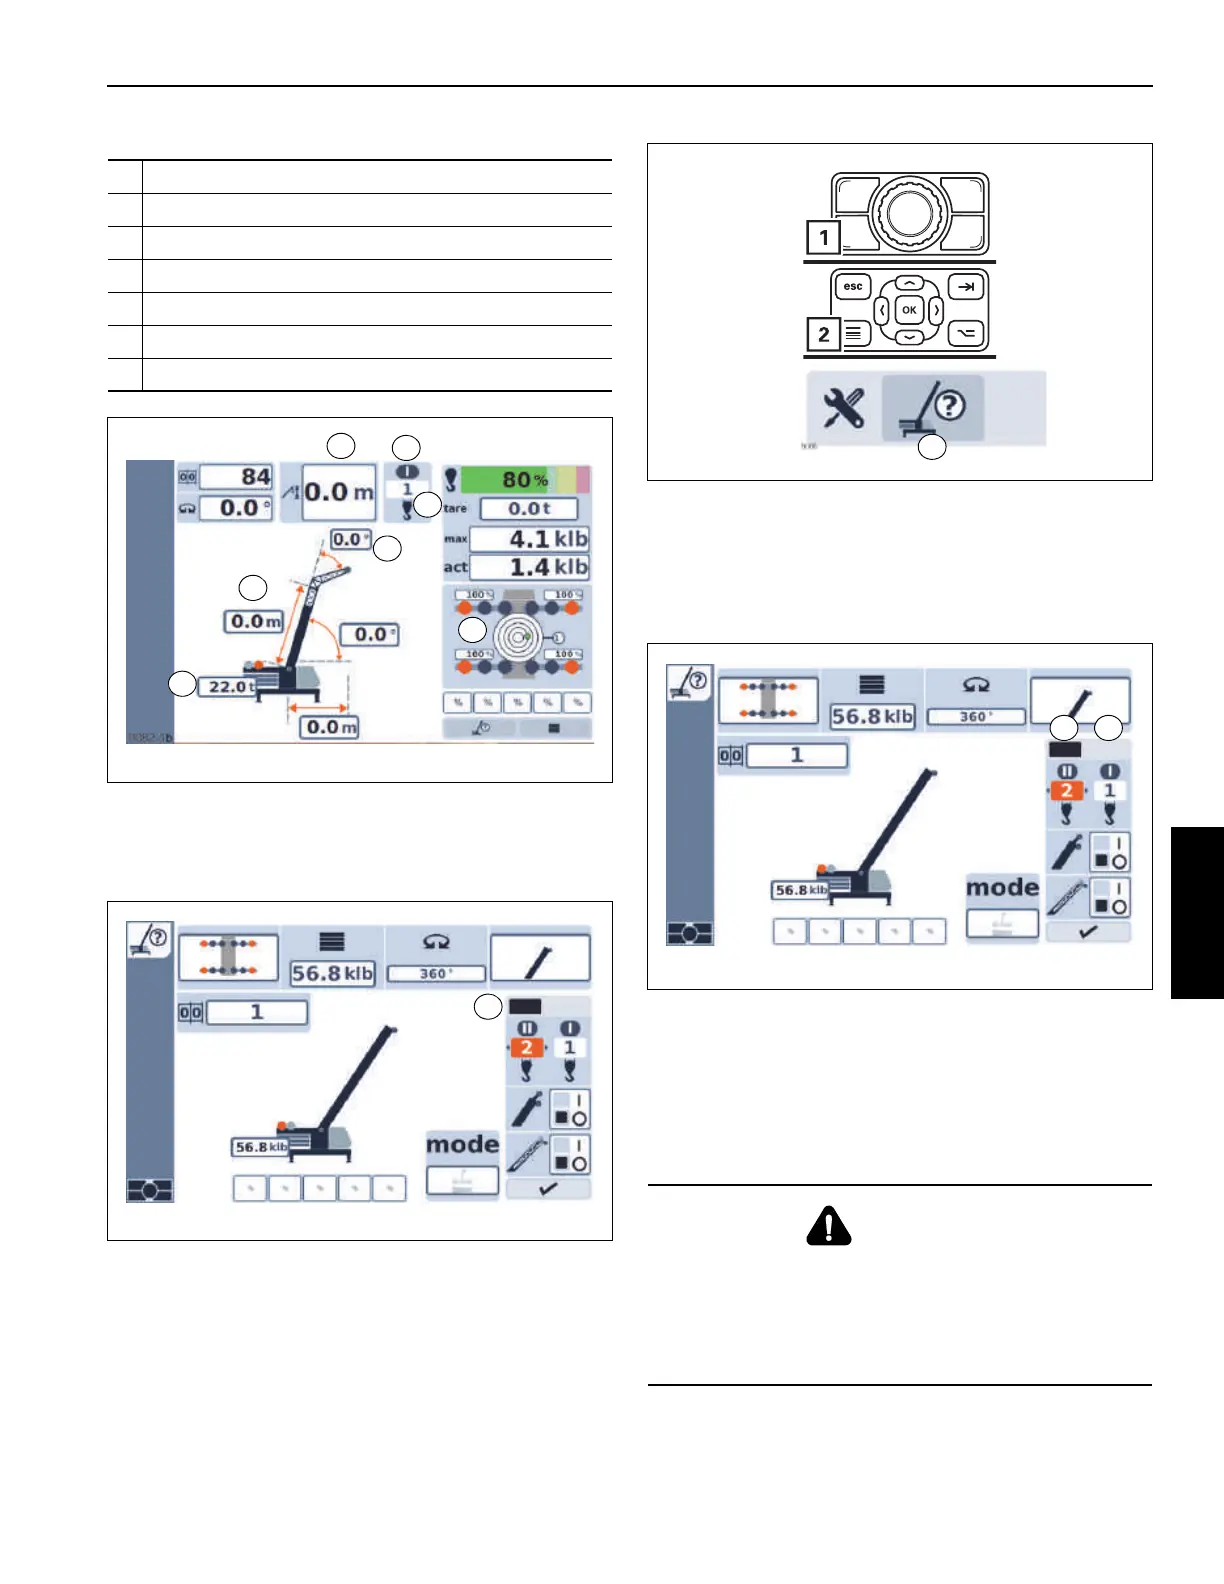
• Check Figure 4-193:
Hoists Display
The symbol bar symbol (1, Figure 4-194) must appear over
top of the hoist with which the load is to be lifted.
To switch between main hoist or auxiliary hoist, refer to
Example of how to Switch over the Hoists, page 4-165.
If you need to correct values, press the button (1,
Figure 4-195) or (2) and open the Enter rigging mode (3)
menu.
You can start working with the crane if the correct rigging
mode of the crane is displayed.
Example of how to Switch over the Hoists
The load is planned to be raised with the main hoist, for
example. However, the hoist indicator (1, Figure 4-196) for
the auxiliary hoist is on and the indicator (2) for the main
hoist is off.
Switch over the hoists as follows:
• Switch off both hoists by selecting no hoist indicator.
Switch on the auxiliary hoist indicator.
The hoist indicator will now be displayed above the auxiliary
hoist icon.
1 Lattice extension angle where necessary
2 Boom length
3 Boom tip/boom extension tip height
4 Rigged counterweight
5 Hoist that is switched on
6 Number of reeved hoist rope lines
7 Rigged outrigger span
FIGURE 4-193
1
2
3
4
5
6
7
9905-10
WARNING
Overload Hazard!
When operating the crane with two hoists reeved, ensure
that the hoist in use is identified in the RCL configuration.
Failure to do so may result in overload of the hoist line or
crane. Death or Serious Injury could occur.

 Loading...


