Catch Sensors | V1 | Sensor Configuration
Procedure
1.
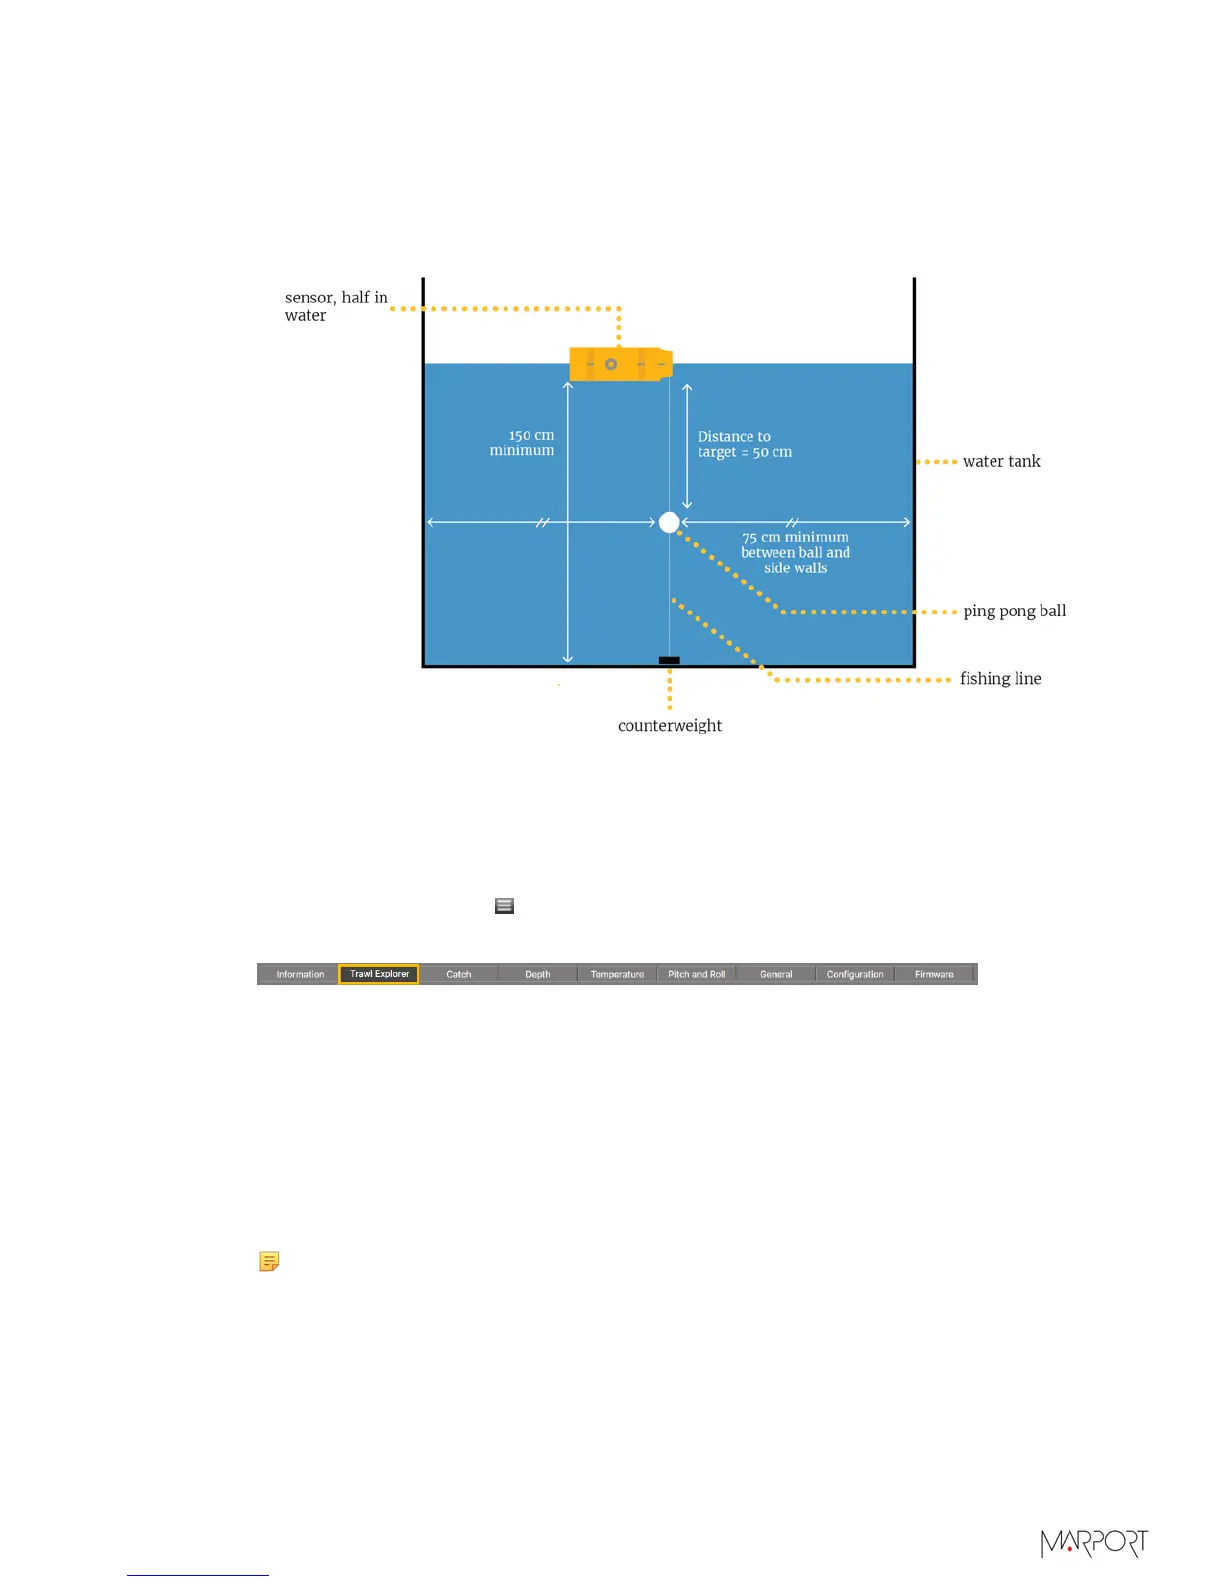
Set up the following installation. See Appendix B: Examples of Installations for a
Target Strength Calibration on page 94.
• Water needs to be still.
• To hold the ping pong ball, use a very thin fishing line (0.1mm thick).
2.
Before putting the sensor in water:
a)
Activate and deactivate the water-switch to connect the sensor to Mosa via
Bluetooth.
b)
Cover the water switch and charging pins with adhesive tape to prevent water from
touching them. If it does, it will quit the configuration mode.
3.
From Mosa, click Menu
> Expert Mode and enter the password copernic.
4.
Click the tab Trawl Explorer and click Ping Down Calibration.
5.
Check that the target strength is the one applicable to your target. In this example, it
is -39 dB (target strength value of a ping pong ball of 39 mm diameter).
6.
If you have pitch and roll option on the sensor, check that the pitch and roll of the
sensor is between - 5° and 5° to be sure that the beam direction of the sensor is
vertical down:
a)
Click the tab Pitch and Roll.
b)
From Accelerometer Test, click Apply.
7.
From the bottom of the screen, click Send Ping to send one ping that will identify the
distance to the target.
Note: The distance displayed in Max TS level is 15 to 35 cm more than the
actual distance, depending on the ping length (here it is 25 cm for a ping length
of 20 m).
A curve is displayed. A red horizontal line indicates the target strength and a vertical
line indicates the distance. The crossing between the target strength and the distance
to the ball should be at the top of the first curve (ping pong ball). If not, click the
| 29