MAXDATA PLATINUM Server Board User’s Manual
34
Adding or Replacing a Processor
If you are adding a second processor to your system, you must first remove the terminator
from the secondary processor socket. The second processor must be compatible with the
first processor (within one stepping, same voltage, same speed, see the Intel
®
Customer
Support website for specifics).
1. Observe the safety and ESD precautions given at the beginning of this chapter.
2. Remove the chassis cover (see your system or chassis documentation for instructions).
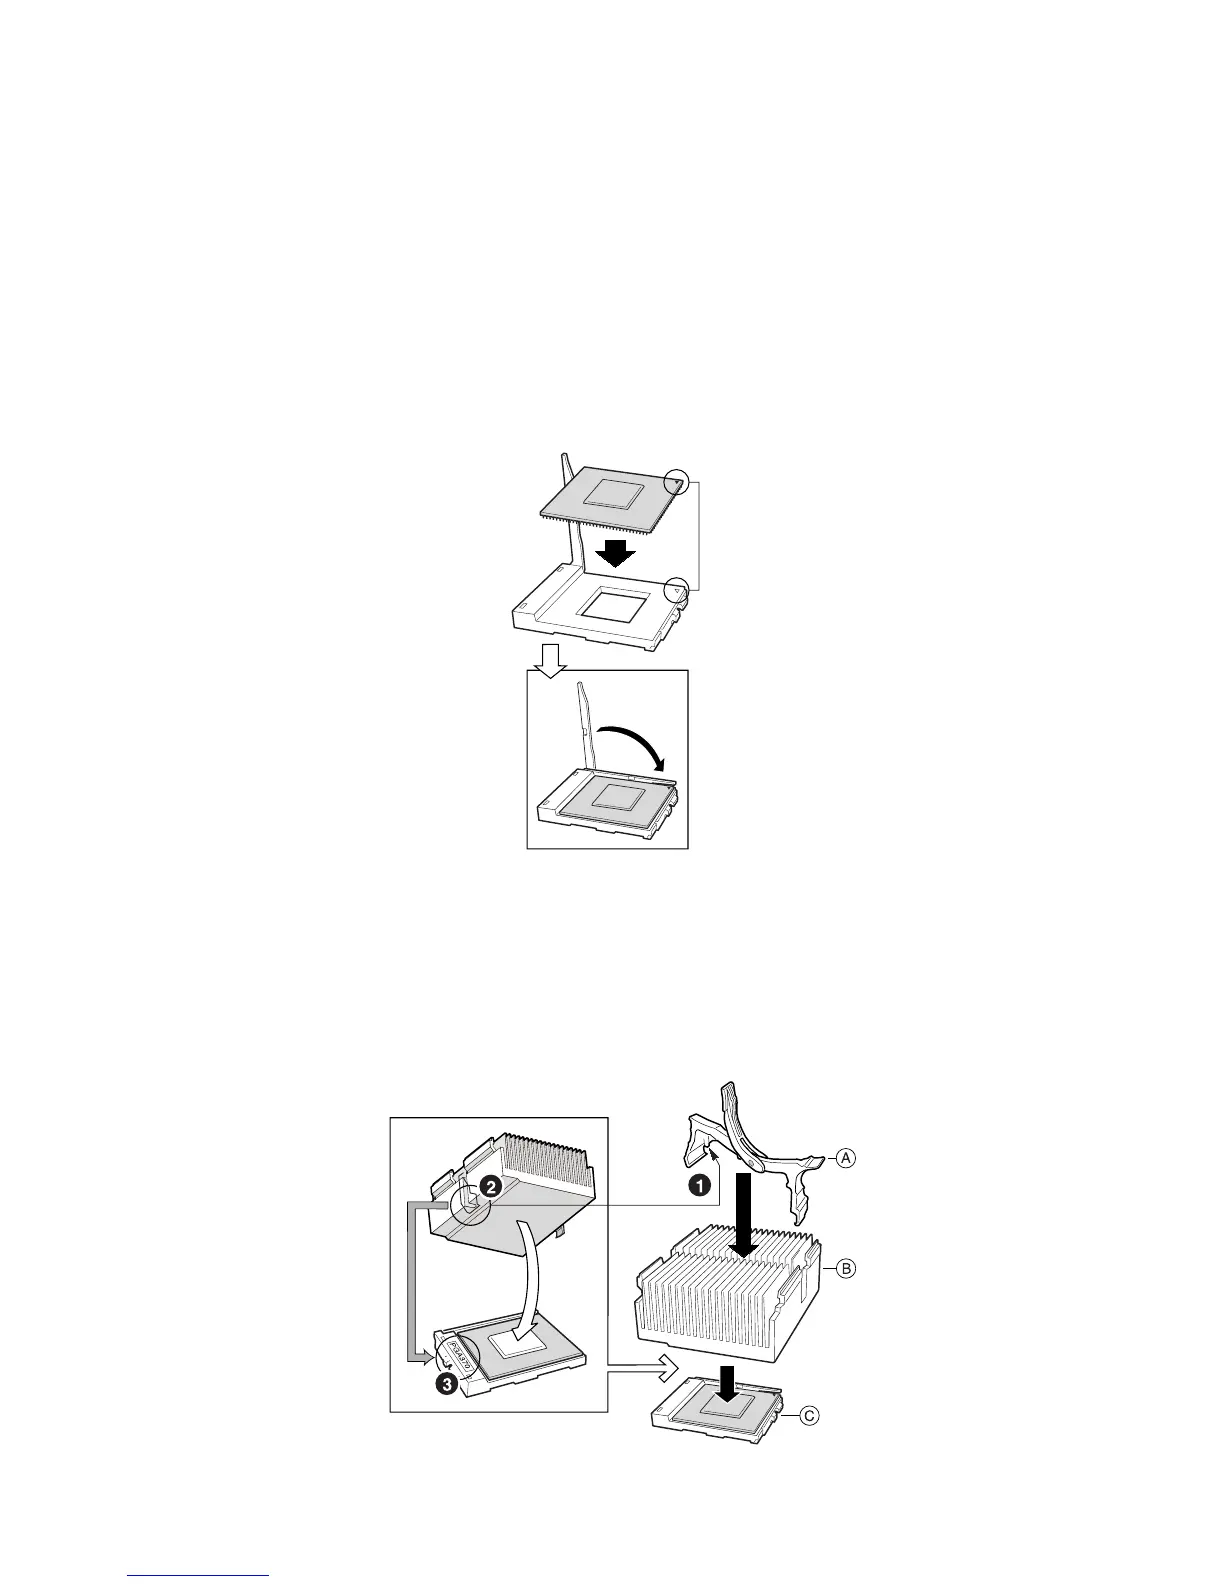
3. Raise the locking bar on the socket.
4. Aligning the pins of the processor with the socket, insert the processor into the socket.
5. Lower the locking bar completely.
Figure 18. Insert the Processor and Lower the Locking Bar
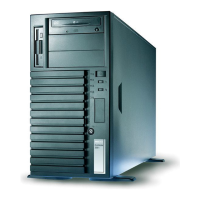
6. Follow the instructions packaged with your boxed processor for preparing the heat sink
and processor for installation.
7. Position the heat sink slot (2) above the socket/processor slot (3).
8. Aligning the raised metal surfaces, place the heat sink on top of the processor.
9. Install the heat sink clip with pin (1) inserted into slot (2).
10. Slowly close the locking lever (A) until it contacts tab (B).
Figure 19. Installing the Heat Sink