IMPORTANT: Always use a new gasket when installing the exhaust manifold.
2. Hand‑tighten two alignment pins (if available) through the appropriate holes in a new gasket and into the two outer
mounting holes in the cylinder head.
!
CAUTION
To avoid the possibility of injury or component damage, use caution when lifting heavy objects. Use an appropriate lifting
device or seek assistance.
IMPORTANT: The exhaust manifold and elbow are heavy. The use of a hoist is highly recommended. If a hoist is not
available, two people should be employed for manifold installation. It may be necessary to remove the elbow and the
catalyst to reduce the weight of the assembly to an amount that is safe to lift without the use of a hoist.
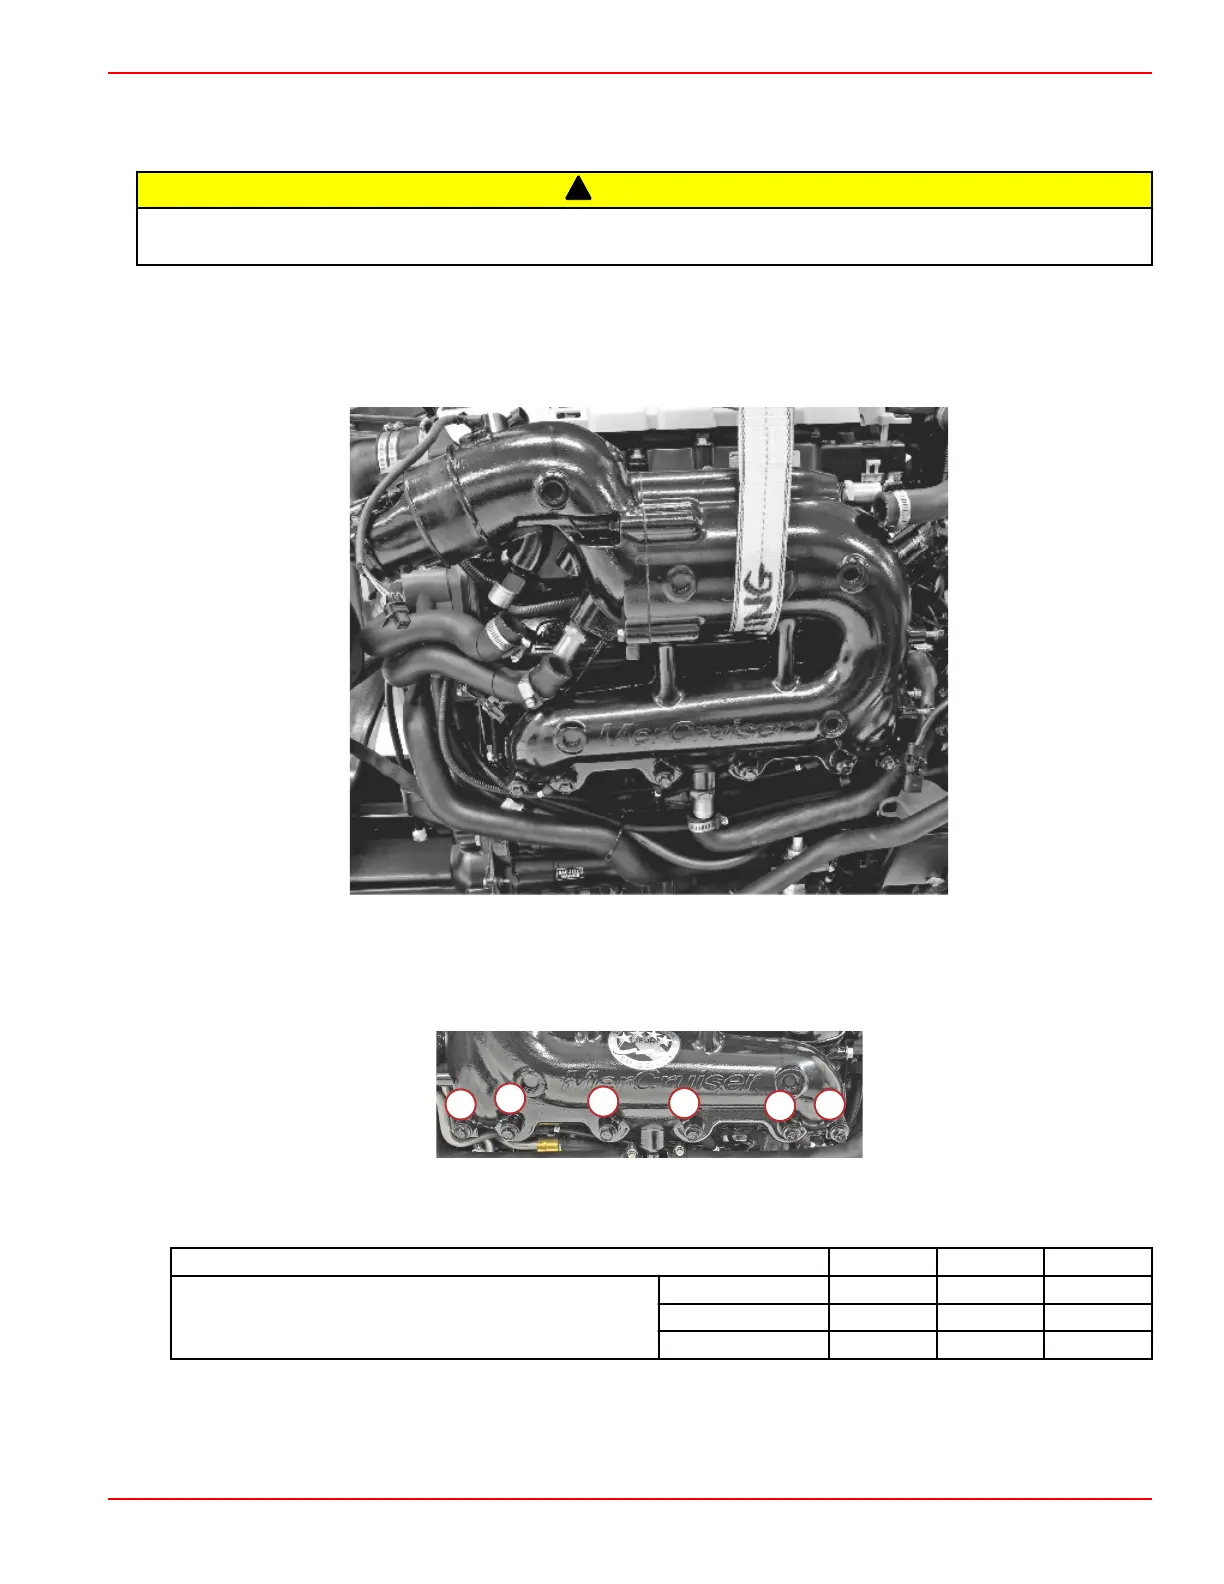
3. Route a suitable lifting strap through the exhaust manifold as shown. Attach the strap to a suitable hoist and move the
manifold into position.
4. Attach the exhaust manifold to the cylinder head using the six mounting screws.
NOTE: Remove the alignment pins only after at least two mounting screws are in place.
5. Tighten the mounting screws to the specified torque, making three passes and following the sequence shown.
Exhaust manifold fastener torque sequence
Description Nm lb‑in. lb‑ft
Manifold mounting screws
First
27 – 20
Second
54 – 39.8
Final
54 – 39.8
6.
Install the catalyst and elbow, if they were removed. Refer to Exhaust Elbow Installation.
7. Attach all cooling hoses, securing them with hose clamps to the specified torque.
8. Connect the exhaust hoses, securing them with two hose clamps to the specified torque at each connection point.
Manifolds and Elbows
90-8M0099748 eng DECEMBER 2015 © 2016 Mercury Marine Page 7B-13

 Loading...