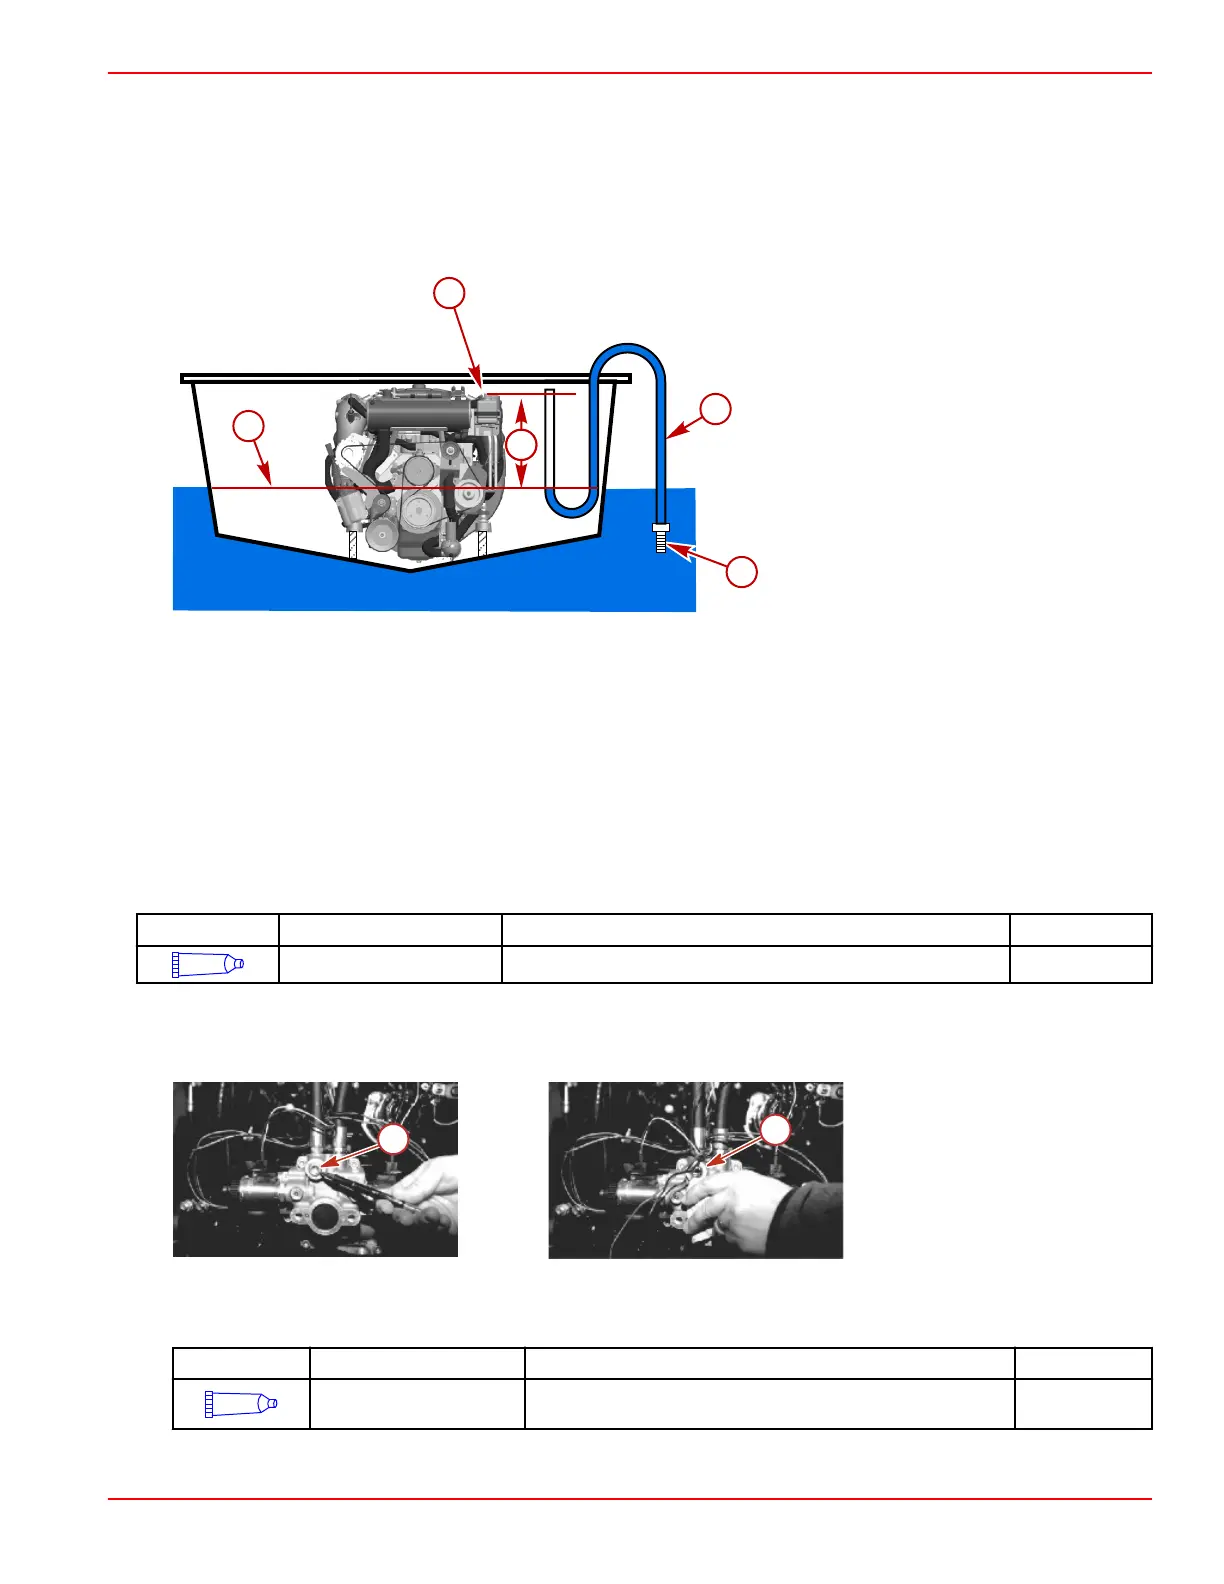
4. Place a finger over the open end of the clear hose before removing it from the water.
5. Coil the excess clear hose into the bottom of the boat bilge. Keep the coil of clear hose below the waterline.
6. Keeping the clear hose in line with the engine's exhaust elbow, lift the end of the clear hose up to the highest point of the
exhaust elbow.
7. Slowly take the finger off of the end of the clear hose to let the water level stabilize. The water will seek the level of the
water outside of the boat. Keep the clear hose close to the exhaust elbow and as vertical as possible.
8. The measurement between the water in the hose and the top of the exhaust elbow is the exhaust elbow height.
a - Waterline
b - Top of exhaust elbow
c - Waterline to top of exhaust elbow
measurement
d - Clear hose
e - Weight
Electrical Connections—TowSport, Inboard
IMPORTANT: Refer to the following precautions when working on or around the electrical harness, or when adding other
electrical accessories, to avoid damage to the electrical system.
• Do not tap accessories into the engine harness.
• Do not puncture wires for testing (probing).
• Do not reverse the battery leads.
• Do not splice wires into the harness.
• Do not attempt diagnostics without the proper, approved service tools.
IMPORTANT: When routing all wire harnesses and hoses, ensure that they are routed and secured to avoid coming in contact
with hot spots on the engine and to avoid contact with moving parts.
Tube Ref No.
Description Where Used Part No.
25
Liquid Neoprene All electrical connections 92- 25711 3
Audio Warning Temperature Switch Installation—Inboard
1. Remove the plug using a 5/16 in. Allen wrench.
DTS electronic shift transmission
a - Plug
b - Plug removed
2. Apply sealant to the audio warning temperature switch. The first thread should have no sealant to reduce the risk of
contamination.
Tube Ref No.
Description Where Used Part No.
9
Loctite 567 PST Pipe
Sealant
After the first thread of the audio warning temperature switch 92-809822
3. Install the switch by hand until resistance is felt.
Installation
90-8M0099748 eng DECEMBER 2015 © 2016 Mercury Marine Page 2B-43

 Loading...