NOTE: For models not factory equipped with a Y‑fitting, refer to
Mercury Parts Catalog, Closed
‑
Cooling Systems (Bravo)
to
order the specified Y‑fitting, seawater supply bulk hose, and hose clamps that meet MerCruiser specifications.
1. Cut a 10 cm (4 in.) piece of the supply hose and connect it to the seawater pump inlet and the Y‑fitting port.
2. Install a seawater supply hose onto the Y‑fitting port and the sterndrive's water inlet at the transom. Cut off any excess
hose.
3. Install a seawater supply hose onto the Y‑fitting port and the through‑the‑hull or through‑the‑transom seawater pickup. Cut
off any excess hose.
4. Properly secure all hoses to all fittings to prevent water leaking into the boat.
Installing the Seawater Supply Hose
For engine models not using a through‑the‑hull or through‑the‑transom seawater pickup:
1. If applicable, remove the Y‑fitting at the seawater pump inlet.
2. Install a seawater supply hose that meets MerCruiser specifications to the engine's seawater pump inlet.
3. Route the seawater supply hose directly to the seawater inlet fitting on the transom. Cut off any excess hose.
4. Properly secure the hose at both ends to prevent water leaking into the boat.
NOTE: For models not factory equipped with a seawater supply hose, refer to the
Mercury Parts Catalog, Standard
‑
Cooling
Systems (Bravo)
to order the specified bulk hose, hose clamps, and quick‑connect fittings that meet MerCruiser specifications.
NOTE: For models with quick‑connection fittings, refer to
Bravo Seawater Inlet Fitting Connection
in
Section 2B
.
Through‑the‑Hull Seawater Pickup System
IMPORTANT: Use a 32 mm (1‑1/4 in.) ID wire‑reinforced hose that is capable of supporting 34 kPa (10 in. Hg) vacuum when
suction is created by the seawater pump impeller.
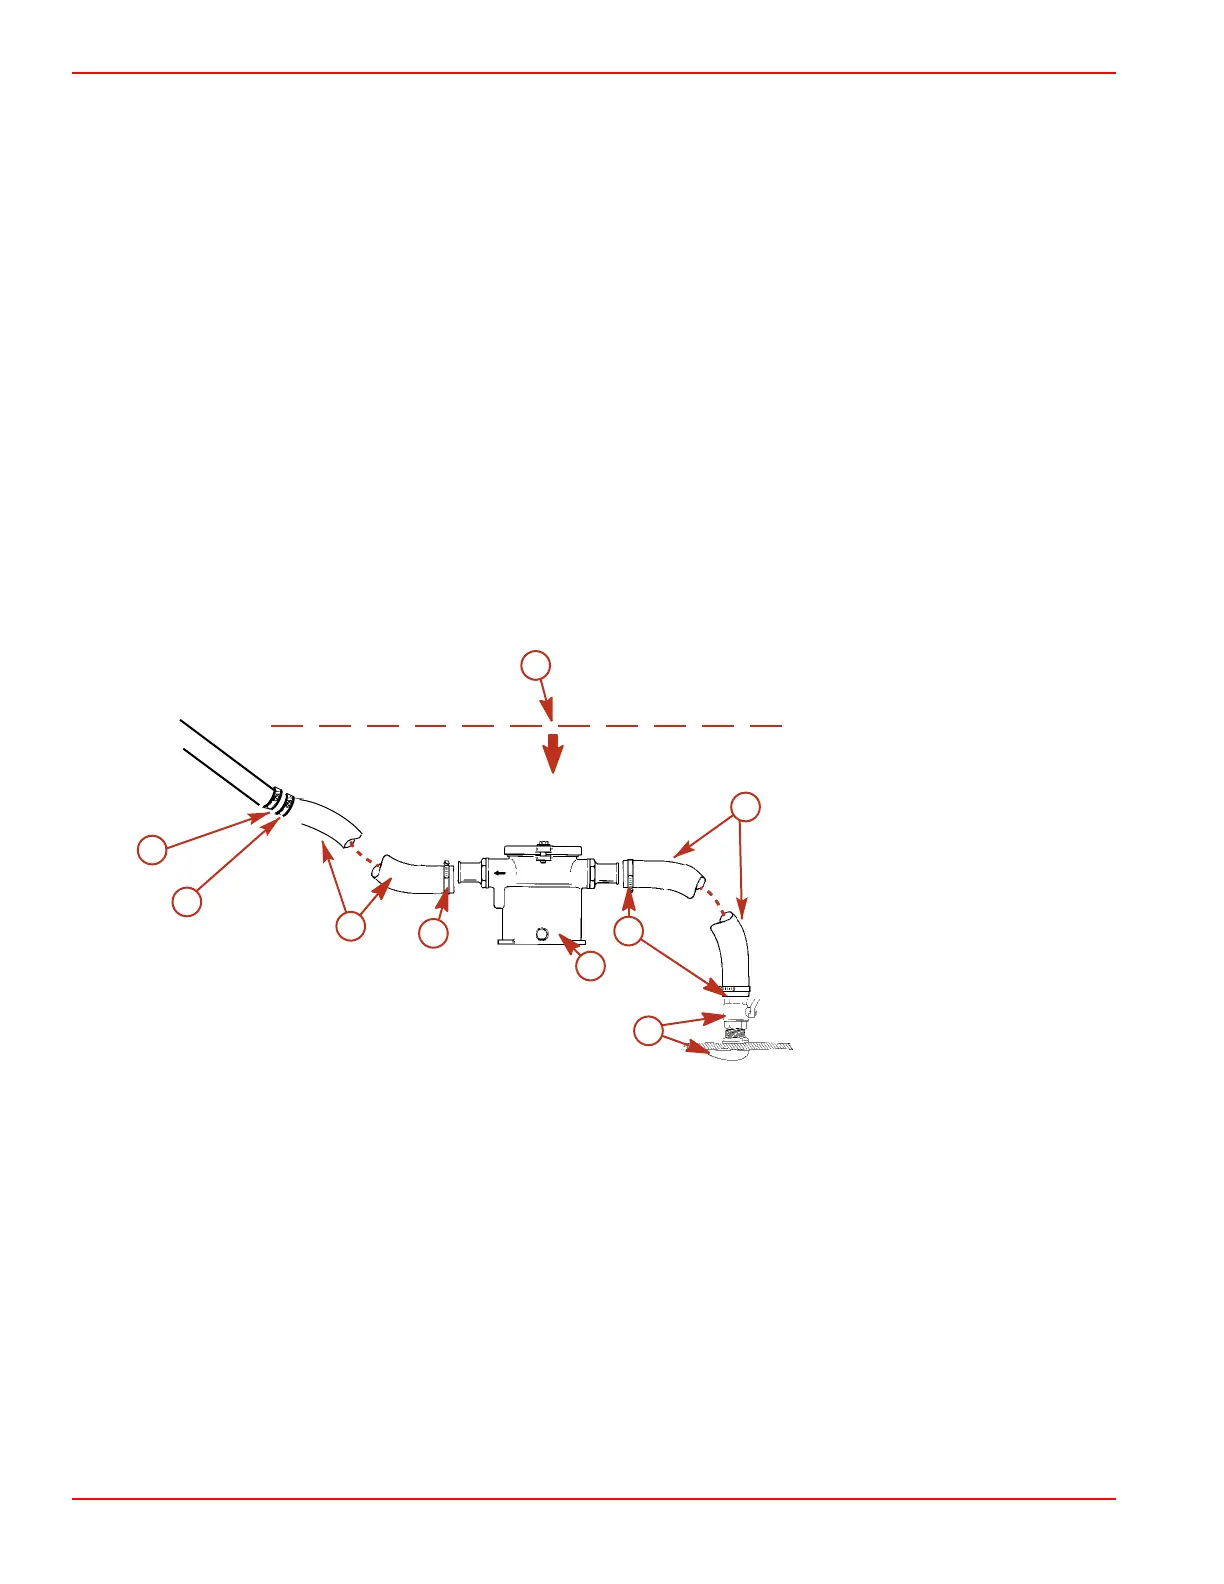
Typical installation shown with a
through-the-hull seawater pickup
a - Seawater pickup and seacock
b - Hose clamp
c - Seawater hose to seawater
strainer
d - Quicksilver seawater strainer
e - Seawater hose to engine
f - Seawater pump hose
connector (if equipped)
g - Below seawater pump level
IMPORTANT: Do not install the seawater pickup directly in line with the propeller, as the pickup may create turbulence and
allow air to flow into the propeller slipstream. This will cause propeller ventilation and will adversely affect boat performance.
IMPORTANT: Make gradual bends in the seawater hoses to avoid kinks. Hoses must not come in contact with steering system
components, engine coupler, or driveshaft.
• The seawater pickup must be large enough to permit sufficient seawater flow to engine seawater pump for adequate
engine cooling.
• The seawater pickup also must supply a positive head while underway.
• The seawater pickup should be located as close to the seawater pump inlet as possible and in an area where an
uninterrupted, solid stream of seawater will flow when the boat is underway.
g
d
a
b
c
b
f
b
e
7924
Models with Closed Cooling
Page 6C-6 © 2016 Mercury Marine 90-8M0099748 eng DECEMBER 2015

 Loading...