NOTICE
Discharge of oil, coolant, or other engine/drive fluids into the environment is restricted by law. Use caution not to spill oil,
coolant, or other fluids into the environment when using or servicing your boat. Be aware of the local restrictions governing
the disposal or recycling of waste, and contain and dispose of fluids as required.
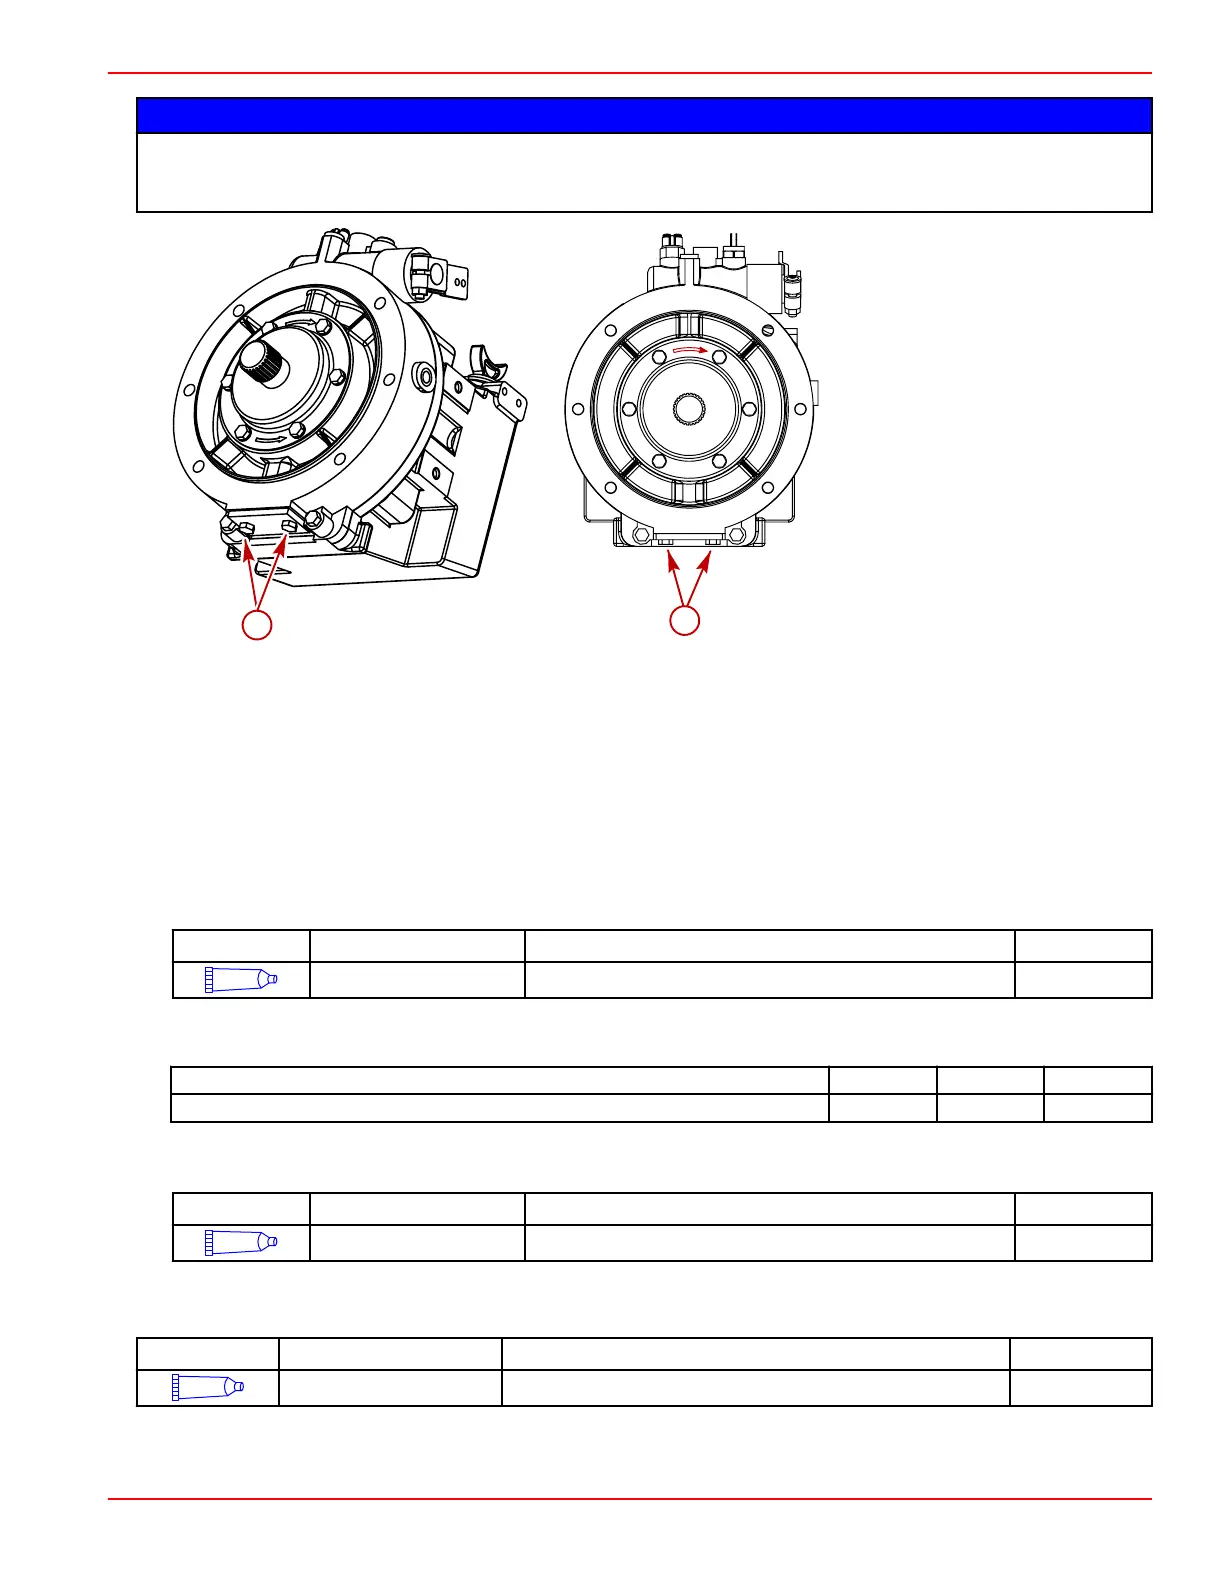
a - Filter plate bolt and washer
3. Place a suitable container under the filter plate to catch the fluid.
4. Remove the two bolts, two washers, filter plate, seal, and filter element.
5. Completely drain the fluid from the transmission.
6. Check the fluid for:
•
Metal particles: A few small particles are normal. Larger metal chips are an early sign of transmission failure, which
may mean the transmission should be disassembled and inspected for internal damage.
•
Rubber particles: Indication of cooler hose wear. The hoses should be inspected for cracks or fraying. Replace the
damaged hoses.
7. Inspect the seal for wear and replace it if necessary.
8. Clean the filter element with Loctite 703 Fast Cleaner or equivalent.
Tube Ref No.
Description Where Used Part No.
Loctite 703 Fast Cleaner Filter element Obtain Locally
9. Install the filter element, seal, and filter plate.
10. Install the bolts and washers. Tighten the bolts to the specified torque.
Description
Nm lb‑in. lb‑ft
Filter plate bolt 18 159 –
11. Apply Loctite 574 Surface Seal to the threads of the breather valve and install the valve into the transmission.
Hand‑tighten.
Tube Ref No.
Description Where Used Part No.
Loctite 574 Surface Seal Breather valve threads Obtain Locally
12.
Fill the transmission with the specified fluid through the dipstick hole. Refer to Specifications.
13. Install the dipstick and O‑ring.
Tube Ref No.
Description Where Used Part No.
28
Dexron III Automatic ZF/45IV transmissions Obtain Locally
Filling
IMPORTANT: Use only the specified transmission fluid.
a
a
26712
ZF/45C, 45IV, 63A, 65IV Transmissions
90-8M0099748 eng DECEMBER 2015 © 2016 Mercury Marine Page 9A-9

 Loading...