OM-253 906 Page 20
5-4. Turning On Remote 14 Receptacle Control For Stick
805 288-A
! Turn Off welding power
source, disconnect input
power, and check voltage
on input capacitors accord-
ing to Section 7-6 before
proceeding.
When this control is active and a
current/contactor control is
connected to the Remote 14
receptacle on the power source
front panel, the contactor and
primary/secondary amperage
control will function in both TIG and
Stick modes.
1 User Interface Board
2 Dip Switch
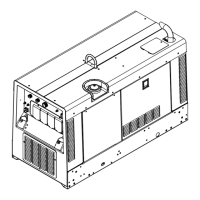
Remove feeder and side mount
cable hangers from top of unit, if
applicable.
Remove top cover from power
source.
Move number 2 switch to the up
position (on stick side). Use a small
screwdriver to move switch, if
necessary.
Reinstall cover.
Replace side mount cable hangers
and feeder to top of unit, if
applicable.
2
Tools Needed:
1
5/16 in.
Stick
Remote
Off
Stick
Remote
On
ON ON
1122
 Loading...