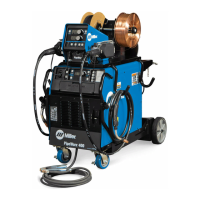
OM-253 906 Page 52
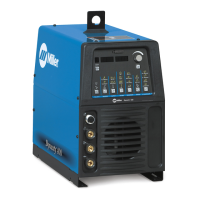
D. Stick And TIG Welding Process Controls
1. Stick Process Select Button
Press and release this button to activate the stick welding process controls. The STICK text below the button illuminates as well as the active stick
electrode type text and the swoosh above the amperage adjust knob. The operator must select the desired stick electrode type and adjust the
amperage knob to the appropriate setting within a range from 40 to 400 amps.
2. Stick Electrode Type Select Button
Press and release this button to select the desired stick electrode type (EXX10 or EXX18). The text above or below the button will illuminate for the
active electrode type. This button is only active with the stick welding process selection and only then will text for the electrode type selection illuminate.
3. Adjustable DIG And Hot Start
Adjustable DIG and Hot Start features are provided when in the STICK process. Settings for both DIG and Hot Start on EXX10 and EXX18 electrodes
are independent (each has their own settings). To access the adjustable DIG and adjustable Hot Start functions, proceed as follows:
a. When in the STICK mode, press and hold the STICK button for two seconds.
The Amperage display will show the DIG setting with the right most decimal point illuminated.
The default value for DIG is 40.
b. Rotate the Amperage knob to adjust the DIG setting.
Adjustable range is 0 to 99.
c. When in the adjustable DIG function, press the STICK button To access the adjustable Hot Start function.
The Amperage display will show the Hot Start setting with the middle decimal point illuminated.
The default setting is 1.3.
d. Rotate the Amperage knob to adjust the Hot Start setting. Adjustable range is 0.0 to 2.0.
e. Press the STICK button or any other button on the interface to exit the adjustable DIG and Hot Start function.
4. Ammeter Display
The display illuminates and shows amperage setting when either a stick or TIG welding process is selected. Dashes are displayed when any MIG
welding process is selected indicating the display is inactive; however, actual amperage is displayed while welding regardless of the selected welding
process. Measured amperage just prior to the end of a welding operation will appear on the display for 10 seconds after the welding operation.
5. Amperage Adjust Knob
Use this knob to set a desired amperage setting for either a stick or TIG welding process. Rotating the knob clockwise increases amperage and count-
er-clockwise decreases amperage. Amperage adjustment is active when the swoosh above the knob is illuminated. If a remote control is connected to
the Remote 14 receptacle, the unit will automatically adjust output control to a primary/secondary configuration. In this configuration, the Amperage
Adjust knob on the unit becomes the primary and sets the maximum amperage output of the unit. The remote control becomes the secondary and
provides an amperage range of 0 to 100% based on the Amperage Adjust knob setting.
. The Remote 14 receptacle is factory set to be active in TIG mode only. As an option, this receptacle may also be enabled in Stick mode (see Section
5-4).
6. TIG Process Select Button
Press and release this button to activate the TIG welding process controls. The TIG text below the button illuminates as well as the active starting
method text and the swoosh above the amperage adjust knob. The operator must select the desired starting method and adjust the amperage knob to
the appropriate setting within a range from 10 to 350 amps. If the TIG process has been selected and a remote current/contactor control is connected,
holding the TIG process select button for more than two seconds will display the effective amperage command (based on the amperage setting and the
remote current/contactor control setting).
7. TIG Starting Method Select Button
Press and release this button to select the desired TIG starting method either HF or Lift Arc. The text above or below the button will illuminate for the
active starting method. This button is only active with the TIG welding process selection and only then will text for the starting method selection illumi-
nate.
E. TIG Sequence Controls
The TIG Sequence Controls provides flexibility in the TIG process operation. It provides “Std” (no sequencing), 2T and 4T trigger operation. The TIG
Sequence Controls are active for both Lift Arc and HF start mode, To activate TIG Sequencing, proceed ad follows:
a. Press the TIG Set-up button.
When pressed, the Amperage display will show “Std”, “2T” or “4T”.
Rotate the Amperage knob to select the desired operation mode. When “2T” or “4T” is selected, the appropriate icon on the interface panel will
illuminate.
b. Sequential pressing of the TIG Set-up button will cycle through the set-up options. An LED will illuminate at each option indicating the active
option being programmed.
S Preflow − 0.0 to 10.0 seconds (HF start only)
S Initial amperage − 10 to 350 amps
S Initial time − 0.0 to 10.0 seconds (2T only)
S Ramp up time − 0.0 to 10.0 seconds
 Loading...