How to Set Cutting Area
3-7
How to Set Cutting Area
Set an effective cutting area in accordance with the size of the work to be engraved on.
*1
1
Press (or ) to display the
second page of the local mode.
2
Press (or ) to display the
screen shown on the right.
3
Press (or ) to move the
head to the existing LL point.
Press to move the head to the target
LL point.
4
Press to set the LL point tempo-
rarily.
The screen is displayed as shown on the right.
*2
5
Press (or ) to move the
head to the existing UR point.
Press to move the head to the target
UR point.
6
Press to set the LL point and the UR point.
*2
*1. If a G-code is set using an operation switch, the cut area setting is disabled.
*2. Press on the step 4 and 6 to cancel it.
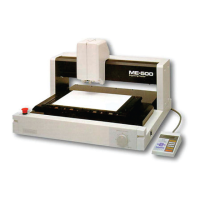
* Maximum size of the effective cutting area *
Model Max. size (mm)
ME-300STII 310(X) x 220 (Y)
ME-500STII 483 (X) x 305 (Y)
ME-650STII 650 (X) x 440 (Y)
Clamp Table
LL (lower
left point)
Effective cutting
Work
UR (upper-right point)
 Loading...