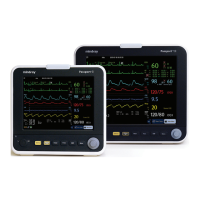
Passport 12/Passport 8 Operator’s Manual 4-1
4 Managing Patients
4.1 Admitting a Patient
The monitor displays physiological data and stores it in trends as soon as a patient is connected. This allows you to
monitor a patient that is not admitted yet. However, it is recommended that you admit a patient so that you can clearly
identify them on recordings, reports and networking devices.
To admit a patient:
1. Select the [Patient Setup] QuickKey, or [Main Menu]→[Patient Setup >>].
2. Select [Discharge Patient] to clear any previous patient data. If you do not erase data from the previous patient,
the new patient’s data is combined with the previous patient’s data. The monitor makes no distinction between the
old and the new patient data.
3. If [Discharge Patient] button appears dimmed, directly select [Admit Patient] and then select:
[Yes] to apply the data saved in the monitor to the new patient, or
[No] to clear the data saved in the monitor.
4. In the [Patient Demographics] menu, enter the demographic details, of which:
[Patient Cat.] allows the user to select patient size (Neo, Ped, Adu) which will determine the way your monitor
processes and calculates some measurements, and what safety and alarm limits are applied for your patient.
[Paced] determines whether to show pace pulse marks on the ECG waveform. When the [Paced] is set to [No],
pace pulse marks are not shown in the ECG waveform.
5. Select [Ok].
WARNING
The [Patient Cat.] and [Paced] fields always contain a value, regardless of whether the patient is fully
admitted or not. If you do not specify settings for these fields, the monitor uses the default settings from the
current configuration, which might not be correct for your patient.
For paced patients, you must set [Paced] to [Yes]. If it is incorrectly set to [No], the monitor could mistake a
pace pulse for a QRS and fail to alarm when the ECG signal is too weak.
For non-paced patients, you must set [Paced] to [No].

 Loading...