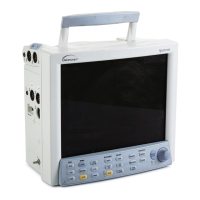
Troubleshooting Guidelines Repair Information
1 - 2 0070-10-0556-02 Spectrum
®
/Spectrum OR
™
Service Manual
1.3 Troubleshooting Guidelines
1. Identify the problem - Due to the wide variety of potential symptoms certain
problems may be more subtle than others. One approach to troubleshooting is to set up
the instrument as described in Chapter 4.0. Following the guidelines of the tests will help
determine the problem if one exists.
2. Avoid shorting component leads - During repair procedures, it can become
tempting to make a series of quick measurements. Always turn the power off before
connecting and disconnecting the test leads and probes. The accidental shorting of
leads can easily stress the components and cause a second failure (aside from the safety
risk).
3. Use the Proper equipment - The equipment listed below is suggested to fulfill a
wide range of troubleshooting requirements. It is imperative to use the designated
equipment in order to ensure proper results of any and all test procedures.
4. Clean up the repair area - After any repair, especially after any soldering or
desoldering, clean off the repair area with alcohol and a stiff brush. This will remove
any residual solder flux, in turn allowing the instrument to return to its original
appearance.
1.4 Exchange Programs
An exchange program for certain assemblies in the instrument is available. In many cases
replacement of the complete assembly will result in the most expedient repairs.
1.5 Special Tools Required
•DVM
• Digital Mercury Manometer - 0 to 300 mmHg
• Safety Analyzer
• Patient Simulator
• Test Chamber / Dummy Cuff (P/N 0138-00-0001-01 (700 cc) or -03 (500 cc)
• BISx Sensor Simulator (P/N 0454-00-0060)