The magnets on both brackets line up automatically, securing the mount to your shirt.
CAUTION: WATCH YOUR FINGERS! Because of the strength of the magnets, separating the
brackets requires some effort. Realigning the brackets causes them to snap together forcefully.
Keep your hand flat and keep your fingers away from the snap-to area.
2.2.2
Mounting the Locking Molle Mount
The Locking Molle Mount, when locked, is secure and cannot detach from the vest unless you slide the
locking pins in a downward motion.
Prerequisites: Install the mount on the vest before you connect the camera to the mount.
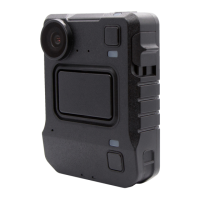
Figure 3: Locking Molle Mount
Procedure:
1 Determine which two sewn seams on the Molle vest you want to mount the camera to.
2 On the back of the mount, find the tabs on the side of the spring-loaded pin Molle-Lok
™
attachments.
3 On each Molle-Lok attachment, grab and squeeze the tabs at the bottom of the attachment until
the spring-loaded pin latch releases.
4 Slide the two Molle-Lok attachments connected to the mount over and through the sewn seams
on the vest.
MN009878A01-B
Chapter 2 : V700 During a Shift
22
 Loading...