NE-4100 Series User’s Manual Initial IP Address Configuration
5-6
9. Press Y and then Enter to save the new IP address and restart the module.
Ready to restart
(y) Yes
(n) No
Key in your selection: y_
Serial Console (19200, n, 8, 1)
If you wish to configure the IP address of the module without going through the network, you may
use the serial console, which involves connecting a serial terminal directly to the RS-232 console
port on the evaluation board. Moxa offers a free utility called PComm Terminal Emulator that can
be used for this purpose, although you are free to choose among other terminal emulators that are
widely available. PComm Lite may be downloaded at www.moxa.com.
Th
e following instructions show the procedure using PComm Lite. If you are using another utility,
the instructions may vary slightly.
1. Plug one end of a serial cable into the RS-232 DEBUG (P1) serial port on the evaluation
board; plug the other end directly into your computer’s male RS-232 serial port.
2. From the Windows desktop, click on Start Æ Programs Æ PComm Lite Æ Terminal
Emulator.
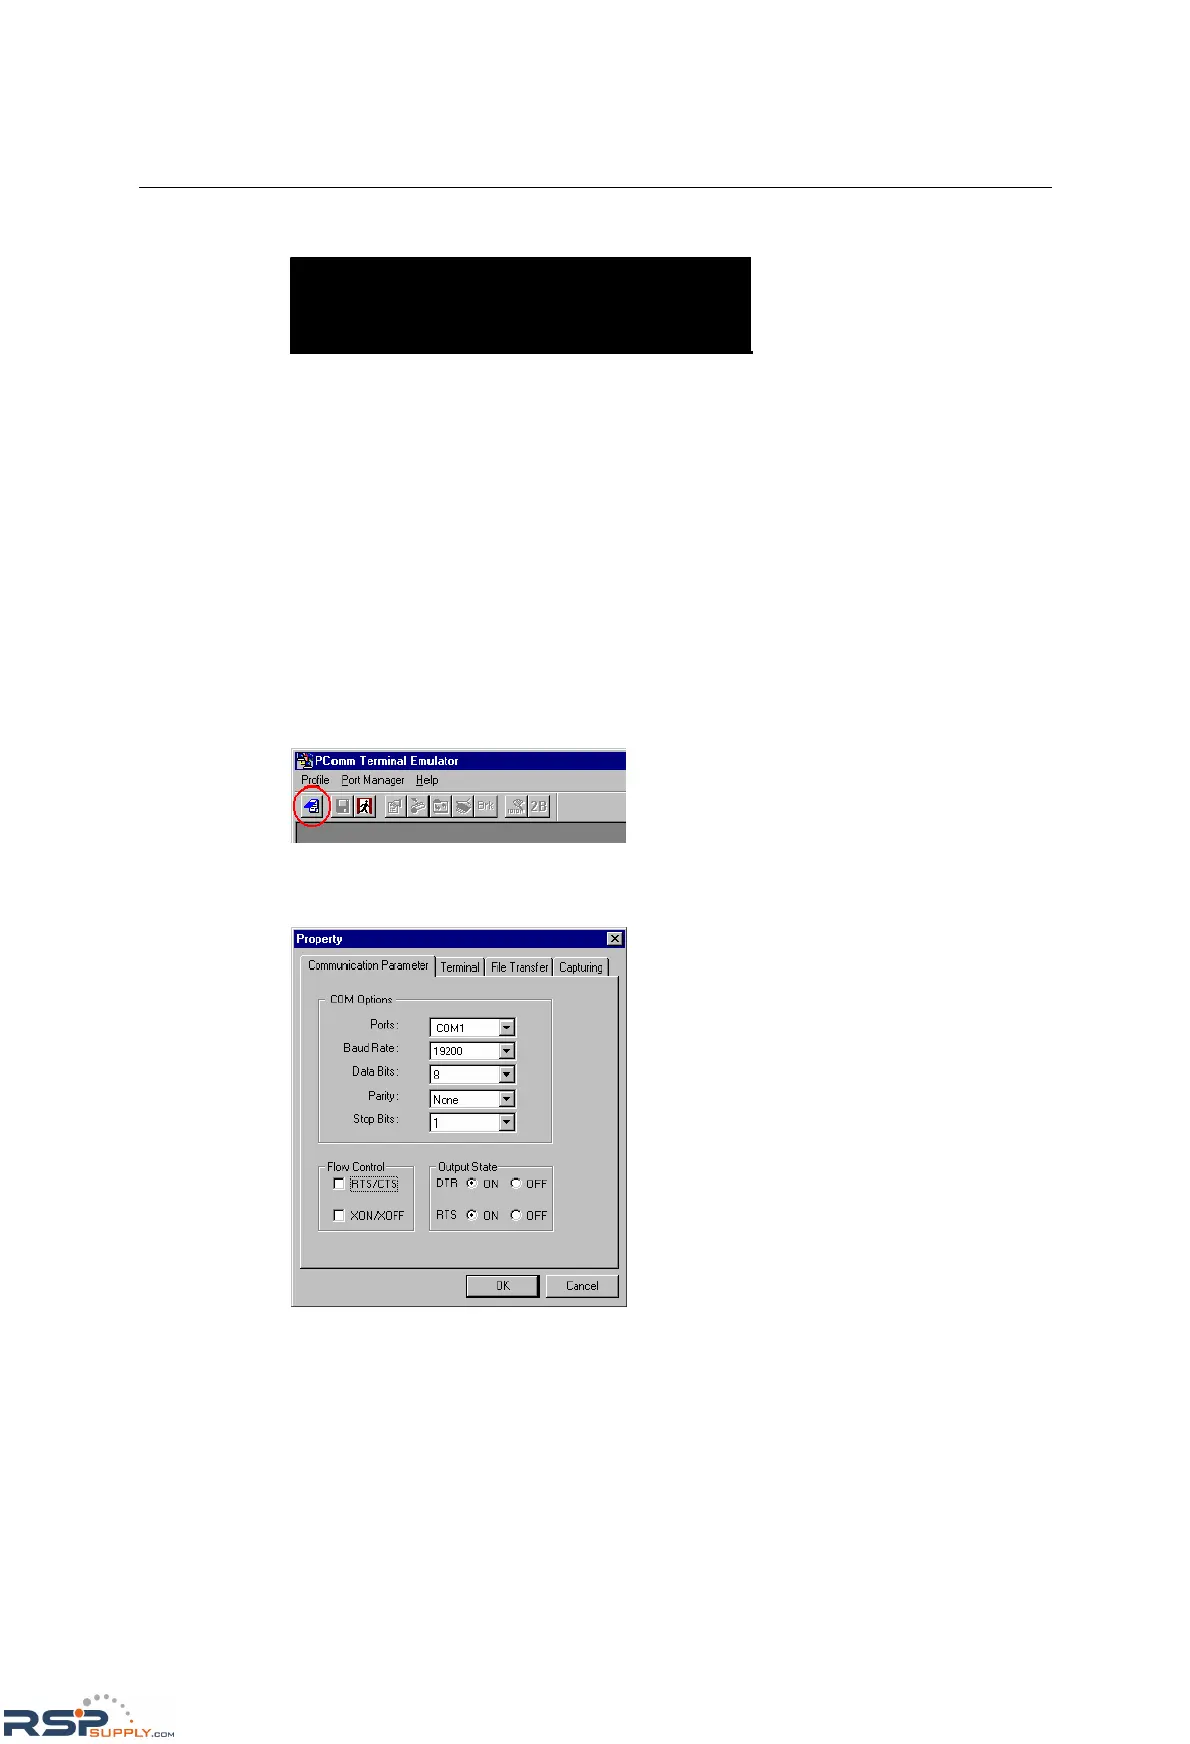
3. When the PComm Terminal Emulator window opens, select Open from the Port Manager
menu, or simply click on the Open icon.
4. The Property window opens automatically. On the Communication Parameter tab, select
the appropriate COM port for the connection, COM1 in this example. The parameters should
be set to 19200 for Baud Rate, 8 for Data Bits, None for Parity, and 1 for Stop Bits.
5. On the Terminal tab, select ANSI or VT100 for Terminal Type and then click OK.
If you select Dumb Terminal as the terminal type, some of the console functions—especially
the Monitor function—may not work properly.
6. Enter any character to switch automatically from data mode to console mode.

 Loading...