Web Console Navigation
On the NPort 6000 web console, the left panel is the navigation panel and contains an expandable menu tree
for navigating among the various settings and categories. When you click on a menu item in the navigation
panel, the main window will display the corresponding options for that item. Configuration changes can then be
made in the main window. For example, if you click on Basic Settings in the navigation panel, the main
window will show a page of basic settings that you can configure.
You must click on the Submit button to keep your configuration changes. The Submit button will be located
at the bottom of every page that has configurable settings. If you navigate to another page without clicking the
Submit button, your settings will not be retained.
Changes will not take effect until they are saved and the NPort is restarted! You may complete this in
one step by clicking on the Save/Restart option after you submit a change. If you need to make several
changes before restarting, you may save your changes without restarting by selecting Save Configuration in
the navigation panel. If you restart the NPort 6000 without saving your configuration, the NPort 6000 will
discard all submitted changes.
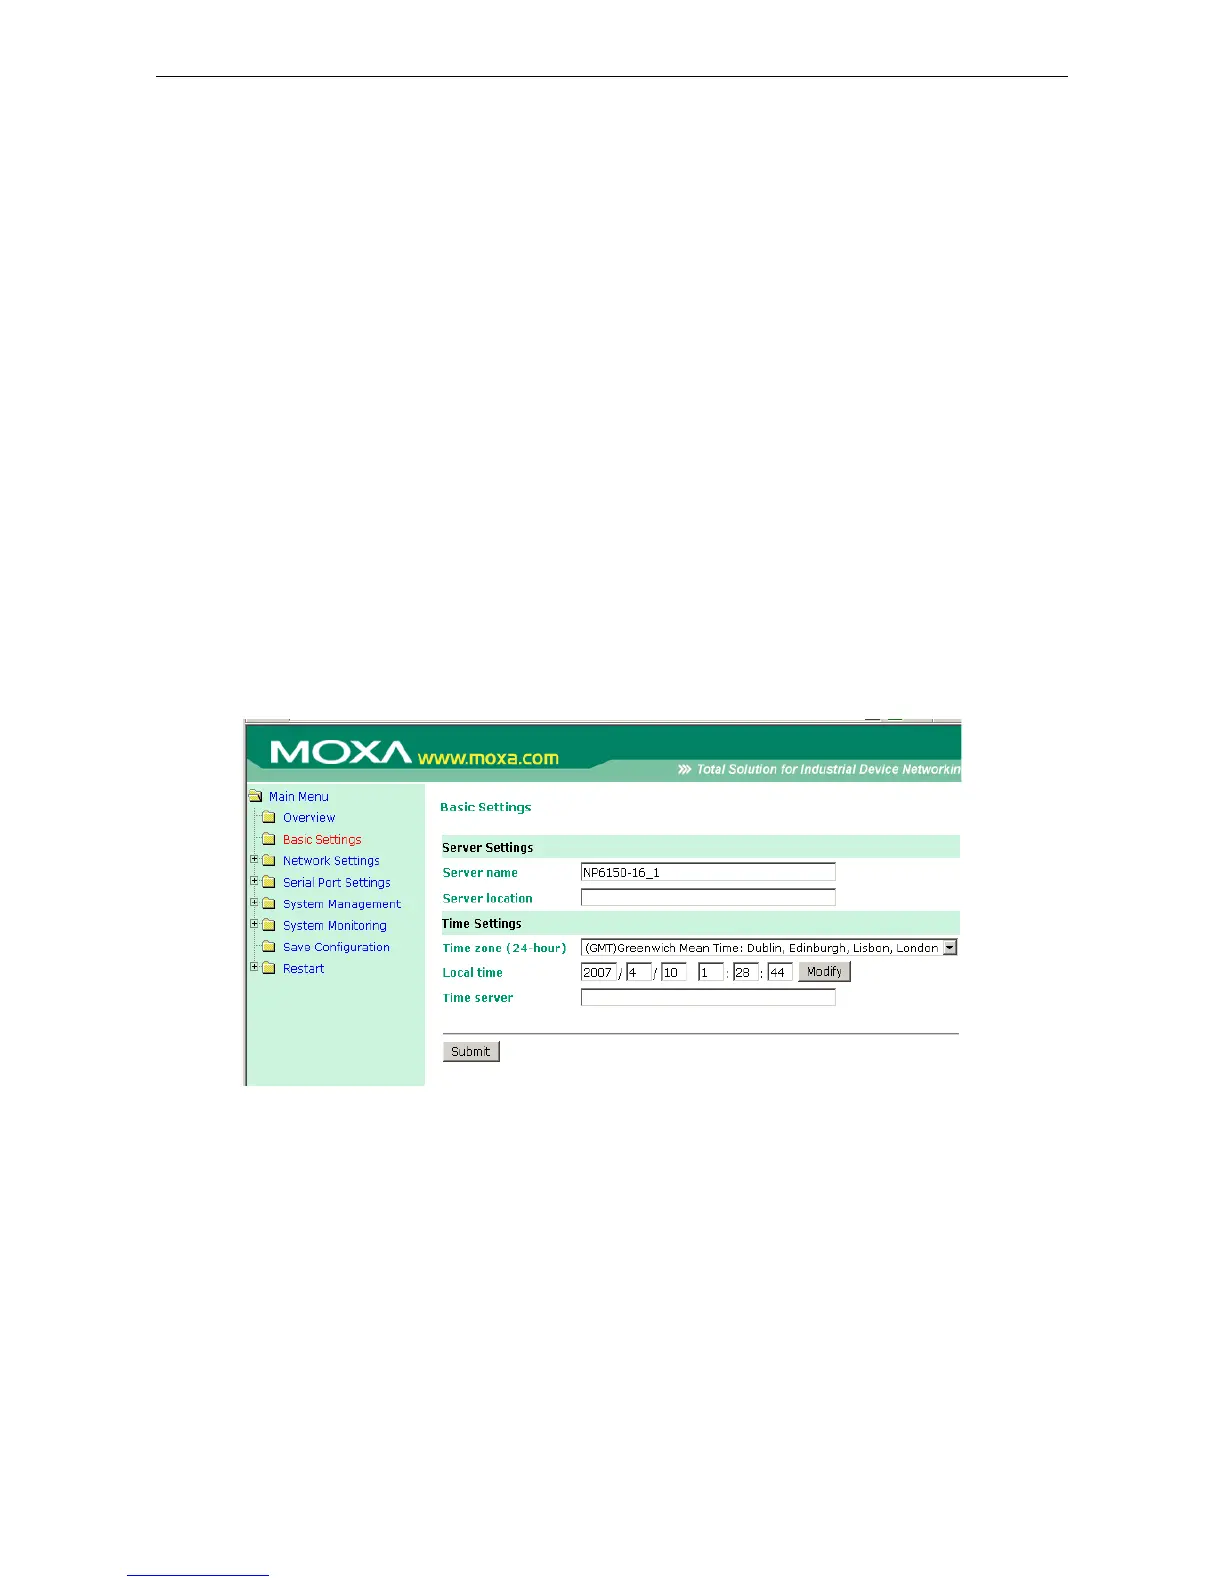
Basic Settings
You may access Basic Settings in the navigation panel.
Server Settings
Server name: This is an optional free text field for your own use; it does not affect operation of the NPort 6000.
It can be used to help differentiate one NPort 6000 server from another.
Server location: This is an optional free text field for your own use; it does not affect operation of the NPort
6000. It is useful for assigning or describing the location of a NPort 6000. In a network environment of multiple
servers, this can be a valuable aid when performing maintenance.
Time Settings
The NPort 6000 has a built-in Real-Time Clock for time calibration functions. Functions such as Auto Warning
Email or SNMP Trap can add real-time information to messages.
Before making any adjustments to the time, first select the correct time zone and submit the change. The
console will display the real time according to the time zone. To modify the real time clock, click on Modify next
to the Local time field. Once you submit the new time, the NPort 6000’s firmware will modify the GMT time
according to your time zone and local time settings.
 Loading...