L NAPCO Security Systems
X GEM-X255 Programming Instructions
Page 59
WI1092E 10/05
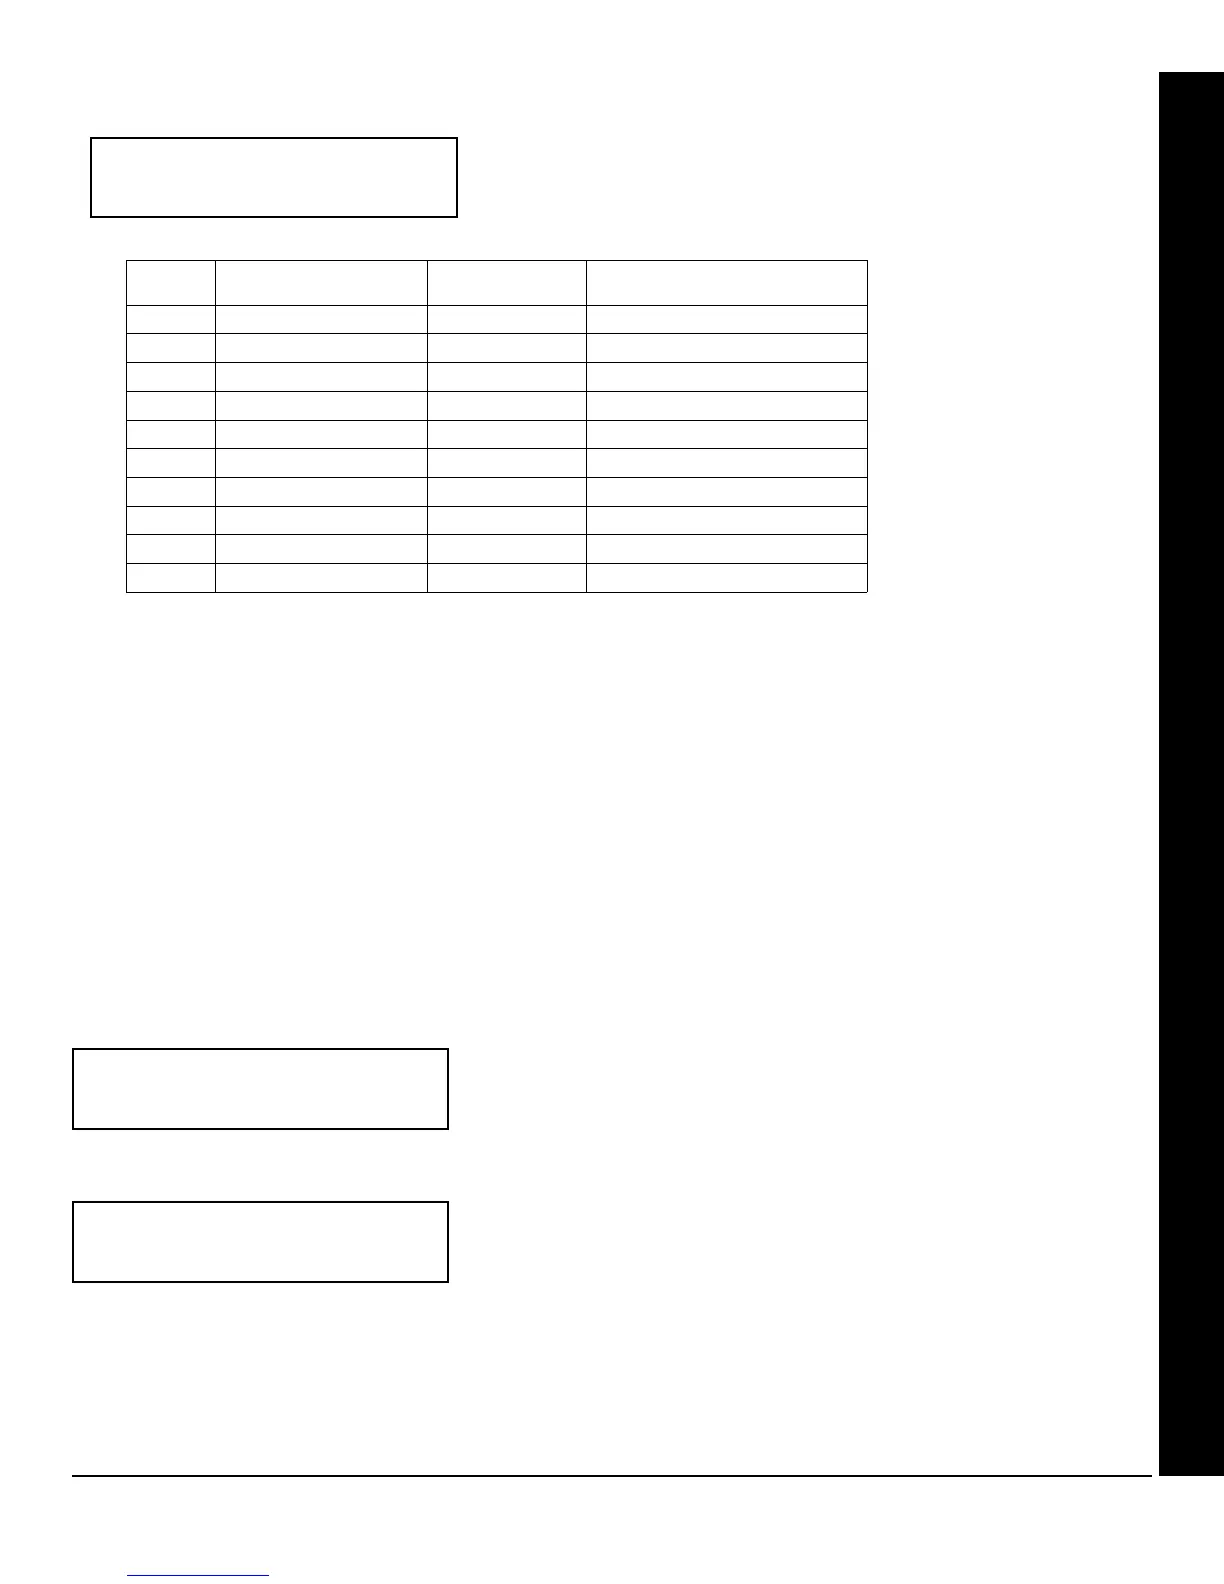
ZONE DESCRIPTIONS (GEM-RP1CAE2 / GEM-K1CA KEYPADS)
Enter an identifying description for each zone. Characters are selected by
pressing keypad buttons multiple times, "Cell Phone" style. Buttons
1
through
9 plus 0 and G are used, as per the following table:
Press [
A] to move cursor right.
Press [
B] to move cursor left.
Notes:
1. After releasing the number button for 1 second, the character will be accepted and the cursor advanced to the right.
2. After releasing the number button, if a new number button is pressed before the 1 second window expires, the cur-
rent character will be accepted and the cursor automatically advanced to the right. The first of the 4 characters of
this new number button will be displayed.
3. To erase an existing entry, use [
A] or [B] to move the cursor below the character to be changed. Enter a
new character to overwrite the old.
4. To generate lowercase characters, the [
G] button must be pressed and held down while pressing the number
button. If the [
G] button is released during the 1 second window, the current character will change to uppercase.
Press
U to save.
To proceed to the next description, place the cursor under the Zone Number (e.g. “1”) and press the number that corre-
sponds to the zone. Repeat this procedure until all zones have been programmed. After programming the user codes,
press the NEXT button to proceed.
Enter Date (Press the (
R) button to set cursor.)
Enter the current date in the format MM/DD/YY, where MM = the month
(01–12); DD=the day (01–31); and YY=the year. Press U to save. Press
NEXT button to proceed.
Enter Time (Press the (
R) button to set cursor.)
Enter the current time in the format HH:MMA/P, where HH=hours (01–12);
MM=minutes (00–59). Select Am or Pm by pressing any number button,
then press
U once again to save.
NOTE: To enter the date and time, GEM-RP1CAe2/GEM-K1CA keypad (version 6 or greater) must be used and
“Enable Keypad Time/Date Display” (Address 3874) must be enabled.
(Direct Entry)
Enter Date
( / / )
(Direct Entry)
Enter Time
( : )
USER PROGRAM MODE
(Direct Entry)
01-
PRESS: CHARACTERS DISPLAYED
IN SEQUENCE
HOLD G
AND PRESS:
CHARACTERS DISPLAYED
IN SEQUENCE
[1]
ABC1
[1]
abc1
[2]
DEF2
[2]
def2
[3]
GHI3
[3]
ghi3
[4]
JKL4
[4]
jkl4
[5]
MNO5
[5]
mno5
[6]
PQR6
[6]
pqr6
[7]
STU7
[7]
stu7
[8]
VWX8
[8]
vwx8
[9]
YZ90
[9]
yz90
[0]
(SPACE) - . ( ) , / : ? #
[0]
(International Characters)