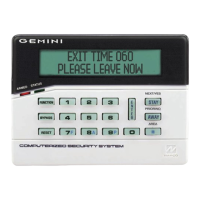
X GEM-X255 Programming Instructions
L NAPCO Security Systems
Page 10
WI1092E 10/05
Enter User Codes (Press the R button to set cursor.)
Enter up to 195 User Codes with User Options, Authority Level and Access
Control Options (if necessary) for each code. Refer to the tables below and on
the next page for available data entries for User Options, Authority Level and
Access Control Options. Note: All 195 Users must be assigned to areas in
“Enable User Code by Area”. Only Users 1-96 can be assigned through
Addresses 2455-2550 in Direct Address Programming; other User Areas must
be assigned through the PCD-Windows software.
Press the R button to set the cursor to the User Code. Use the number buttons 1 through 9 to enter
a code from 3 to 6 digits. Enter up to 6 digits in the first six boxes from left to right for each user code. Valid entries
are: 0-9. Note: Press the
0 button for a zero. No blank spaces in between; leave blank (•) any trailing boxes. If
an “Ambush Code” (Address 0495) is entered, do not program the first two digits of ANY User Code as the same
digits entered for the “Ambush Code”.
If the programmed code is less than 6 digits, press the R button to set the cursor to the OPTION/LEVEL.
Refer to the tables below for the available User Option and User Level data entries. Enter the user options data in
the left digit. Enter the level data (with arming options, if any, added) in the right digit. Note: For entries greater than
9, press the
G1 buttons through the G5 buttons for B through F, respectively.
For Keypad Access Control, press the R button once again to program applicable keypads. Refer to the tables
below, use the number buttons to enter the data for Keypad 1–4 in the right digit; and the data for Keypad 5–8 data in
the left digit. (Press the
0 buttons for blank).
USER OPTIONS
USER CODE
(UP TO 6 DIGITS)
USER
OPTION
USER
LEVEL
ACCESS CONTROL
KEYPADS
DATA
ENTRIES
AUTHORITY
LEVEL
CODE
TYPE
blank (•) NONE ARM/DISARM
1 LEVEL 1 ARM/DISARM
2 LEVEL 2 ARM/DISARM
3 LEVEL 3 ARM/DISARM
4 NONE ARM ONLY
5 LEVEL 1 ARM ONLY
6 LEVEL 2 ARM ONLY
7 LEVEL 3 ARM ONLY
8 NONE SERVICE
9 LEVEL 1 SERVICE
0 LEVEL 2 SERVICE
B LEVEL 3 SERVICE
C* NONE AMBUSH
D* LEVEL 1 AMBUSH
E* LEVEL 2 AMBUSH
F* LEVEL 3 AMBUSH
Note: “Y” indicates option is enabled.
USER OPTIONS
DATA
ENTRIES
BLOCKED
VIEW
USER
PROGRAM
BYPASS OVERVIEW
blank (•)
1 Y
2 Y
3 Y Y
4 Y
5 Y Y
6 Y Y
7 Y Y Y
8 Y
9 Y Y
0 Y Y
B Y Y Y
C Y Y
D Y Y Y
E Y Y Y
F Y Y Y Y
DISABLED
Note: “Y” indicates option is enabled.
ACCESS CONTROL KEYPADS
DATA
ENTRIES
K.P. 1 K.P. 2 K.P. 3 K.P. 4
blank (•)
1 Y
2 Y
3 Y Y
4 Y
5 Y Y
6 Y Y
7 Y Y Y
8 Y
9 Y Y
0 Y Y
B Y Y Y
C Y Y
D Y Y Y
E Y Y Y
F Y Y Y Y
NONE
Example: Enter a code of “123456” as
“123456” (from left to right).
Note: “Y” indicates option is enabled.
ACCESS CONTROL KEYPADS
DATA
ENTRIES
K.P. 5 K.P. 6 K.P. 7 K.P. 8
blank (•)
1 Y
2 Y
3 Y Y
4 Y
5 Y Y
6 Y Y
7 Y Y Y
8 Y
9 Y Y
0 Y Y
B Y Y Y
C Y Y
D Y Y Y
E Y Y Y
F Y Y Y Y
NONE
Enter user code
001 123 -E3-
User# User Code
GEM-RP1CAE2/GEM-K1CA KEYPAD EASY PROGRAM MENU
*Note: These entries are only
available when address 3905 bit
7 is enabled.