PROPlus / PRO Series Automated Dispensing Systems
39www.nordsonefd.com info@nordsonefd.com +1-401-431-7000 Sales and service of Nordson EFD dispensing systems are available worldwide.
Camera Screen, Tab Bar, and Icons
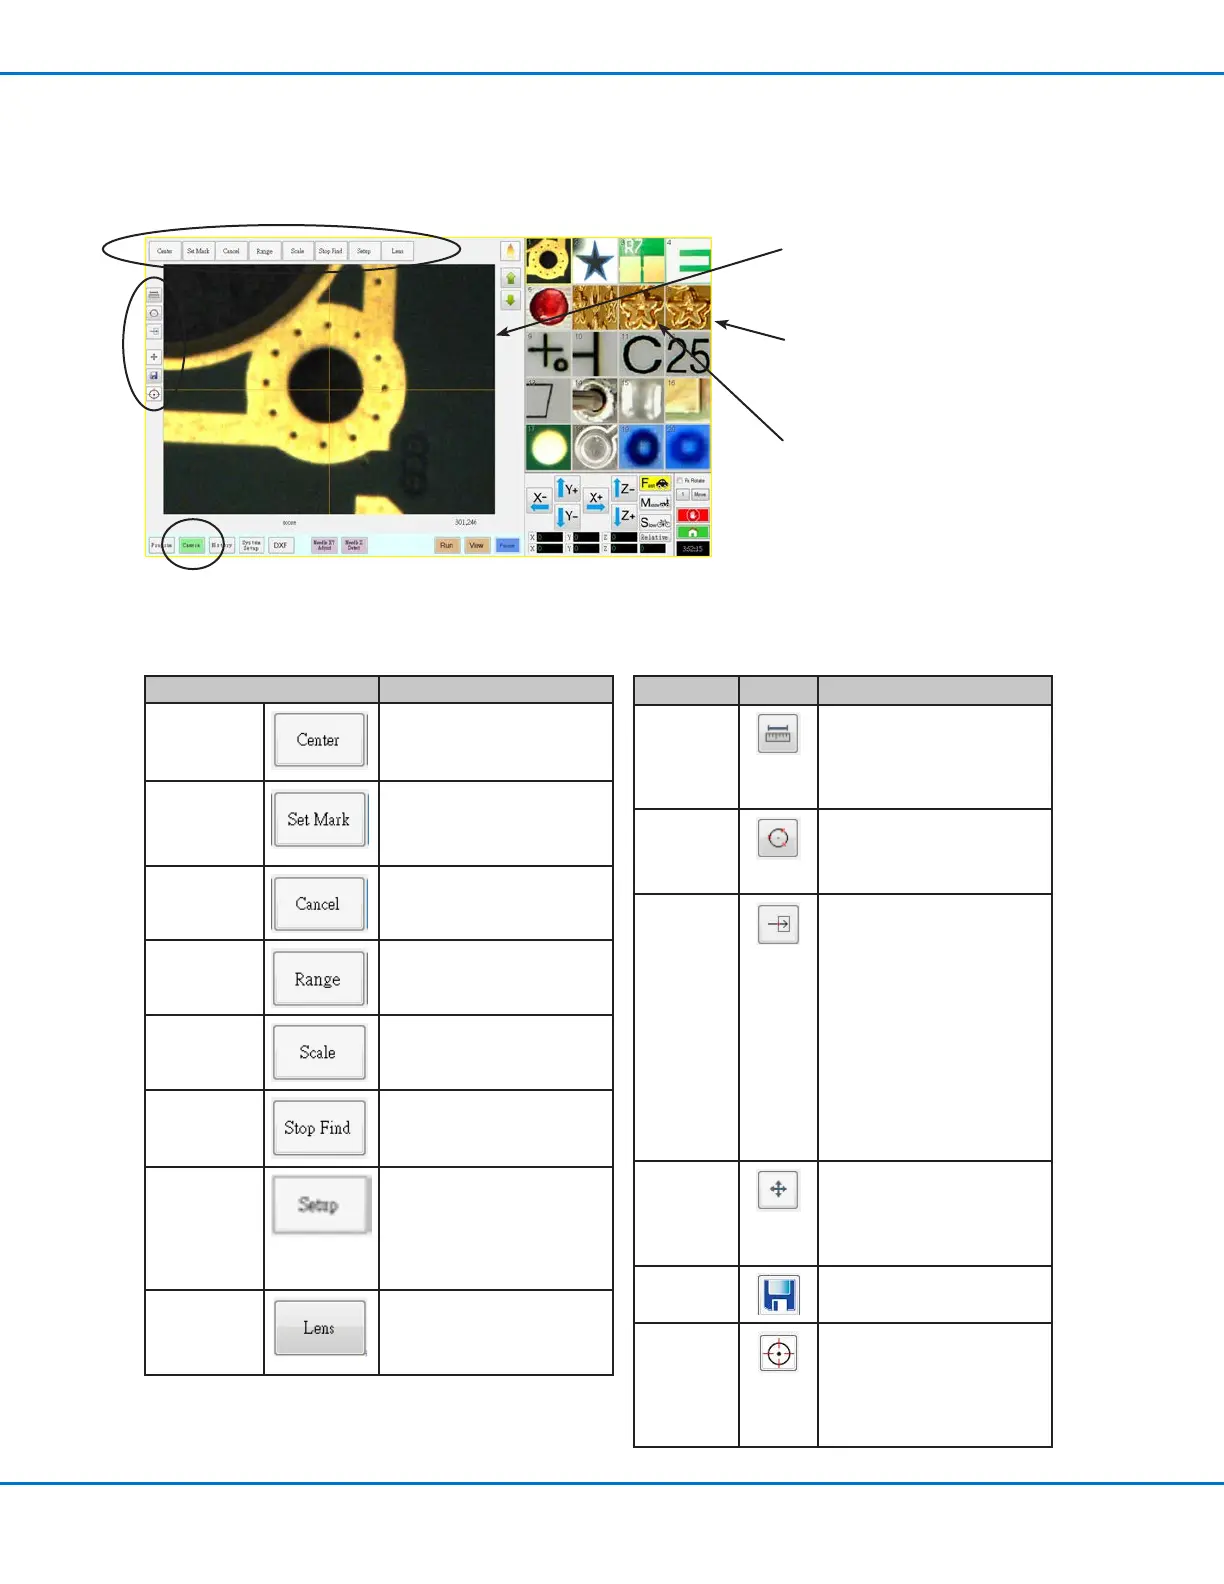
Click the CAMERA tab to go to the Camera screen. The actual view of what the camera sees appears in the Primary
View screen and the Mark Library appears in the Secondary View screen. The tabs at the top of the Camera screen
are used for camera setup and mark creation.
Camera Screen Tab Function
Center
Moves the camera focal point
to the center of an object
Set Mark
Sets a mark. Refer to “About
Marks” on page27 and to
“How to Create a Mark” on
page70.
Cancel Cancels the last camera-
related action
Range
Sets the area within which the
system searches for a mark
Scale
Scales the screen to match
the camera view scale (occurs
during setup).
Stop Find
Stops the attempt to find a
mark
Setup
Opens the Camera Setup
window that provides access
to important setup fields
related to the camera. Refer
to “Camera Setup Screen” on
page42.
Lens
Opens the Camera Properties
window. Refer to “Camera
Properties Window” on
page40 for details.
Icon Name Icon Function
Measure
Length
Measures the distance
between two points. Refer
to “How to Measure a Path
or Circle on a Workpiece” on
page65.
Measure
Circle
Diameter
Measures the diameter of
a circle. Refer to “How to
Measure a Path or Circle on a
Workpiece” on page65.
Arrow Accesses advanced
functionality for deposit
verification using the optional
OptiSure
™
add-on software
and, if present, confocal laser.
This icon is enabled only
when the OptiSure add-on is
unlocked.
Refer to “Accessories” on
page100 for the OptiSure
kit part numbers. Refer to the
OptiSure manual for operating
instructions.
Touch Move When toggled, moves the
camera to the point clicked
and moves the focal point
to the center of the viewing
screen
Save
Saves the displayed camera
image as a bitmap (*.bmp) file.
CCD Focus
Automatically moves the
Zaxis to the focus position
established during Robot
Initial Setup (Step 5 or 6),
or as defined in the camera
setup window (under Offset)
Primary View screen shows the actual
camera view when the Camera tab is
selected
Secondary View screen shows the Mark
Library when the Camera tab is selected
Right-click on any image and then select
PROPERTY to open the Template Match
window. Refer to “Template Match
and Area Windows” on page41 for
information about this window.


 To Next Page