Configuring the Network Settings
-69-
Setup
1
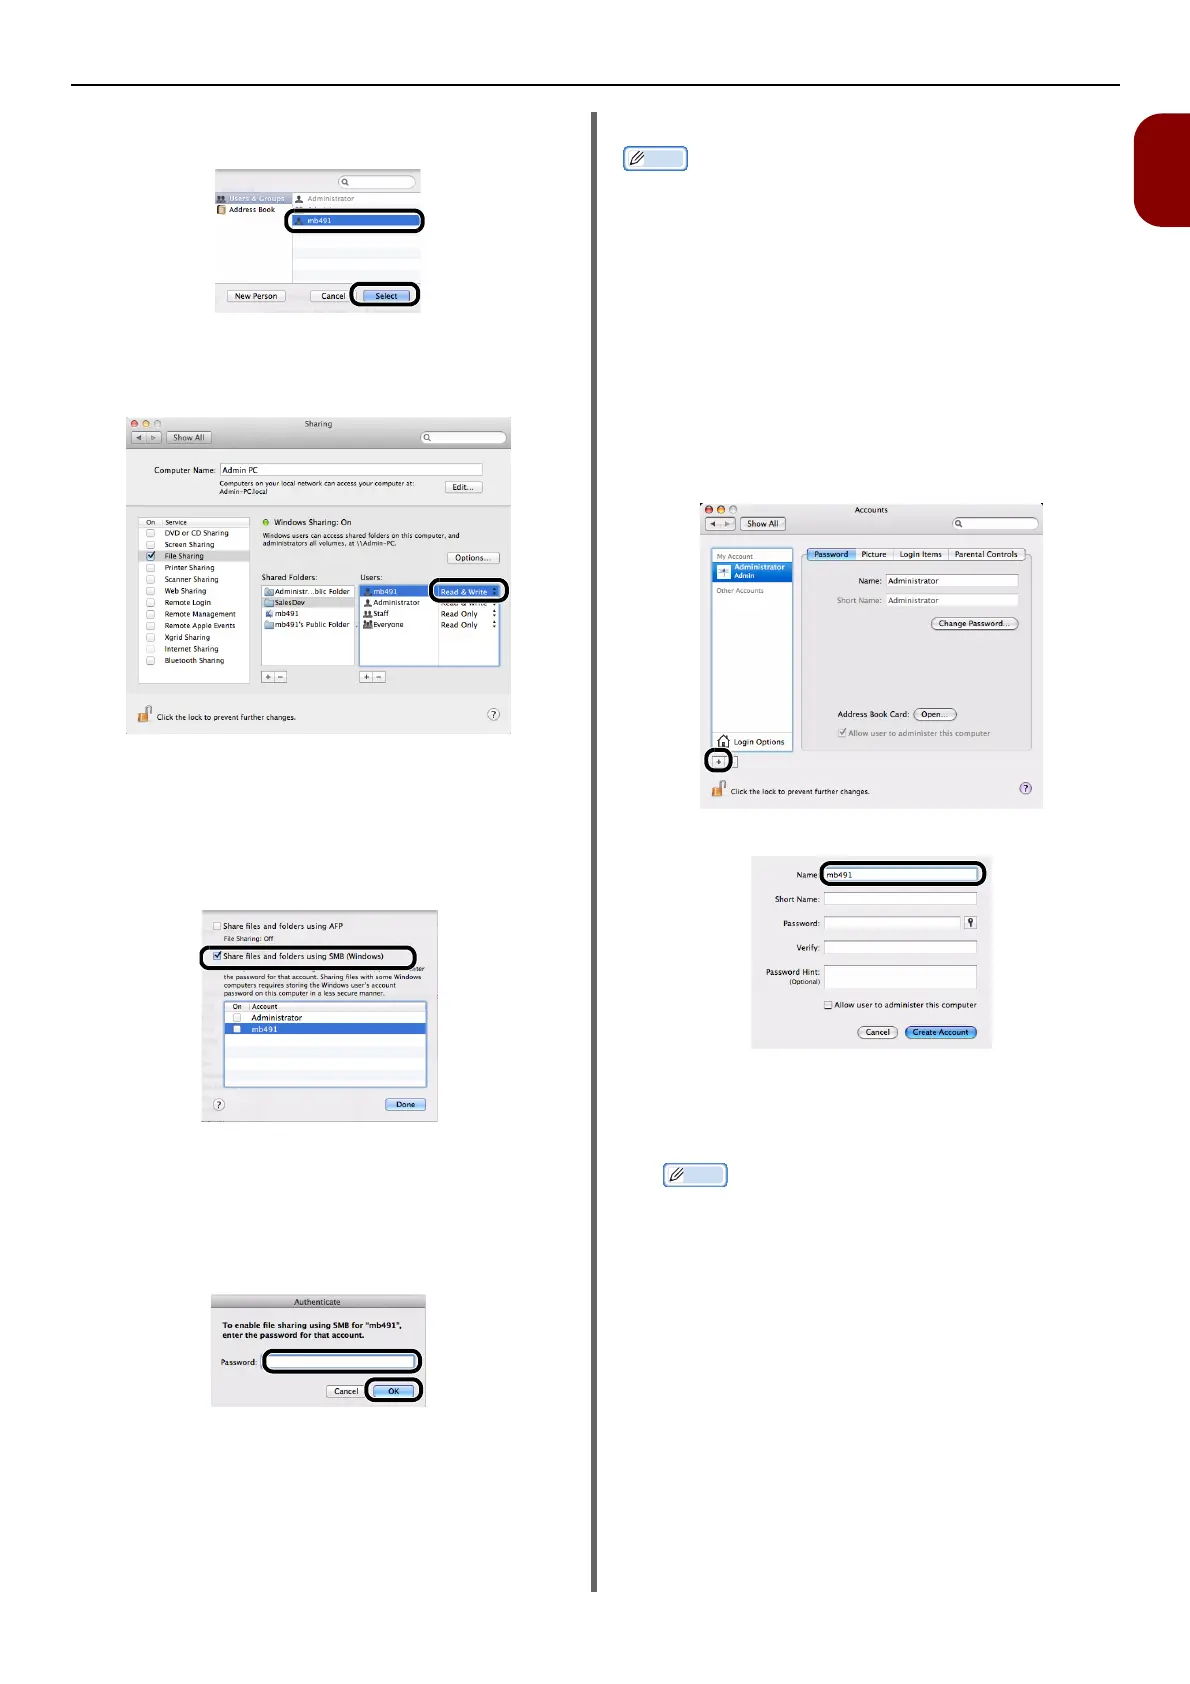
17 Select the account created in the step 8
and click [Select].
18 Click the triangle button at the right side
of the user added in the step 17 and
select [Read & Write].
19 Click [Options].
20 Check the checkbox of [Share files and
folders using SMB (Windows)].
For Mac OS X 10.5, check the checkbox of [Share
files and folders using SMB].
21 Check the checkbox of the account
added in the step 16.
22 Enter the value of C-3 in [Password]
and click [OK].
23 Click [Done].
24 Close [Sharing].
Proceed to "Creating a Profile for Scan To Network
PC" P. 70
For Mac OS X 10.4.0 to 10.4.11
Memo
z The following procedure uses Mac OS X 10.4.11 as an
example. Depending on an OS, the description may be
different.
1 From the Apple menu, select [System
Preferences].
2 Click [Accounts].
3 Click [Click the lock to make
changes.] at the bottom left of the
screen and enter the administrator's
password. Then, click [OK].
4 Click [+].
5 Enter the value of C-2 in [Name].
6 Enter the value in C-3 in both
[Password] and [Verify].
7 Click [Create Account].
Memo
z After the dialog box for auto login appears, disable the
auto login.