Connecting to a Computer
-57-
Setup
1
12 Click the [Exit] button.
13 Remove "Software DVD-ROM" from the
computer.
The installation is complete.
Print a test page to check that the printer
driver is successfully installed on the
computer.
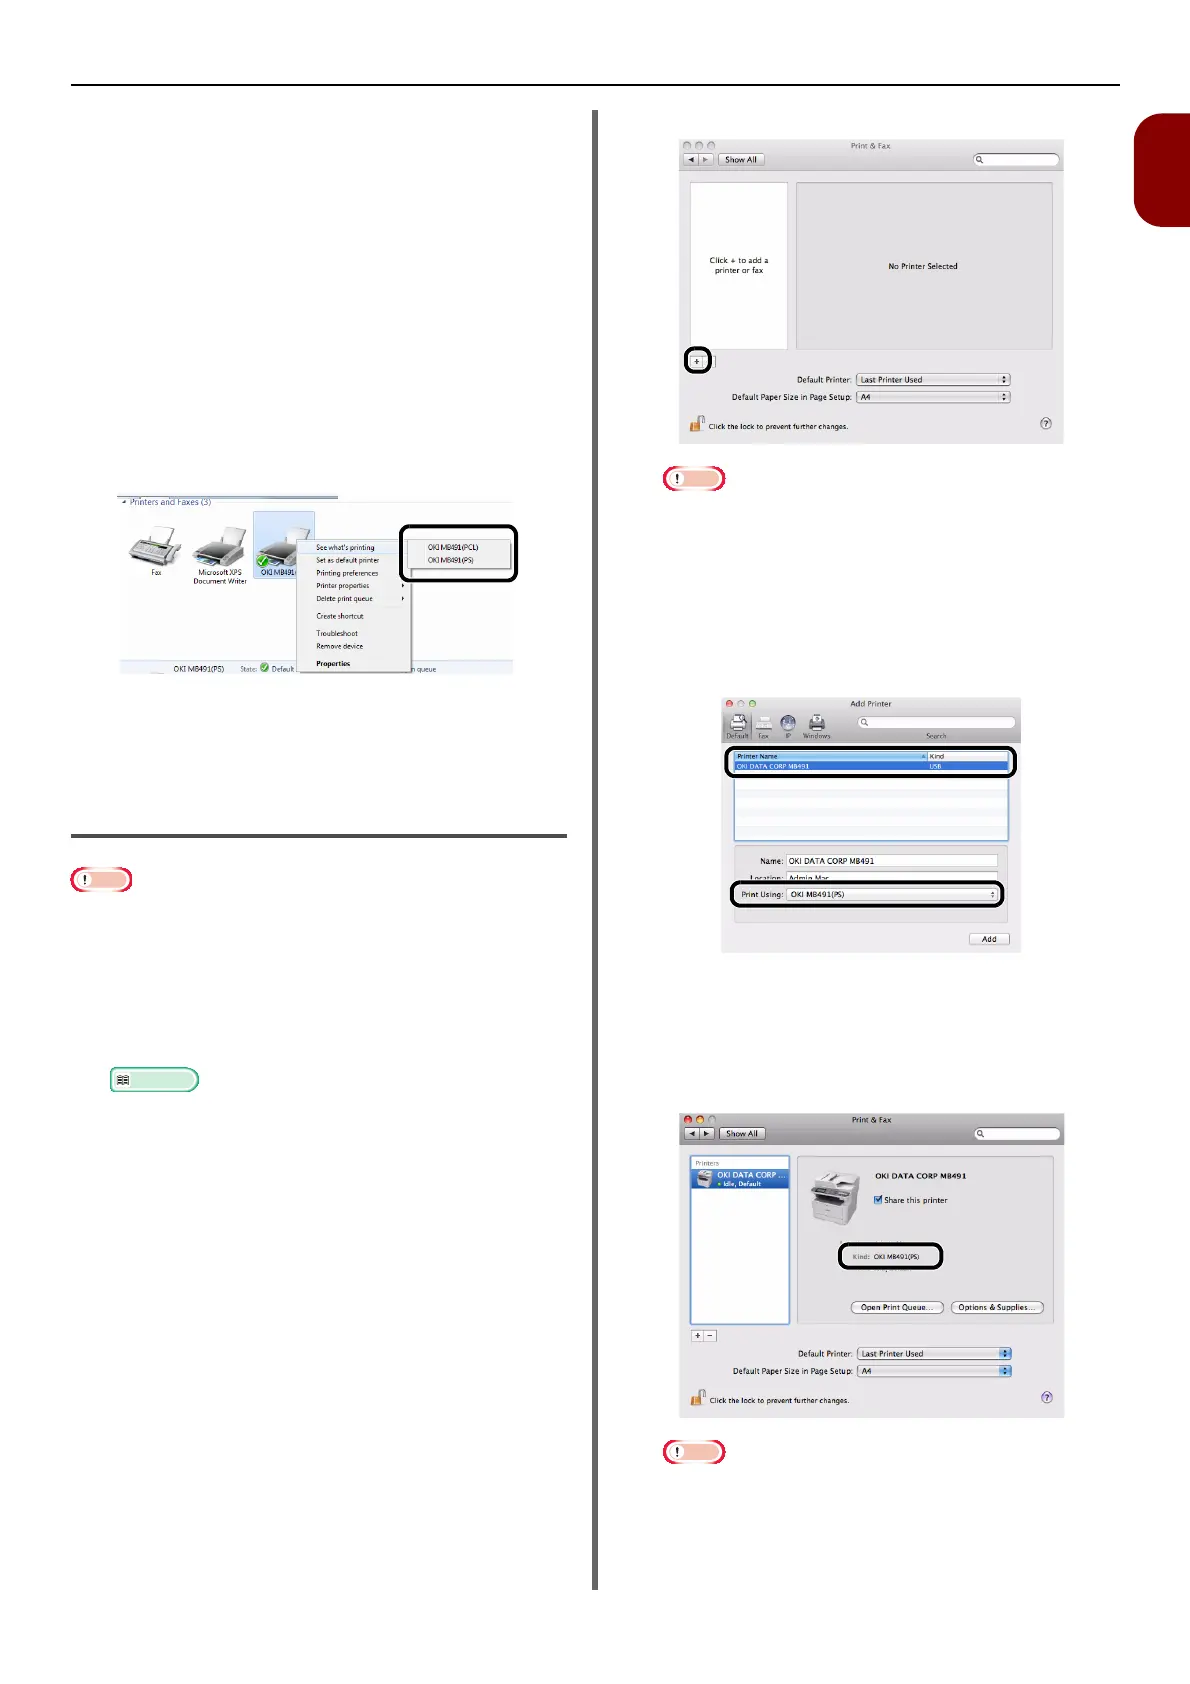
1 Click [Start] > [Devices and Printers].
2 Right-click the OKI MB491 icon and
select [Printer properties] (> a desired
printer driver if you have installed
multiple drivers) from the pop-up menu.
3 On the [General] tab, click [Print Test
Page].
Installing a Printer Driver
(For Mac OS X)
Note
z Disable the anti-virus software before starting this
procedure.
For Mac OS X 10.5 to 10.7
1 Ensure that your machine and the
computer are turned on and connected.
Reference
z "Connecting a USB Cable" P. 55
2 Insert "Software DVD-ROM" into the
computer.
3 Double-click the [OKI] icon on the
desktop.
4 Double-click [Driver] folder > [PS] or
[PCL] folder [Installer for MacOSX].
5 Enter the administrator's password, and
then click [OK].
Follow the instructions displayed on the screen to
complete the installation.
6 From the Apple menu, select [System
Preferences].
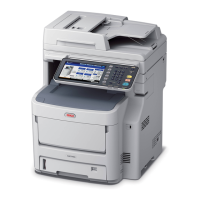
7 Click [Print & Scan] (Mac OS X 10.5 and
10.6:[Print & Fax]).
8 Click [+].
Note
z If the machine is already shown in [Printers], select
your machine, and click on [-] to delete. After this,
click [+].
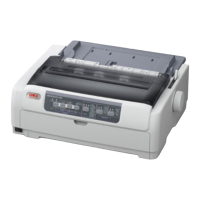
9 Select the name of your machine whose
[Connection] is [USB], and then check
that [OKI MB491(PS)] or [OKI
MB491(PCL)] is displayed in [Print
Using].
10 Click [Add].
11 Check that the name of your machine is
displayed in [Printers] and [OKI
MB491(PS)] or [OKI MB491(PCL)] is
displayed.
Note
z If [OKI MB491(PS)] or [OKI MB491(PCL)] is not
correctly displayed, click [-] to remove your machine
from [Printers] and then redo the procedure from
steps 8 to 10.