74
Exposure
5
Drive mode
Note
● Sequential shooting is not possible in the following case:
When NOISE REDUCTION is set to ON.
● During sequential shooting, if the battery check blinks due to low battery, the camera stops
shooting and starts saving the pictures you have taken on the card. The camera may not
save all of the pictures depending on how much battery power remains.
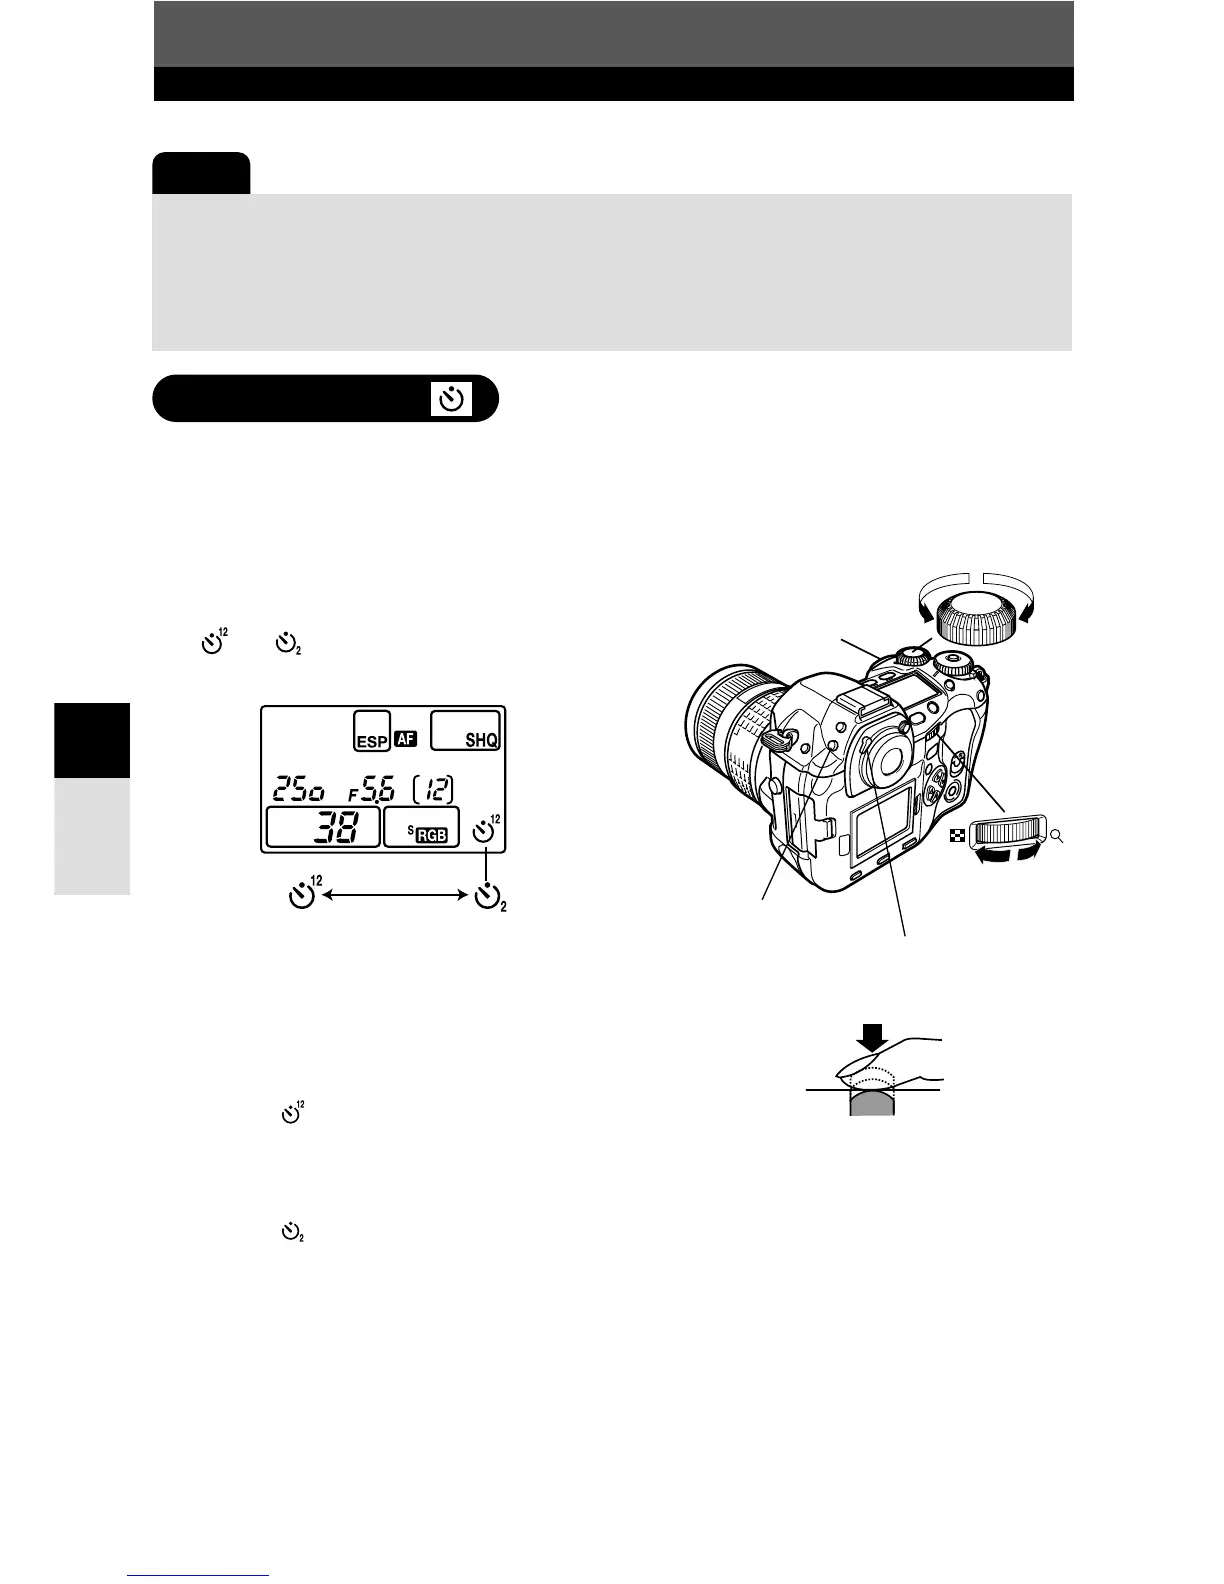
This function lets you take pictures using the self-timer. You can set the camera to
trigger the shutter after either 12 or 2 seconds. Fix the camera securely on a tripod for
self-timer shooting.
1
While holding down the DRIVE button,
rotate the main dial or sub dial so that
or appears on the control panel.
Self-timer shooting
Main dial
Sub dial
DRIVE button
Shutter button
Eyepiece shutter lever
(12-second self-timer)
Control panel
2
Press the shutter button all the way.
● A picture is taken.
● The focus and exposure are locked when the
shutter button is pressed halfway.
● When is selected: First, the self-timer lamp
lights up for approximately 10 seconds, then it
blinks for approximately 2 seconds and the
picture is taken.
When is selected: The self-timer lamp
lights up for approximately 2 seconds, then
the picture is taken.
● To cancel the activated self-timer, press
DRIVE.
3
To exit the self-timer mode, press DRIVE while rotating the main dial or sub
dial.
All the way down
(2-second self-timer)