Replacing a ZS3-2 PCIe Card or Riser
17.
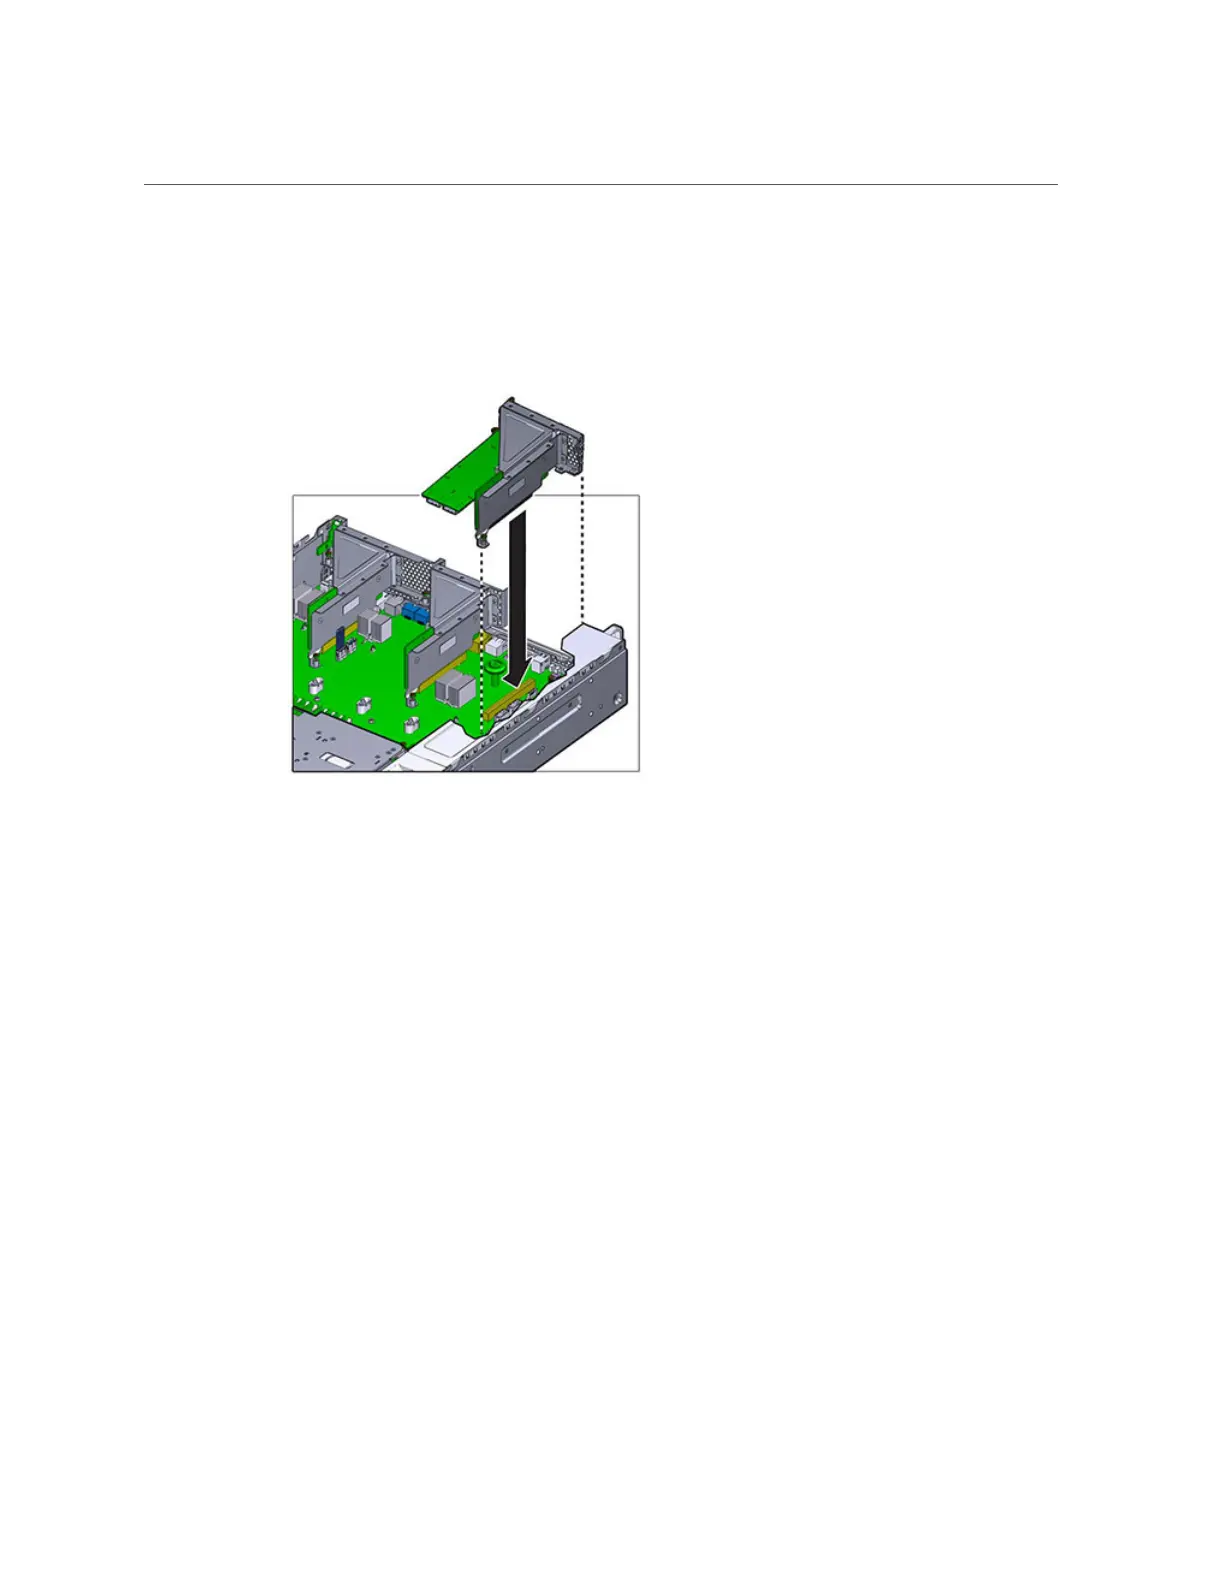
Lower the riser card onto the motherboard and press the card edge connector
securely into the socket. The bracket of the riser (riser 2 and 3) overlaps the
bracket of the adjacent riser.
18.
Tighten the two captive screws that secure the riser to the motherboard.
19.
Replace the top cover and tighten the two captive screws.
20.
Push the release tabs on the side of each rail and slowly push the storage
controller into the rack, making sure no cables obstruct the path of the
controller.
21.
Reconnect all cables to their original ports, referring to the labels previously
added as a guide. For cabling details, see the Oracle ZFS Storage Appliance
Cabling Guide.
22.
Connect the power cords to the power supplies. Verify that standby power is on,
indicated by the Power/OK and SP status indicators flashing green on the front
panel.
23.
After the SP status indicator is solid green, use a pen or other pointed object to
press and release the recessed Power button on the front panel. The Power/OK
status indicator next to the Power button lights and remains lit.
Servicing the ZS3-2 Controller 151