A
awallaceSep 13, 2025
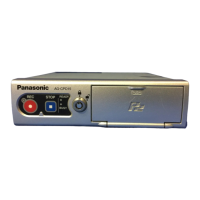
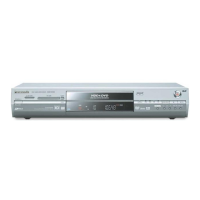
How to open the Panasonic AG-CPD20P cover?
- KKatherine StuartSep 14, 2025
To open the cover of your Panasonic DVR, use the supplied key.
How to open the Panasonic AG-CPD20P cover?
To open the cover of your Panasonic DVR, use the supplied key.
Details buttons for display, zoom, recording, audio mute, and IR mode.
Explains buttons for camera selection, volume, brightness, power, live/archive, skip, return, and menu access.
Explains cursor button usage for menus and playback control (pause, slow, rewind, fast forward).
Covers manual recording start, trigger-based recording, and power-on recording.
Details trigger sources like speed signals, GPS, and radar guns.
Defines conditions and methods for stopping recording, including post-recording.
Explains how to start recording with the REC button and stop with the STOP button.
Details how to add bookmarks to mark specific points in a recording.
Guides on selecting video inputs from camera connectors and trigger switching.
Explains how GPO signals indicate recording errors and status.
Details the output signals (GPO1, GPO2, GPO3) for various recording states.
Details how to activate the LPR system and its related settings.
Lists settings configurable by officers, including camera, LPR, and display options.
Sets power-off time, initial preset, video output, power-on record, loop, and intermittent recording.
Configures continuous recording time, prerecord, and postrecord times for video and audio.
Defines actions for trigger signals (GPI1-16) and detection methods.
Configures IP address settings for PC LAN, UPLOAD LAN, and USB Wireless LAN.
Explains automatic officer data loading from USB memory using AUTO mode.
Step-by-step guide to manually load officer data (Officer1) via the menu.
Guides on selecting and loading officer data from a registered list.
Steps to delete Officer1 or Officer2 data, including associated Source, Area, Shift, Work Time.
Guides on switching camera views and adjusting zoom levels.
Explains how to improve visibility in backlit or dark conditions.
Steps to use the autofocus function for clear image focus.
Details how to adjust camera brightness using the AE shift setting.
Guides on setting up LPR mode, including camera connection and recognition mode.
Details how to set shutter speed for capturing fast-moving subjects in LPR mode.
Explains how to set camera zoom ratio within the 1.0 to 22.0x range for LPR mode.
Allows viewing recorder status and trigger signals via AUTO, SIMPLE, DETAILS, or OFF OSD.
Explains how to start playback using the LIVE/ARCHIVE button.
Explains controls for pausing, slow playback, and quick replay (7 seconds prior).
Details how to rewind and fast forward playback at various speeds.
Explains using the Skip back button to navigate to bookmarks, triggers, or file beginnings.
Explains using the Skip forward button to navigate to subsequent skip locations.
Details adding bookmarks and classify tags during playback.
Steps to access the file list via the Archive menu for playback selection.
Explains how to turn sound playback on or off for selected audio channels.
Steps to select OSD display options (AUTO, SIMPLE, DETAILS, OFF) during playback.
Procedure to view the most recent error data, including error number and type.
Explains how to copy recorded data to a USB device and delete it from the card.
Steps to manually upload recorded files to a Back-End server.
Explains the process of automatically restoring corrupted files after power interruption.
Step-by-step instructions to restart the recorder to resolve operational issues.
Steps to access the administrator setup screen using a USB memory device.
Sets signal levels for audio inputs [AUDIO IN] 1 through 4.
Automatically detects connected cameras and displays their status.
Sets preset numbers, camera combinations, and resolution/record rate for main/sub video.
Sets prerecord and postrecord times for video and audio, and defines filename rules.
Loads and lists administrator, officer, and classify data from USB.
Sets the overall trigger function to ON or OFF.
Defines actions, detection methods, and display characters for trigger signals.
Sets whether OSD items like Trigger, Time, and Source@Area are embedded on main/sub screens.
Configures zoom limits, AGC, backlight, AE shift, flip, and auto-zoom.
Sets IR mode, auto focus, and enables/disables the LPR function.
Configures classify tag addition, officer data entry methods (AUTO, MANUAL, LIST).
Selects radar gun model, sets connection, and provides notes on usage.
Deletes all video and audio data files from the recorder.
Formats all inserted SDHC memory cards, with notes on unformattable cards.
Configures IP address settings for PC LAN, UPLOAD LAN, and USB Wireless LAN.
Sets DHCP client or server mode for network interfaces.
Sets Wi-Fi parameters like AP priority, network name, security, and key index.
Guides on how to upgrade the recorder's software version using external media.
Resets all recorder settings to their original factory default values.
Table showing status of SDHC and UPLOAD lamps and corresponding recorder states.
Relates REC, READY, and BUSY lamp states to recorder operations and errors.
Addresses problems with power not coming on or automatic shutdown.
Troubleshoots issues with opening covers, removing keys, and card slot operation.
Provides steps for resetting the recorder when it does not respond.
Addresses issues with starting recording, errors, and data usability.