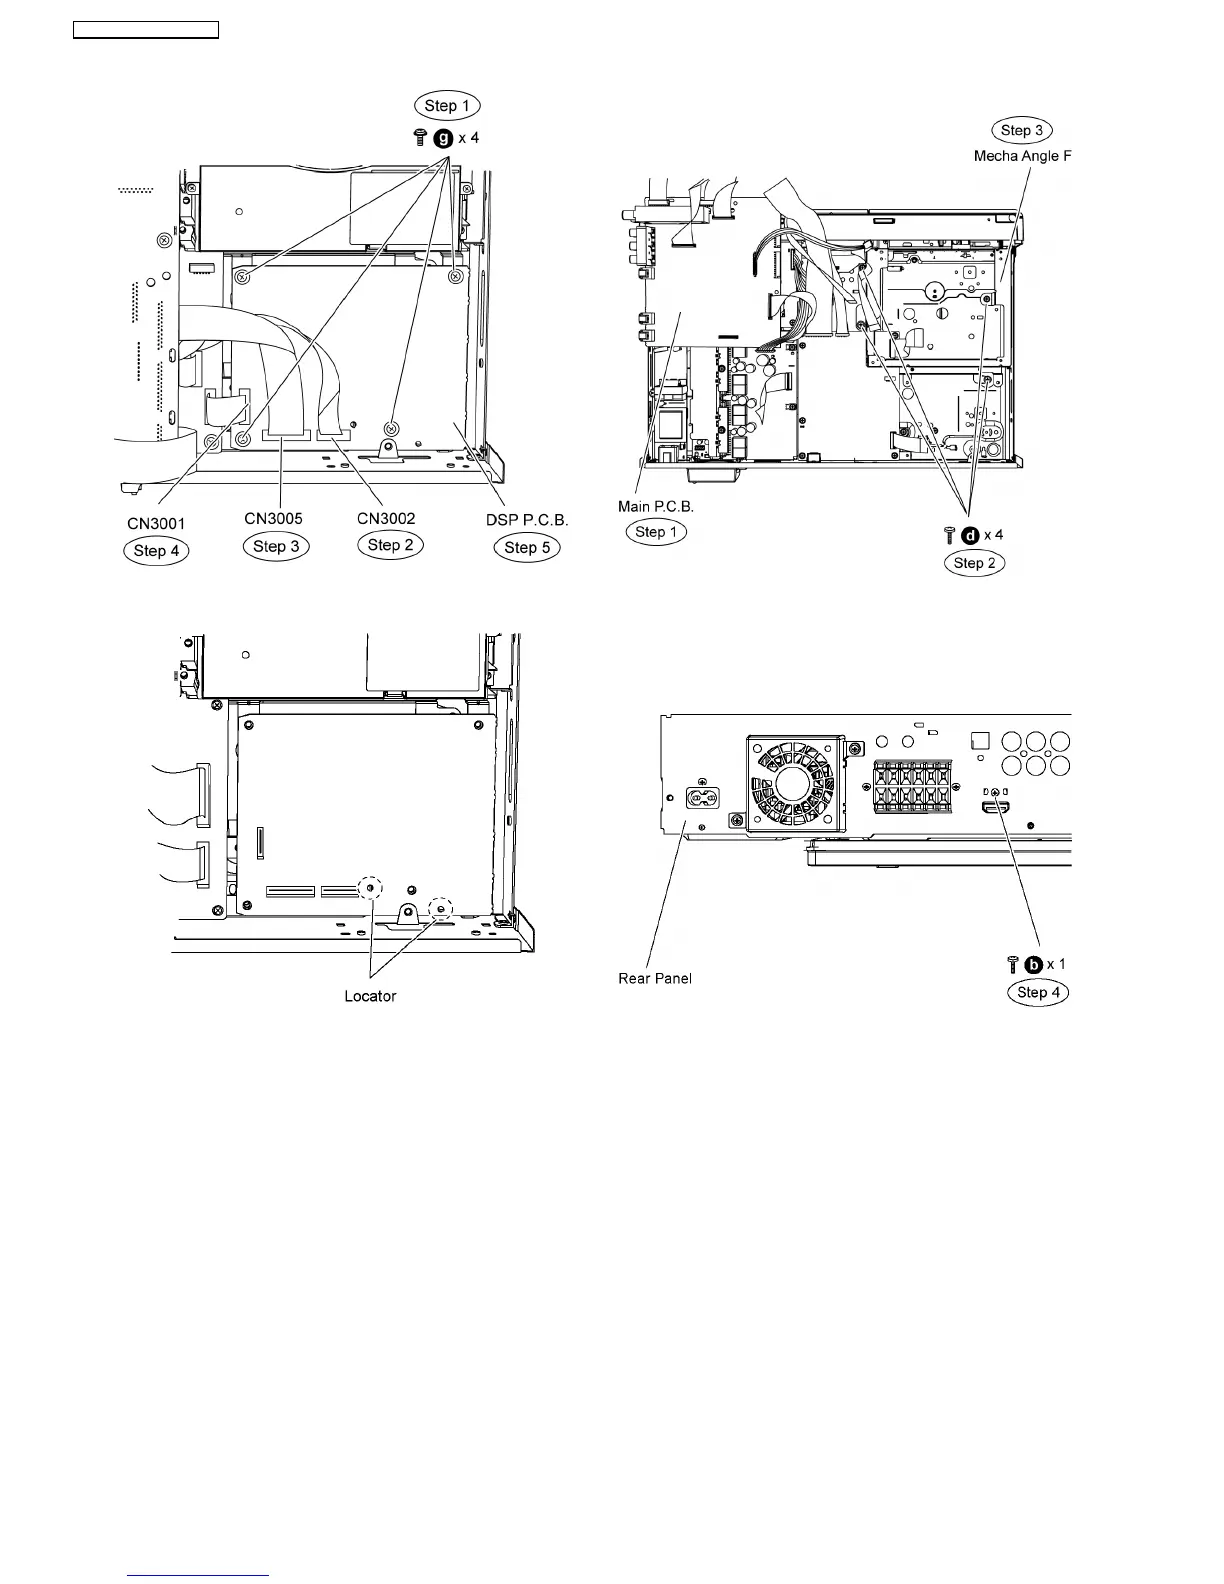
Special Note: During reassembling procedures, ensure the
P.C.B. is seated properly at the locators.
10.23. Disassembly of Digital P.C.B.
•
• •
• Follow (Step 1) to (Step 3) of Item 10.3.
•
• •
• Follow (Step 1) to (Step 6) of Item 10.5.
•
• •
• Follow (Step 1) to (Step 4) of Item 10.6.
•
• •
• Follow (Step 1) to (Step 6) of Item 10.21.
•
• •
• Follow (Step 1) to (Step 5) of Item 10.22.
Step 1 Move aside Main P.C.B according to the diagram
show.
•
• •
• Disassembly of Mecha Angle F.
Step 2 Remove 3 screws from Mecha Angle F.
Step 3 Remove the Mecha Angle F.
•
• •
• Disassembly of Digital P.C.B.
Step 4 Remove 1 screw at the rear panel.
Step 5 Remove 5 screws on Digital P.C.B.
Step 6 Detach 12P FFC cable at the connector (CN58004) on
Digital P.C.B.
Step 7 Remove Digital P.C.B.
58
SA-BT100P / SA-BT100PC