25
1
2
"- LEVEL EXPERT- PELLENC POWER TOOL BATTERY" Workshop document
Issue 11/2016 ref. : DOCUMENT ATELIER_BATTERIE_EXP_OUTILS_PELLENC_V2_2016_ENG
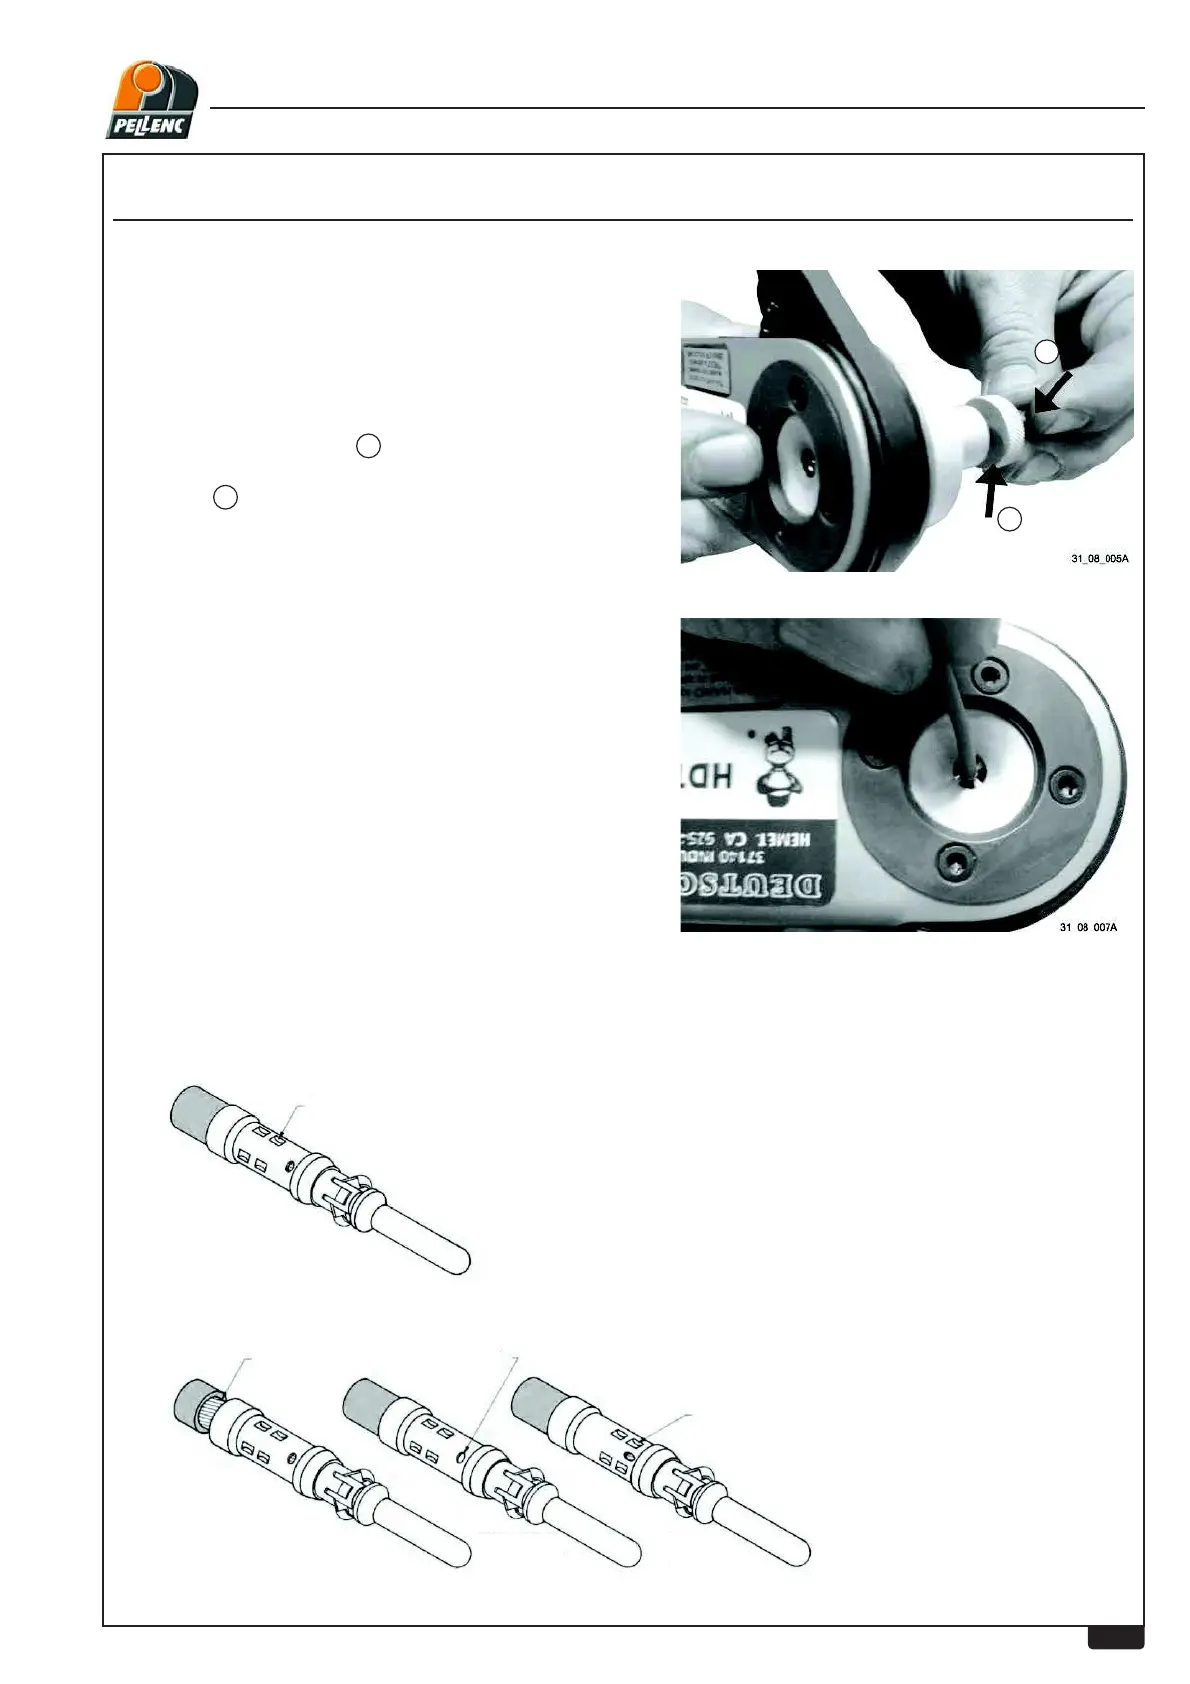
5- Turn the adjustment screw counter-clockwise to
increase the depth
of the lug to be crimped.
1
Then tighten the lock-nut clockwise to "lock" the
selection.
2
4- Adjust the mechanical stop so that the contact is
ÀXVKZLWKWKHRSHQLQJ
8- Inspect the crimp to validate the assembly; the wiremust not come out of the crimp when it is
pulled(Risk of contact splitting if crimped too hard).
6- Insert the wire fully into the lug to be crimped
7- &ULPSWKHZLUH¿UPO\XQWLOWKHFULPSLQJSOLHUVRSHQ
LEVEL 2 - USER'S TECHNICAL DEPARTMENT
Correctly crimped contacts
Exa
mples of Crimping faults
Crimp to meet
recommended tensile
strength.
Strands visible beyond
insulation support.
Stripped part of the
wire too long.
Stripped part of the
wire too short.
Strands not visible
trough inspection hole
Crimp indents too close to
inspection hole
Crimp indents
incorrectly located