41
41
Programming Corpus VS/APE- Specific Attributes
2. Standing sequence 1 adjustment (Only Corpus VS and Corpus APE options
with VS legrest)
This sequence is entered by pressing Button 1 in Standing Sequence Setting mode and LED 1 is solid
red until the button is released.
Note: If the button is pressed for more than 15s, the standing sequence 1 will be reset to the default
standing sequence for S1. When the reset occurs, LED 1 will switch to flashing green as long as the but-
ton is activated. When the button is released, the standing sequence is reset and the chair needs to be
restarted.
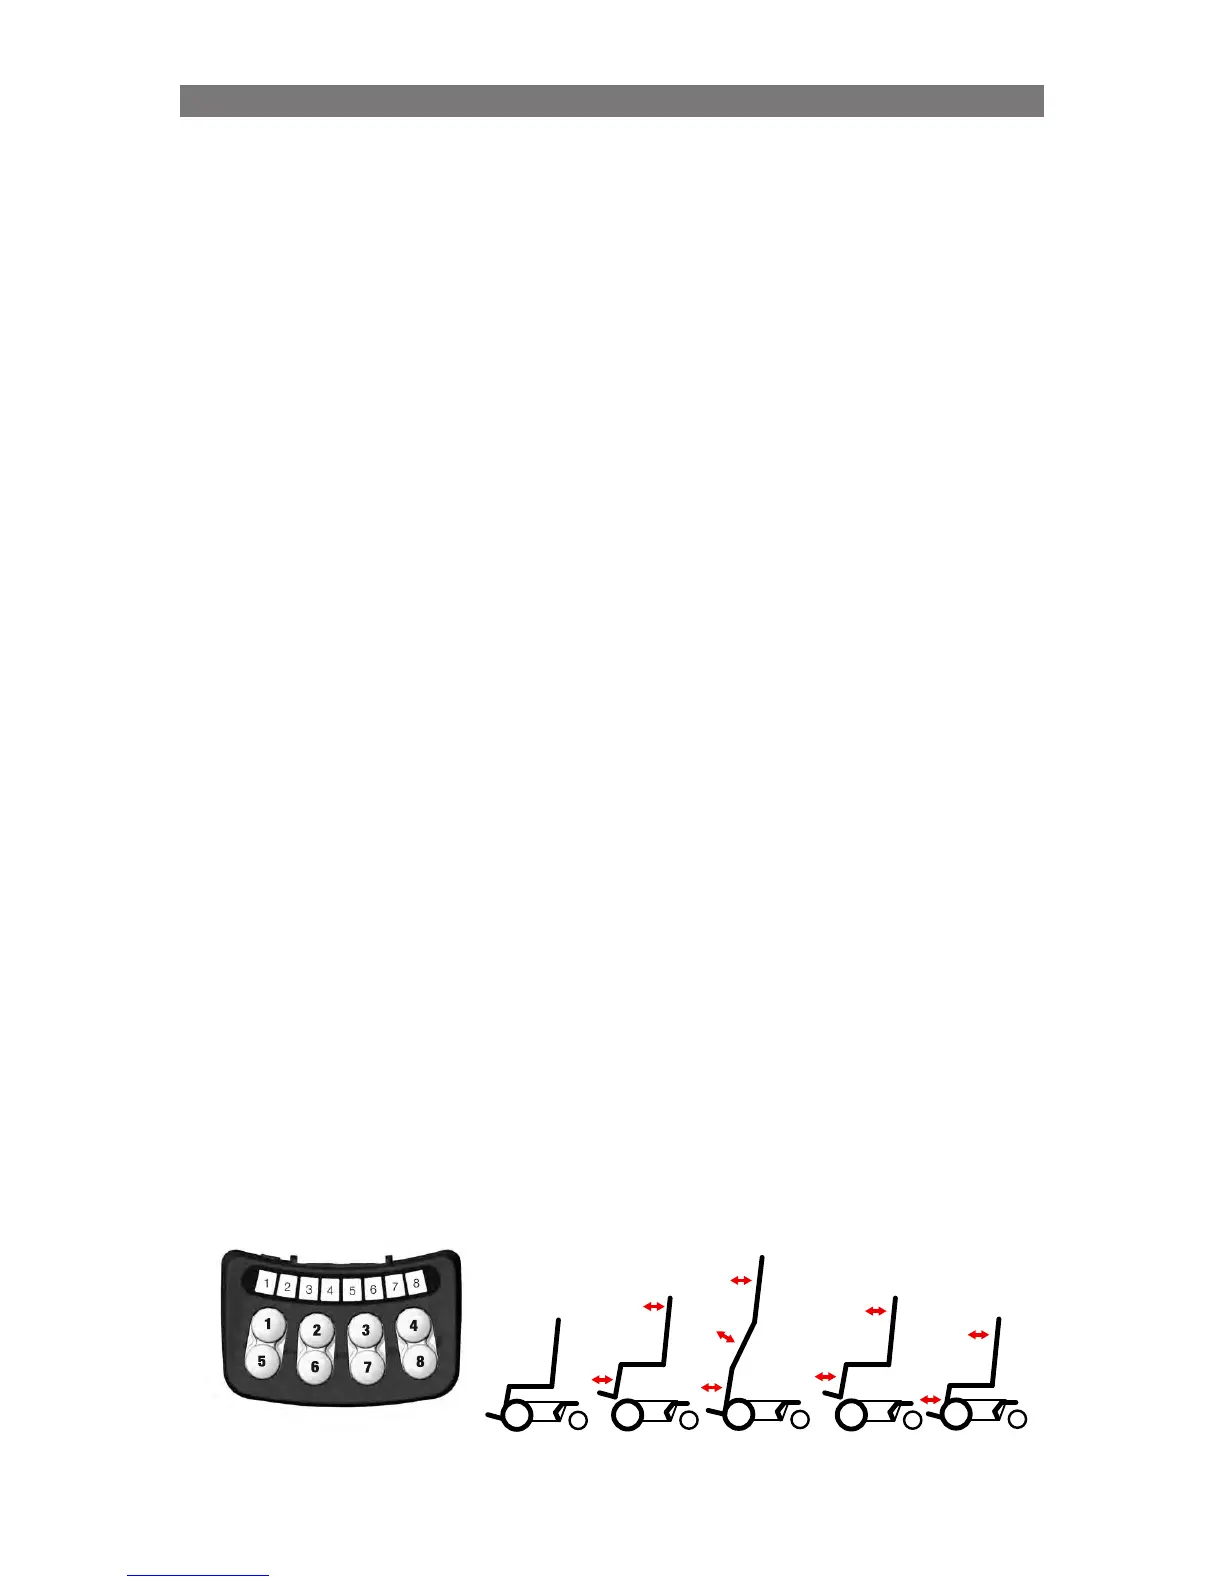
The following buttons are used:
• Button 1 and 5: controls standing seq. up/down (alters LED 1 and 2) Button 1 = up (raise)
• Button 2 and 6: for adjustment of the backrest angle
• Button 3 and 7: for adjustment of legrest angle
• Button 8: Save
Indications on the ICS Switchbox
(CPx = CheckPoint x)
• Led 1 - solid green: CP1 can be saved. CP1 is the highest position where the seat is still
horizontal during the raising part.
• Led 2 - solid green: CP2 can be saved. CP2 is the end position for the raising sequence.
• LED 3 – solid green: CP3 can be saved. CP3 is the position during the lowering part of the
standing sequence where the seat once again becomes horizontal.
• LED 4 – solid green: CP4 can be saved. CP4 is the end sitting position for the lowering part of the
standing sequence.
• Led 8 - flashing green: position can be saved for stand sequence CheckPoints
• Led 8 - solid green: while holding sw8, position saved
• Led 8 - flashing red: while holding sw8, can’t save sequence position
Procedure
(CPx = CheckPoint x)
1.
Start from a relatively low sitting position.
2. Press Button 1 until CP1 is reached (LED 1 solid green) and adjust back rest/legrest and save
3. Press Button 1 again and the seat will start to raise. Press Button 1 until either:
a) LED 2 solid green – save. Press Button 1 for 5s to continue raising to wanted stand angle. Adjust
Back and Leg and Save as final stand position.
b) max wanted stand angle is reached, adjust back/leg and save.
c) raise stops due to that previous endpoint is reached. Press Button 1 for 5s to continue raising to
wanted stand angle. Adjust Back and Leg and Save as final stand position.
4.
Press Button 5 (unstand) until CP3 is reached (LED 3 solid green) adjust back/leg and save
5. Press Button 5 until CP4 is reached (LED 4 solid green) adjust back/leg and save
6. Restart system (Off and On)!
Up
CP1
Stand
CP2
Down
CP3
End
CP4
Start