42
3. Standing sequence 2 adjustment (Only Corpus VS):
This sequence is entered by pressing Button 2 in Standing Sequence Setting mode and LED 2 is solid red
until the button is released.
Note: If the button is pressed for more than 15s, the standing sequence 1 will be reset to the default
standing sequence for S2. When the reset occurs, LED 2 will switch to flashing green as long as the
button is activated. When the button is released, the standing sequence is reset and the chair needs to be
restarted.
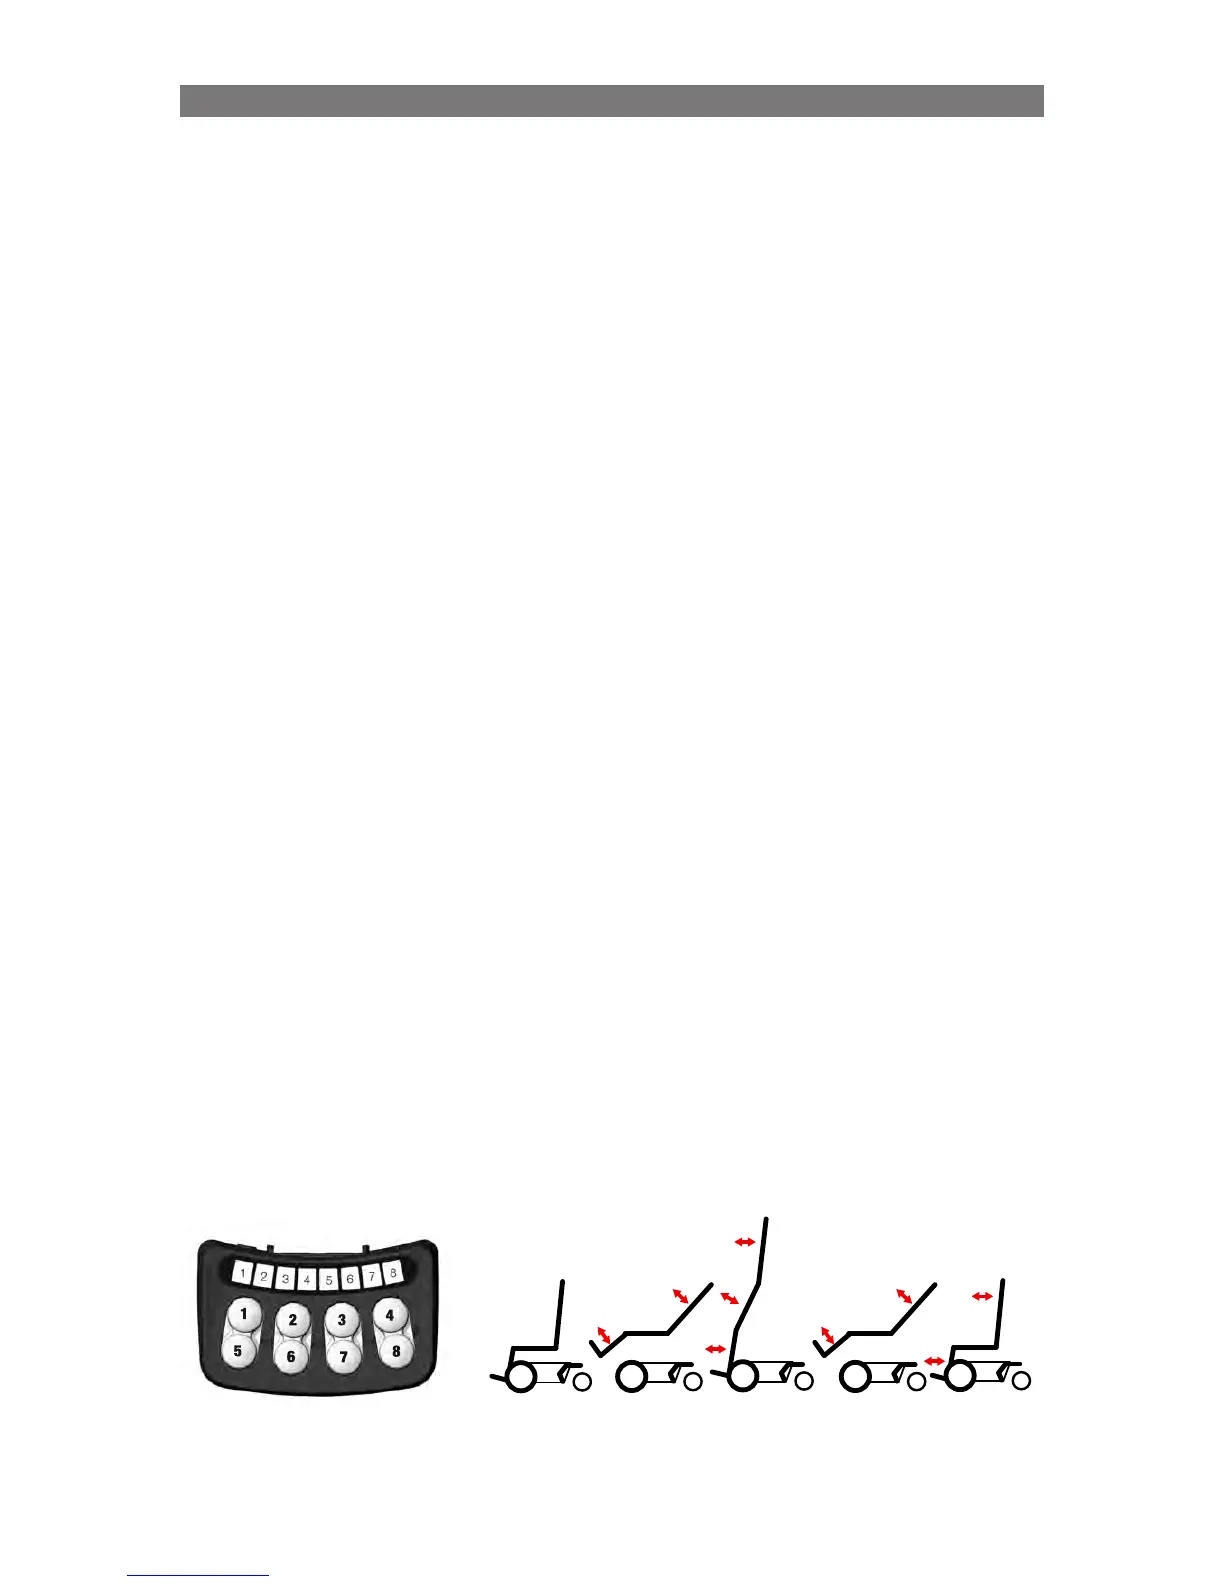
The following buttons are used:
• Button 1 and 5: controls standing seq. up/down (alters LED 1 and 2) Button 1 = up (raise)
• Button 2 and 6: for adjustment of the backrest angle
• Button 3 and 7: for adjustment of legrest angle
• Button 8: Save
Indications on ICS Switchbox
(CPx = CheckPoint x)
• Led 1 – solid yellow: CP1 can be saved. CP1 is the highest position where the seat is still
horizontal during the raising part.
• Led 2 – solid yellow: CP2 can be saved. CP2 is the end position for the raising sequence.
• Led 3 – solid yellow: CP3 can be saved. CP3 is the position during the lowering part of the
standing sequence where the seat once again becomes horizontal.
• Led 4 – solid yellow: CP4 can be saved. CP4 is the end sitting position for the lowering part of the
standing sequence.
• Led 8 - flashing green: position can be saved for stand sequence CheckPoints
• Led 8 - solid green: while holding sw8, position saved
• Led 8 - flashing red: while holding sw8, can’t save sequence position
Procedure
(CPx = CheckPoint x)
1.
Start from a relatively low sitting position.
2. Press Button 1 until CP1 is reached (LED 1 is solid yellow) and adjust back rest/legrest and save
3. Press Button 1 again and the seat will start to raise. Press Button 1 until either:
a) LED 2 is solid yellow – save. Press Button 1 for 5s to continue raising to wanted stand angle. Adjust
Back and Leg and Save as final stand position.
b) max wanted stand angle is reached, adjust back/leg and save.
c) raise stops due to that previous endpoint is reached. Press Button 1 for 5s to continue raising to
wanted stand angle. Adjust Back and Leg and Save as final stand position.
4.
Press Button 5 (unstand) until CP3 is reached (LED 3 is solid yellow) adjust back/leg and save
5. Press Button 5 until CP4 is reached (LED 4 is solid yellow) adjust back/leg and save
6. Restart system (Off and On)!
Programming Corpus VS /APE- Specific AttributesProgramming Corpus VS /APE- Specific AttributesProgramming Corpus VS/APE- Specific Attributes
Up
CP1
Stand
CP2
Down
CP3
End
CP4
Start
90°
90°