6. To change the horizontal position of a graphic items, refer to Positioning a graphic/message.
7. If during a mail run an envelope has the maximum number of images it can accommodate and
the size of the envelope decreases (for example during a WOW job), the graphics and/or
messages will be dropped in a specific sequence. Refer to How markers are dropped/added for
the order in which the markers are dropped.
Positioning a graphic/message
You can move a graphic horizontally within the Transpromotional zone using the position buttons.
These buttons allow you to move the graphic to the left or right. The allowed distance you can move a
graphic depends on the envelope/tape size and the number of graphics already in the zone. If you
attempt to move the graphic more than the maximum allowed, a warning is displayed.
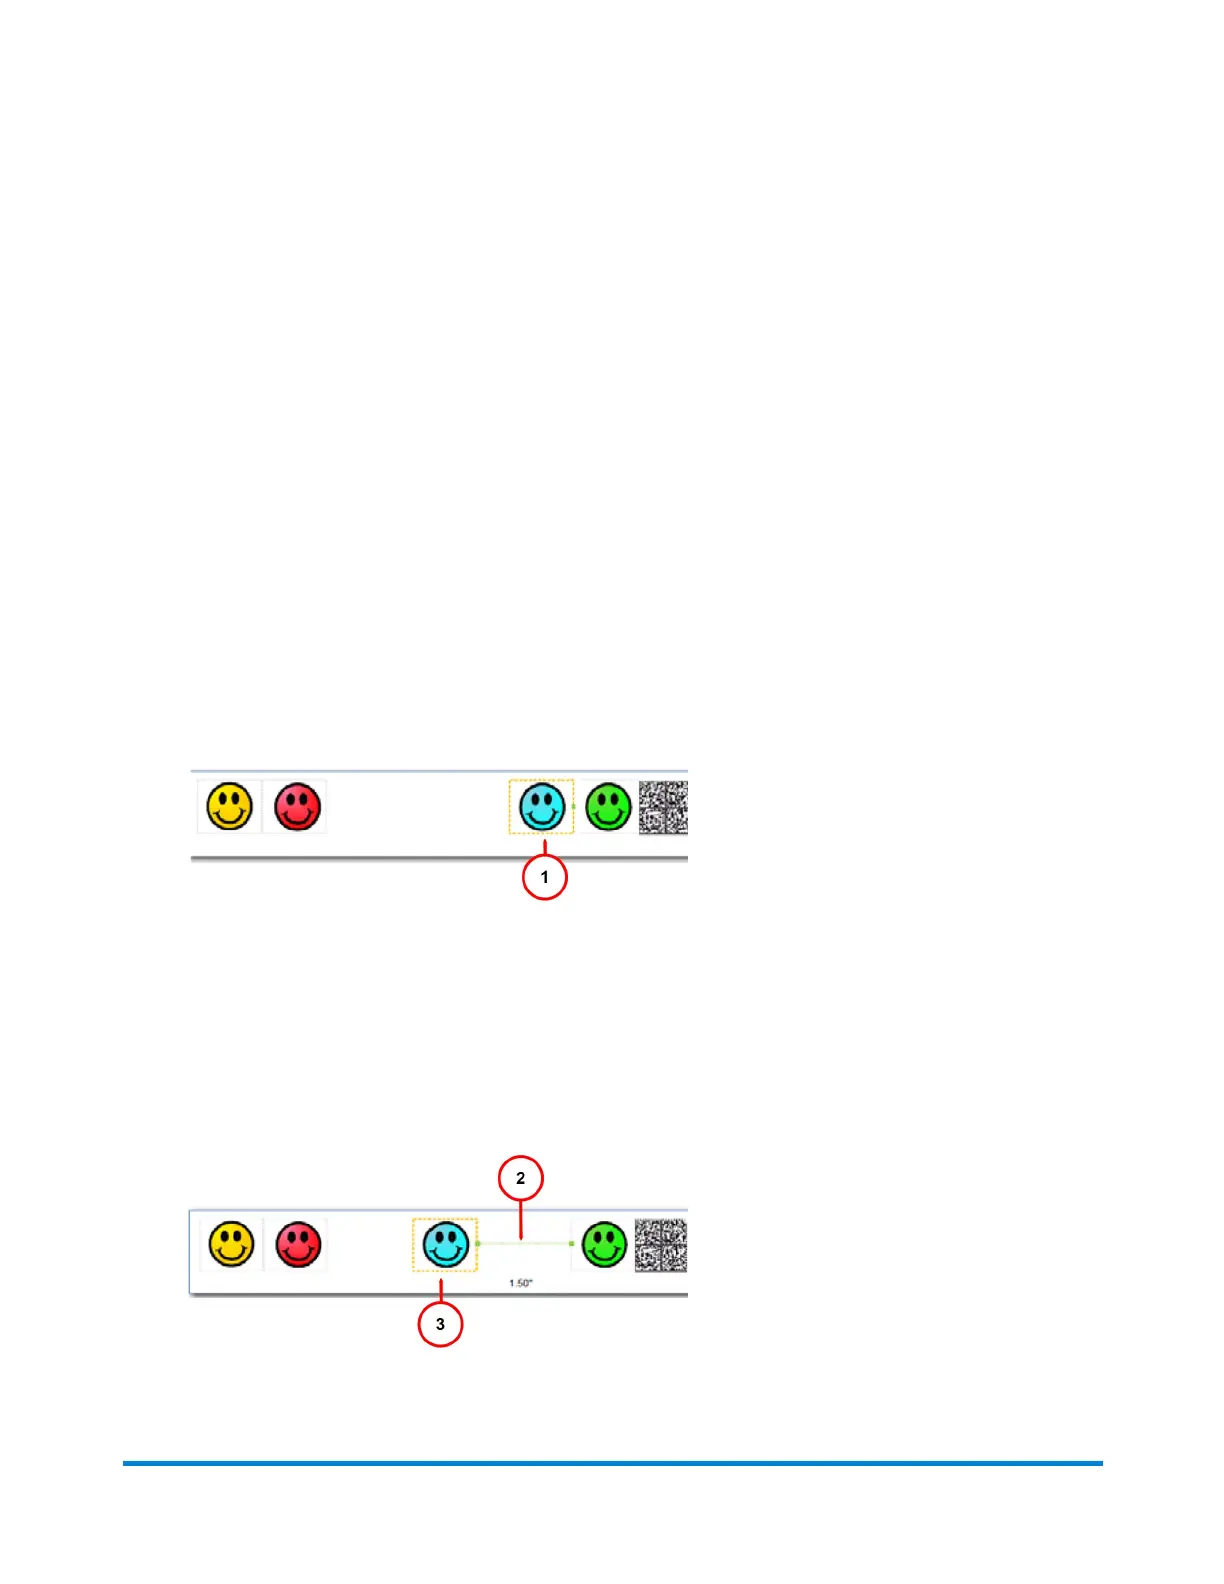
1. When you select an image, a border appears around it and a dot appears on the left or right
depending on whether it is left or right justified.
2. Select the graphic you want to move (1). For this example, we select the right justified blue
graphic.
3. You can move the graphic to the left either by tapping the Margin button and entering the
distance, or by tapping the left position button - a single tap moves the image 0.1 inch (2.54
mm). Press and hold for more than two seconds and the distance increments 0.5 inch (12.7
mm) every additional second. If you exceed the allowable distance, the green inter-element link
(see 2 in the diagram below) turns from green to red. In the example here the right margin for the
blue element is now at 1.5 inches (38.1 mm). Refer to 3 in the diagram below.
Running mail
Pitney Bowes User Guide April 2022 76