Chapter H - CEPHALOSTAT
H-12 ProMax X-ray unit with DImax3
ADJUSTMENTS AND CALIBRATIONS
Technical manual
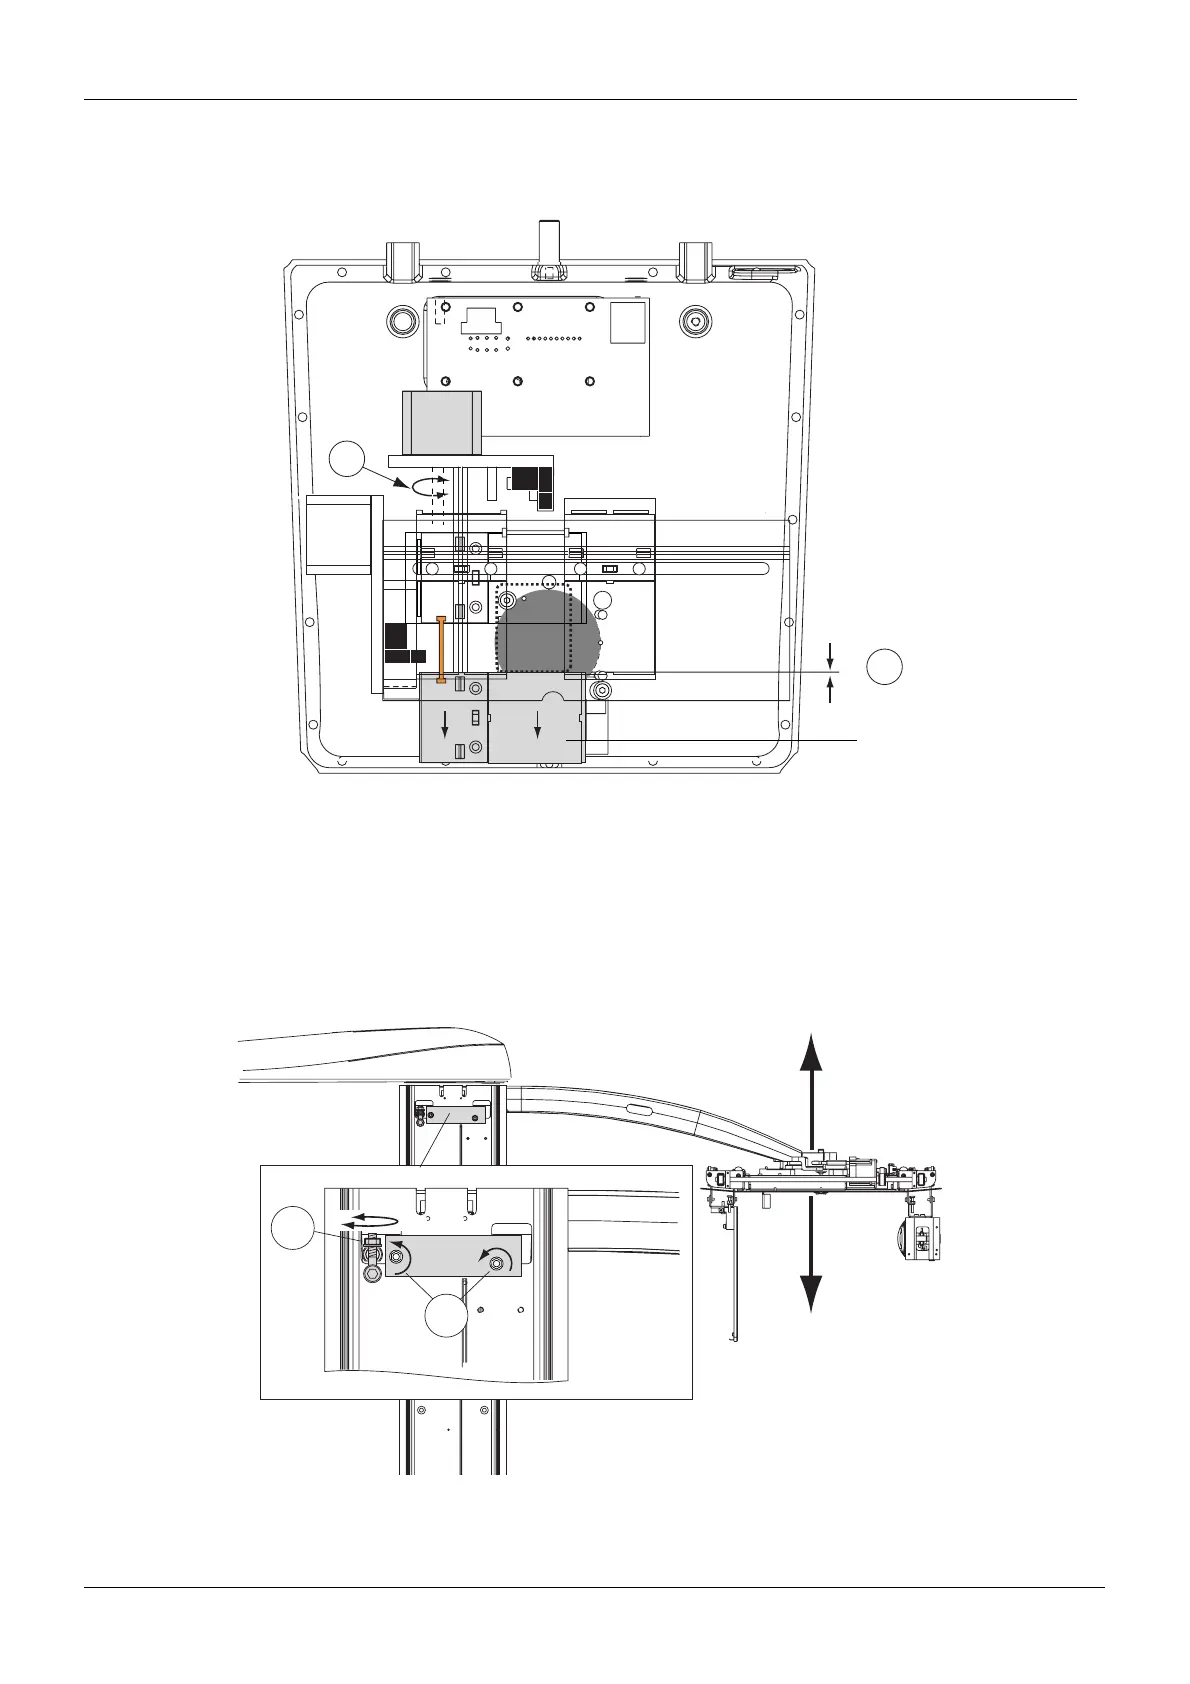
The lower blade of the primary collimator must be on a level with the opening on the alumin-
ium frame. To adjust the position of the lower blade rotate the Y-motor screw (Fig. 22, 1) and
simultaneously move the lower blade (Fig. 22, 2).
Figure 22
Stand behind the tube head and protect yourself from radiation. Press and hold down the
exposure button. The image of the radiation beam will appear on the alignment tool.
Loosen the nuts of the attachment plate (Fig. 23, 1). Adjust the cephalostat height with the nut
of the swing bolt (Fig. 23, 2) so that the bottom edge of the X-ray beam reaches the lower
edge of the rectangle marked on the beam alignment tool when the beam alignment tool is
positioned to the sensor alignment tool upside down to lower vertical position as shown on
Fig. 18.
Figure 23 Adjusting the height of head support.
Exit the
Ceph mode beam position
mode by touching the Cancel field.
1
2
Adj_coll_di .eps
Lower blade
1
2
Adj_DigiCeph_arm.eps

 Loading...


