Section 18: BODY
PA1593
23
o Depth adjustment
1. Support the door panel with a wooden block
and a hydraulic jack.
2. Unfasten and then disconnect rod ends from
door panel fixing plates. Screw or unscrew
rod end in order to adjust door panel depth.
3. Tighten the bolts. Remove the jack and the
wooden block
6.1.7 Front Electrical & Service Compartment
Door
Door adjustment
Check around the perimeter of the door for
binding. If any binding is found, adjust as
follows:
1. Remove the screws and the plastic molding
covering each of the hinges.
NOTE
Ask an assistant to help you to perform the
following adjustments.
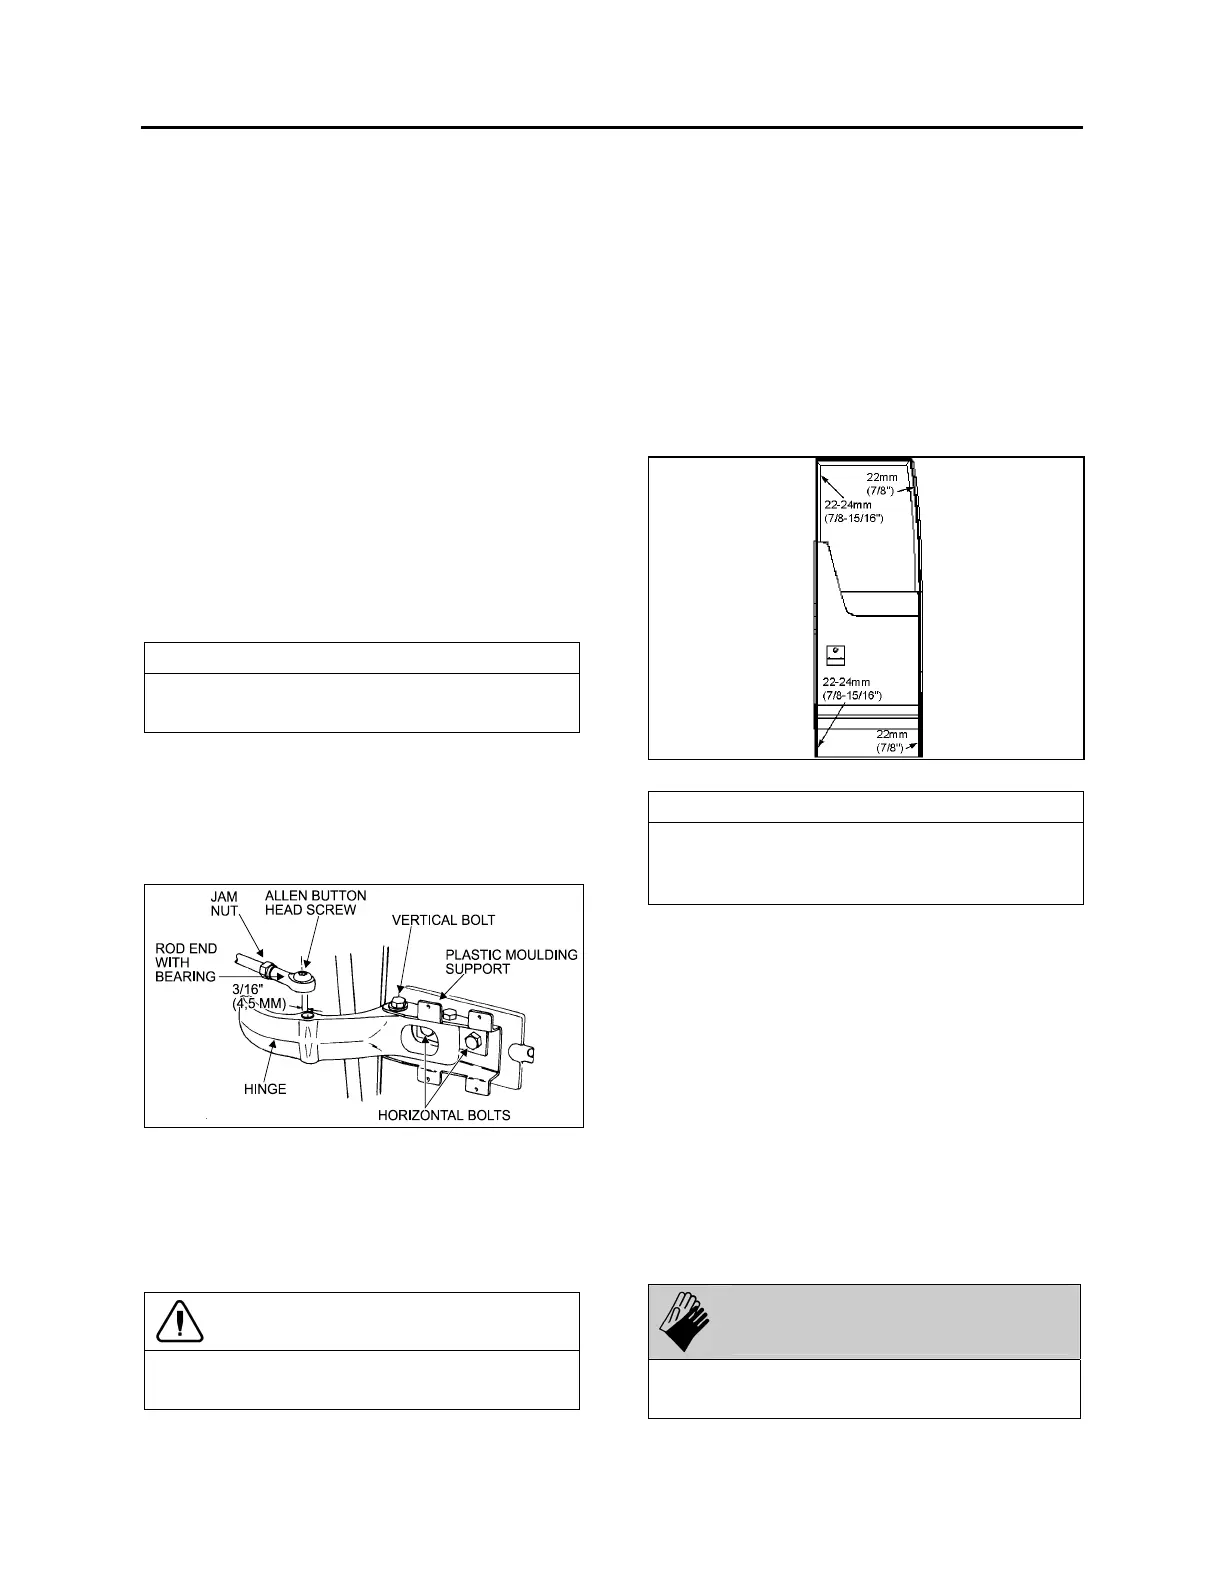
2. Remove the Allen button head screw and
the washer retaining the rod end with bear-
ing to the upper hinge. See figure 25.
3. Support the door with a wooden block and a
hydraulic jack.
FIGURE 25: UPPER DOOR HINGE 18058
4. Loosen the horizontal bolts retaining the
door to the hinges. Adjust the door horizon-
tally and vertically with the jack. Tighten the
bolts to 30-36 Lbf-ft (40-50 Nm). Remove
the jack and the wooden block.
CAUTION
Make sure the front side door does not
interfere with the exterior panel.
5. Pull and fasten the rod end to the hinge with
the washer and the button screw.
6. Screw the plastic moldings covering the
hinges.
Seal Compression Adjustment
1. From the outside of vehicle, insert a straight
edge in the gap along the door outside
perimeter. Measure the distance between
the door frame and the door outside surface
at the door four corners (refer to figure 26).
FIGURE 26: SEAL COMPRESSION ADJUSTMENT 18632
NOTE
The front measurements are the most
important. If required, ask an assistant to help
you to perform the following adjustments.
2. If required loosen the bolts retaining the
door to the hinges. Adjust the bolts to obtain
the proper seal compression.
Door Seal Replacement
1. Inspect the seal; if cracked or torn, it must
be replaced:
2. Remove the old seal and with a sharp edge
knife, scrape tape left on the fiberglass door
surface.
3. Sand the surface of the door where a new
seal will be applied with 240 grit sandpaper.
4. Clean the surface with alcohol.
WARNING
Wear rubber gloves and do not smoke when
cleaning.








 To Next Page