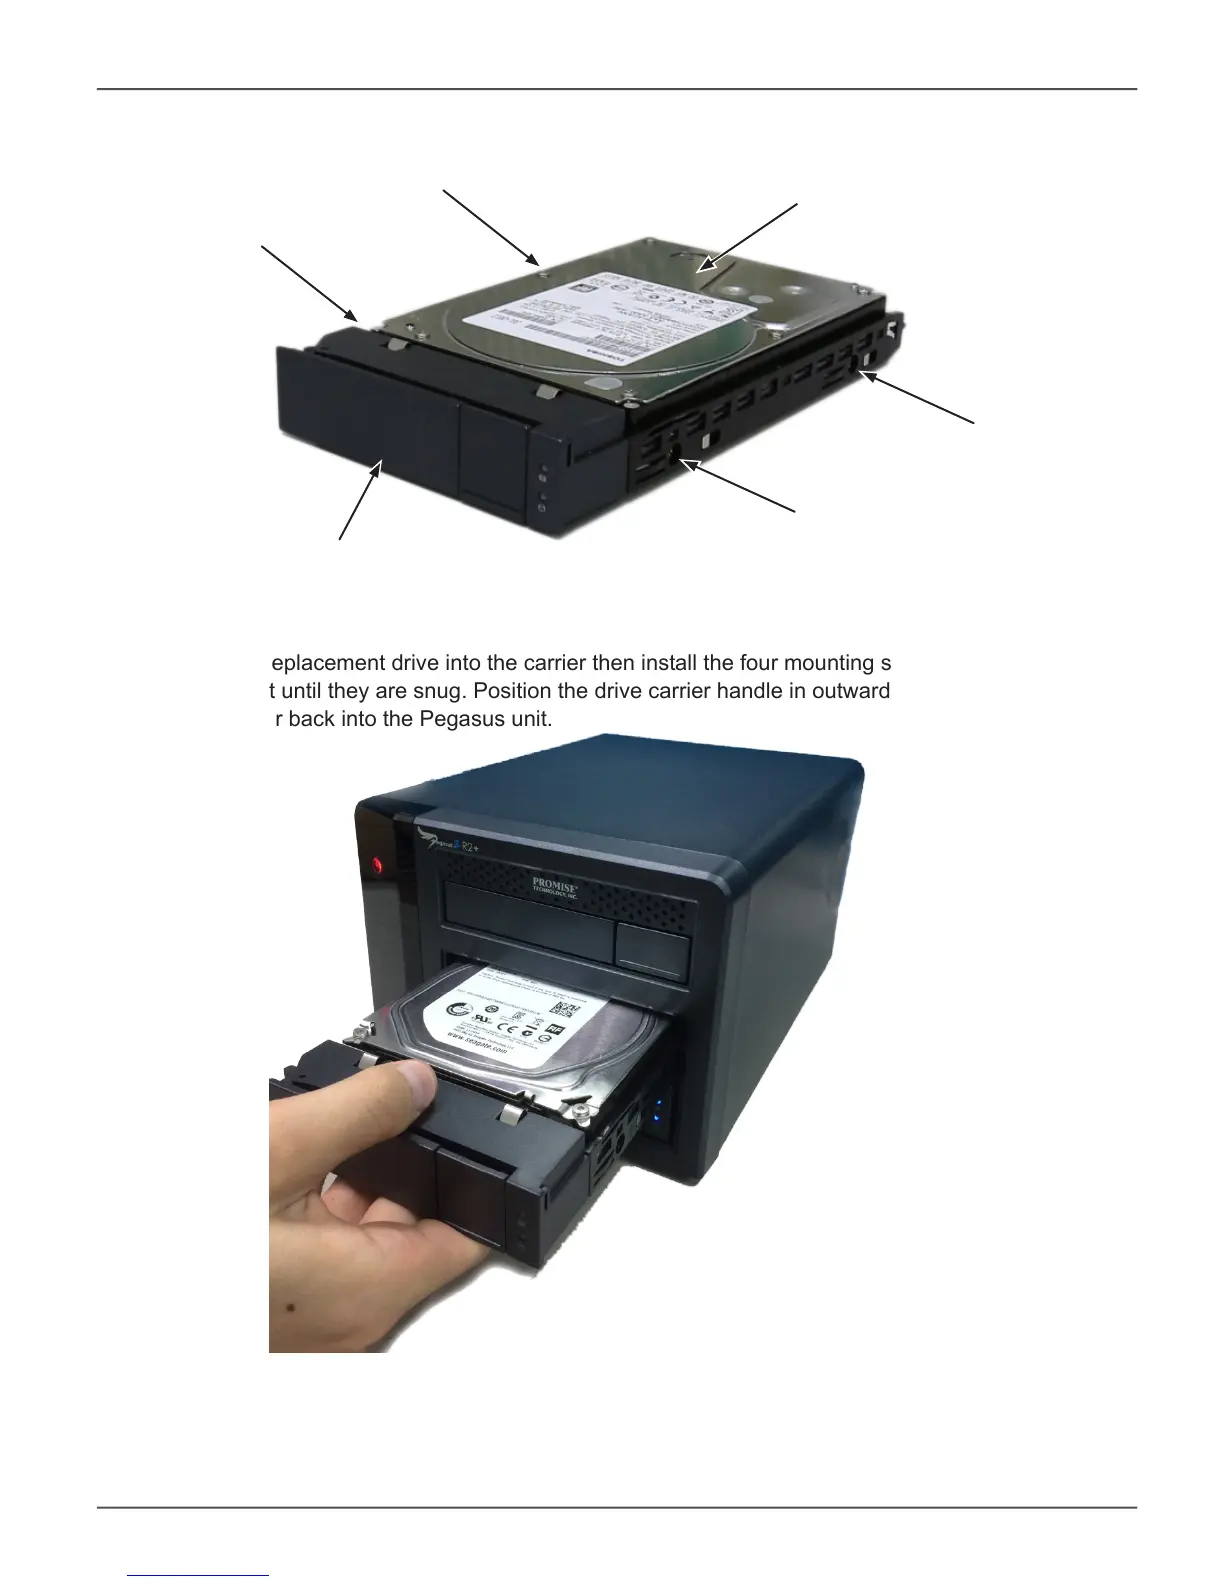
1. Remove the four mounting screws, then slide the failed drive out of the carrier.
2. Place the replacement drive into the carrier then install the four mounting screws. Tighten the
screws just until they are snug. Position the drive carrier handle in outward position and slide the
drive carrier back into the Pegasus unit.
3. Press the drive carrier handle inward until it locks.
Physical drive
Mounting screw
Mounting screw
Mounting screw
Mounting screw
Drive carrier handle
54
Pegasus2 R2+ Product Manual