Q40 Tape Library Installation and Operations Manual
511026 Rev. 07-01-19 136
6. Li
ft the spooling cable from the robotic assembly and place it in its cradle at the top of the spooli
ng
m
echanism.
7. Place the spooling connector to the park position.
8.
Set aside the robotic assembly.
If there is a tape cartridge still in the gripper, remove the cartridge by
lifting it straight up; you may need to move the cartridge slightly from
9. E
xtend the left magazine out of the rack by approximately 15 cm (6 inch).
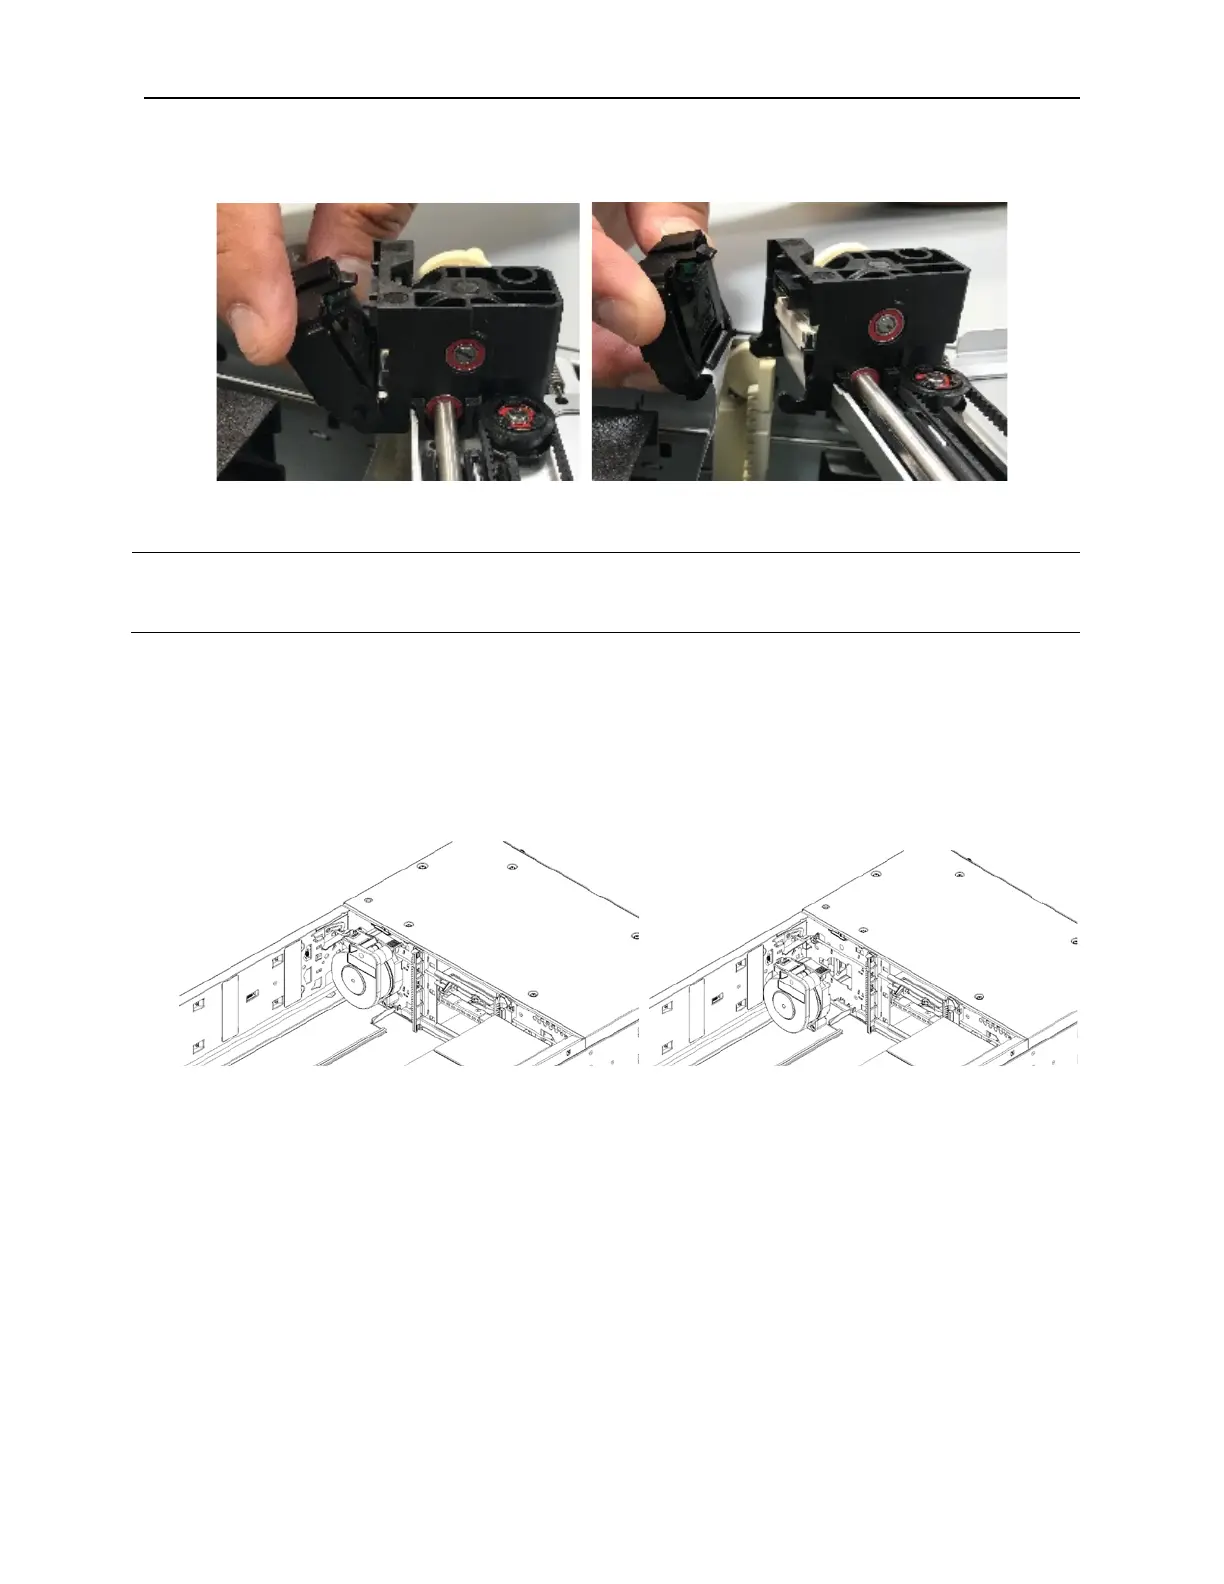
10. While pressing the latch near the top of the spooling mechanism, pull the entire spooling mechanism
gently up until you see it clear the narrow part of the keyhole in the back left of the metal wall. It may
help to push up from the bottom with your other hand.
11. Pull the spooling mechanism toward the front of the module until it disconnects and remove it from
the module.
7.10.4 Installing the Robotic Assembly and Spooling Mechanism into the Base Module
1. Hold the spooling mechanism so that the end of the spooling cable that attaches to the robotic
assembly is pointing up.
2. Align the tab on the back of the spooling mechanism with the keyhole in the back left of the metal
wall.
3. Push the spooling mechanism in and down until it snaps into place.
4. The robotic assembly is shipped with the robot in the unlocked position. Verify that it is unlocked. If
the robot is locked, unlock it; standing at the front of the module, move the blue lever to the left, t
hen
t
oward you, then to the right.