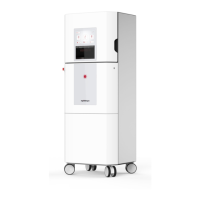
Operating Instructions D50+ | P50+ | SHERAprint 50
Rapid Shape GmbH │ DOCR000438
3. Press the button next to the description to enable the function.
The button lights up green when the function is enabled.
4. Press the «Save» button on the right-hand side of the display to
save the setting.
5. Return to the main menu.
7.5.3 Enable Automatic Part Separation
The Automatic Separation Function (ASM function) facilitates the direct
separation of the printed parts from the build platform following the
completion of the last printed layer. This function can be set with the
“Enable automatic part separation” button.
To set the function, refer to the separate chapter “Setting Up &
Administrating the Automatic Separation Function“. → Chapter 7.7
7.5.4 Show Detailed Printing Screen
During the printing process, you can switch between two different print
views on the touch display. To display the detailed printing screen by
default, enable the “Show detailed printing screen” button.
To set the print view, refer to the separate chapter “Switching the Print
View“. → Chapter 7.8.2
7.5.5 Intelligent Connectivity
The “Intelligent Connectivity” function facilitates communication
between the printer and x_wash and x_cure post-processing devices.
If a connection exists between these machines, the printer provides
finished print jobs for further processing to the post-processing devices.
This function can be set with the “Intelligent Connectivity” button.
Proceed as follows to set this function:
1. Access the «Customer» menu: Main Menu > «Setup» >
«Service» > «Switch Level» > «Customer».
2. Locate the button “Intelligent Connectivity” on the left-hand side
of the display.
The button lights up red when the function is
disabled.
3. Press the button next to the description to enable the function.
The button lights up green when the function is enabled.
4. Press the «Save» button on the right-hand side of the display to
save the setting.
5. Return to the main menu.
6. To connect the printer to the post-processing devices, please
refer to the separate instructions, “x_wash Intelligent
Connectivity” and “x_cure Intelligent Connectivity”. →

 Loading...