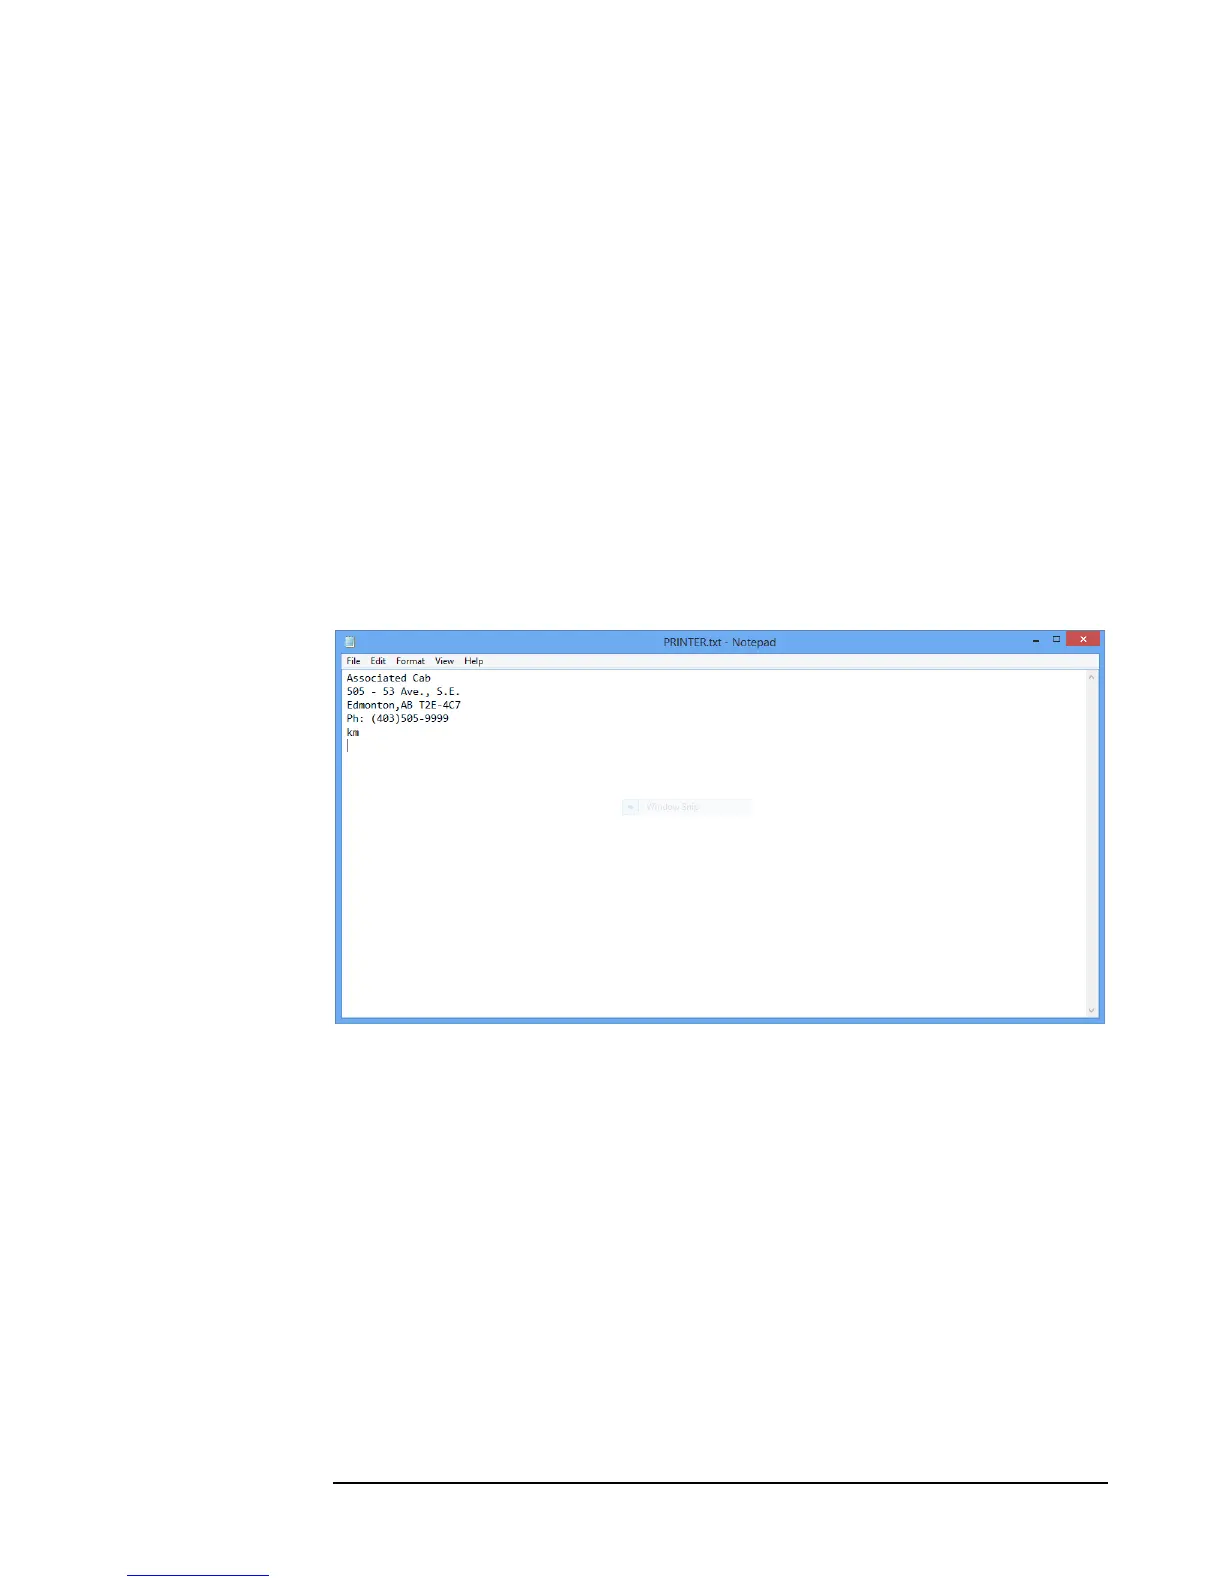
7.3 Creating the Receipt Header file
The receipt header file contains the text that you want to print at the top of your
receipts. This file can then be uploaded to the CG3 from a USB flash drive (see the
USB LOAD function above).
Using a text editor on a personal computer – such as Notepad on a Windows machine,
create a new text file. The receipt header may consist of 4 lines of 31 alpha-
numeric characters. Each line must be ended with a carriage-return.
A fifth line is filled with the distance unit to be used to identify distance on the receipt,
such as miles, mi, or km.
See the image below for an example file.
When completed, save the file as “PRINTER.txt”, and copy the file to a USB flash
drive to be uploaded to the CG3.
Figure 23: An example PRINTER.txt file.
7.3 Printing Receipts
At the end of a fare, you may print a receipt by pressing the Rate Button. You can
print duplicates by pressing the Rate Button any additional number of times.
In addition, if you are in Vacant Mode, you may print a duplicate receipt of the last fare
by entering the Main Menu (5.0) and pressing the Rate Button.