Adjusting the First Scanner Contact Points
1. A(R)DF or platen cover
2. Operation panel, top rear cover ( p.78 "Upper Covers").
3. Exposure glass ( p.85)
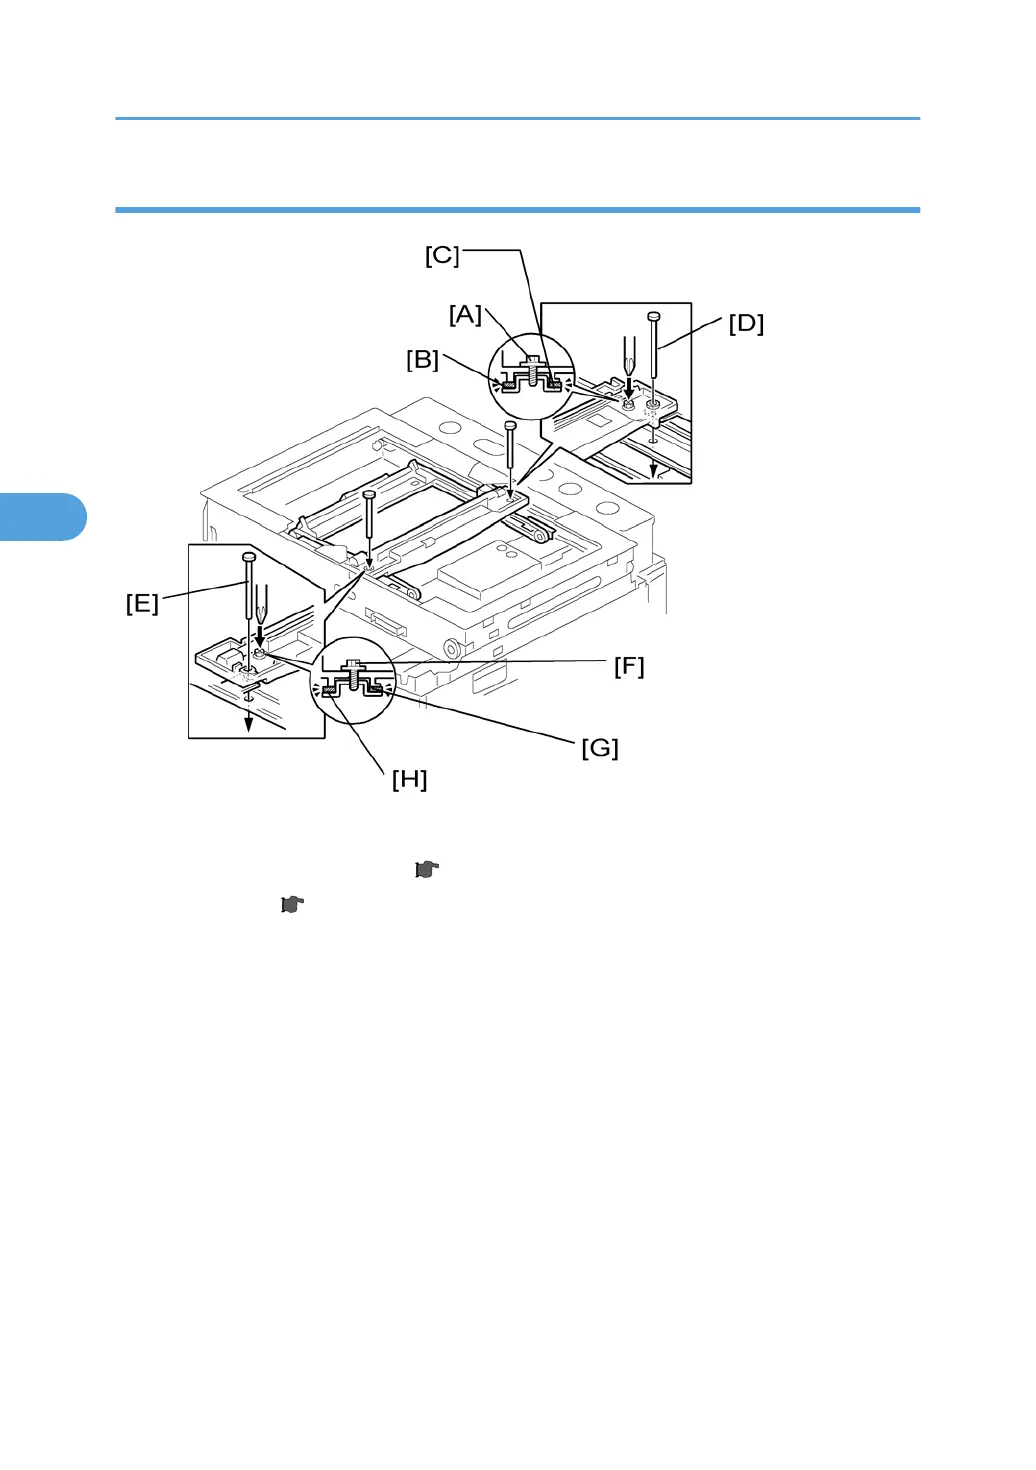
4. Loosen the 2 screws [A] [F].
5. Slide the 1st and 2nd scanners, or one of them, to align the following holes and marks
6.
The adjustment holes in the first scanner
7. The adjustment holes in the second scanner
8. The alignment marks on the frames
9. Insert the positioning tools [D] [E] through the holes and marks.
10. Check that the scanner belts [B] [C] [G] [H] are properly set between the bracket and the 1st scanner.
11. Tighten the screws [A] [F].
12. Remove the positioning tools.
13. Reassemble the machine and check the operation.
4. Replacement and Adjustment
92
 Loading...