2. THERMAL HEAD VOLTAGE ADJUSTMENT
Purpose:
To maintain master making quality and extend the lifetime of the
thermal head.
NOTE:
This adjustment is always required when the thermal head or
power supply board is replaced.
1. Remove the rear cover of the machine.
2. Check the voltage noted on the decal, located on the thermal head.
(The voltage varies according to each thermal head.)
3. Access "I/ Check Mode".
•
Turn on the main switch while holding the Print Start, Stop and
Clear keys. ------ LT version
•
Turn on the main switch while holding the Print Start, Stop, Clear
keys and the full master detection switch. ------ A4 version
4. Input 35 in the copy counter using the number keys, and set "0" in the
Memory/Class display by pressing the Memory/Class key.
5. Press the Print Start key to apply the thermal head voltage.
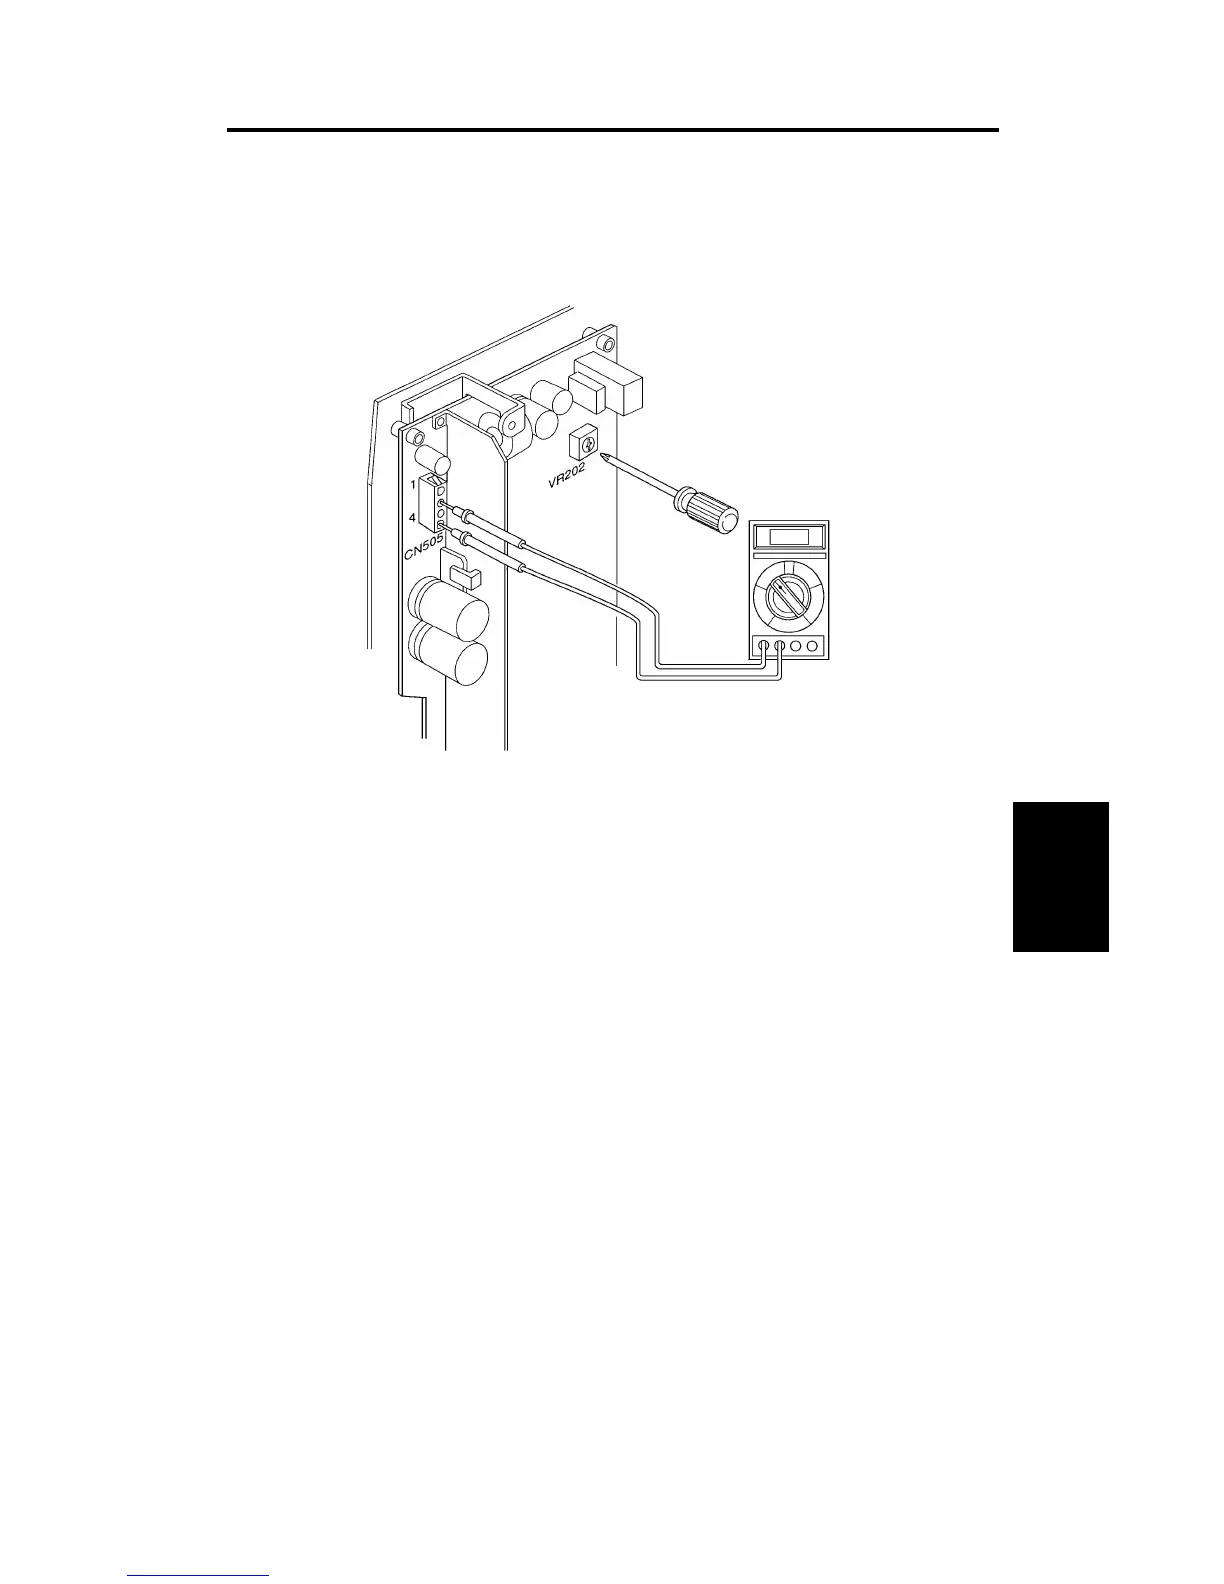
6. While holding down the Print Start key , confirm that the voltage between
pins 2(VHD) and 4(GMD) on CN505 is at the level specified on the decal
(Within + 0 V ,– 0.1 V).
7. If it is not, adjust VR202 on the power supply board.
Replacement
Adjustment
SM 5-7 C216