1. OPTICS ADJUSTMENT
The procedure of the optics adjustment is the same as the VT2130, VT2300
and VT2105. However, the wave shape is not exactly the same because the
pixel density of the VT2200 is different.
Necessary Tools
1) Facsimile Text Chart R-21 (99992131)
2) Resolution Chart (A0129110)
3) Oscilloscope
1.1 PREPARATION FOR ADJUSTMENT
1. Remove the original table and the original table cover.
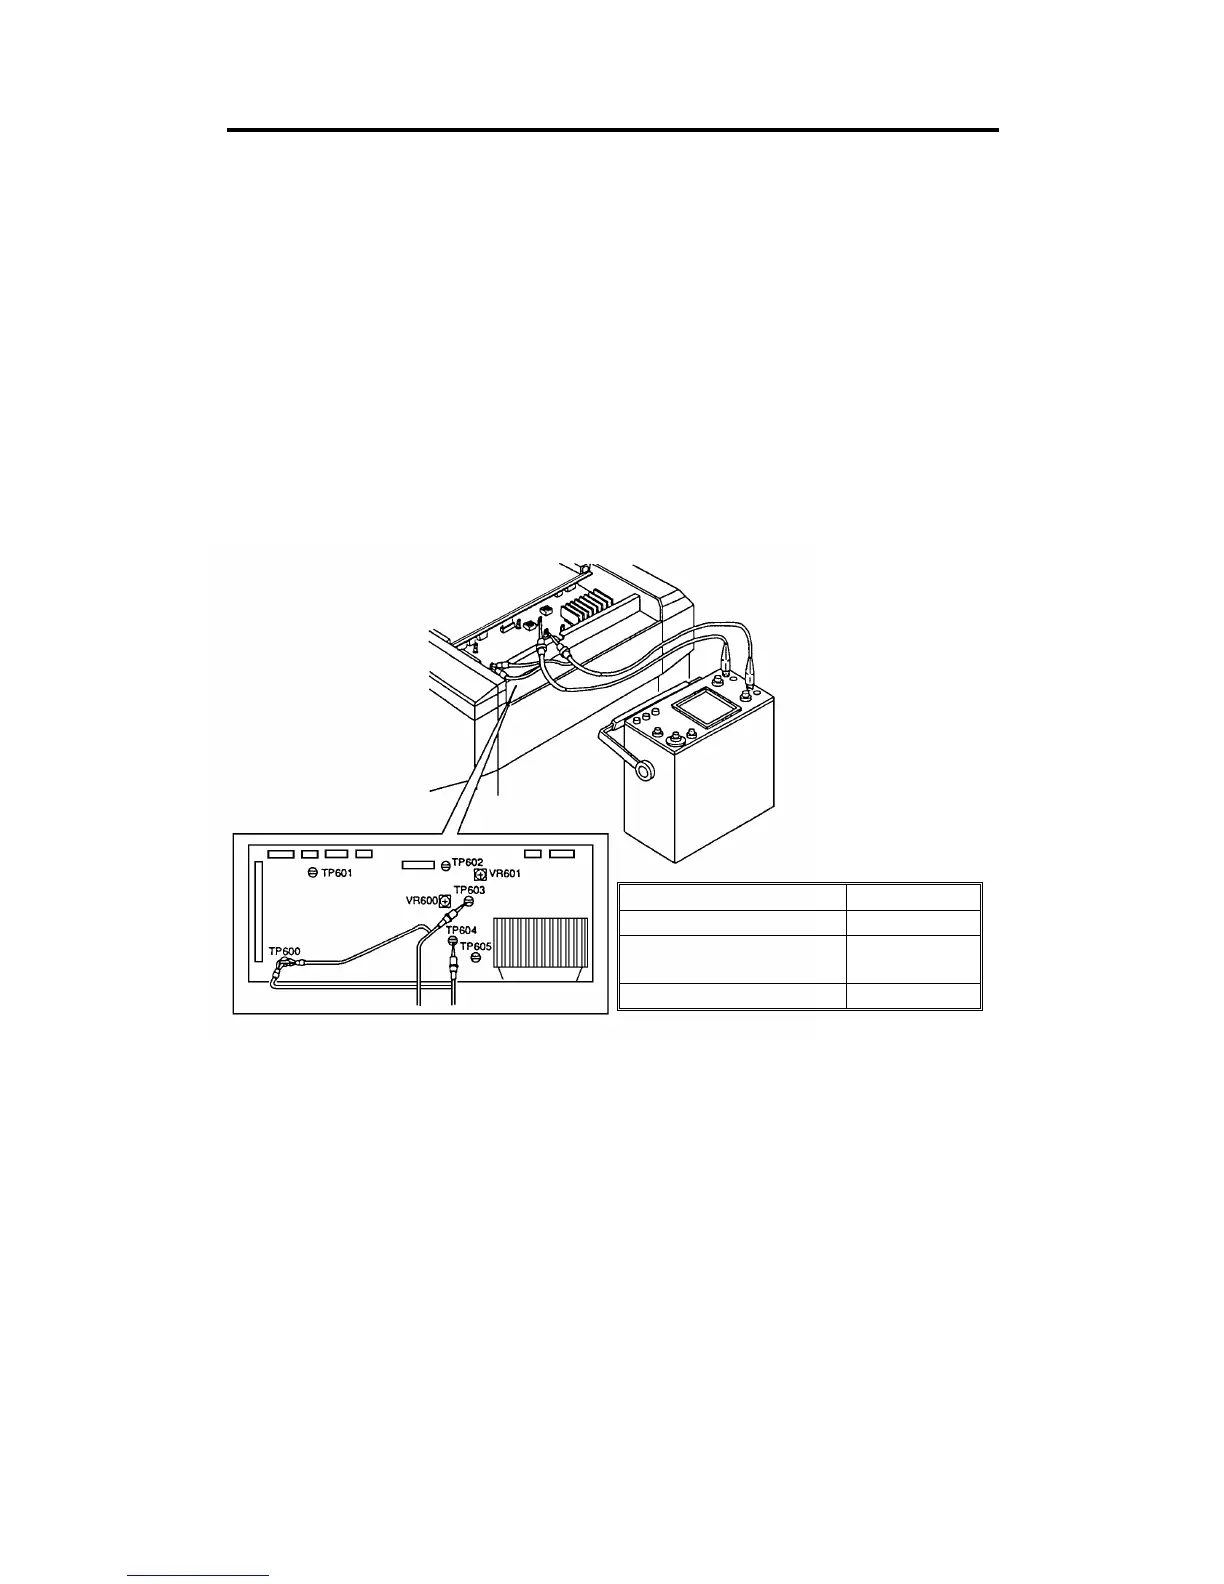
2. Connect the terminals of the oscilloscope to the following test pins on
the A/D conversion board.
3. Access "I/O Check Mode".
•
Turn on the main switch while holding the Print Start key, Stop key
and Clear key on the operation panel.
4. Input 21 in the copy counter using the number keys, and set "0" in the
memory/class display by pressing the memory/class key
5. Press the Print Start key to turn on the fluorescent lamp.
Oscilloscope Text Pin
Channel 1 TP603
Channel 2 (Black level
standard voltage)
TP604
GND TP600
C224 5-2 SM