6.11 HARDWARE INSTALLATION
1. The Controller is connected by cables between both the computer and
the Priport. (The computer and Priport are not directly connected to each
other.) The inputs to the Priport Controller replicate those of a standard
printer, including Parallel, RS-232 Serial and AppleTalk® inputs. Simply
remove the cable from the printer and insert it into the appropriately
labeled connector on the backpanel of the Controller. DO NOT
CONNECT A SERIAL CABLE TO THE DIAGNOSTIC PORT.
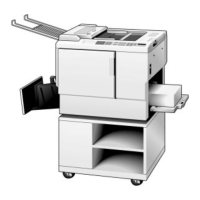
2. The Controller is connected from the Priport port on its backpanel to the
input port on the back of the Priport. The required cable is a standard
IBM-PC parallel printer cable which is included with the Controller.
3. Cabling Diagrams:
Parallel Connection
Serial Connection
AppleTalk Connection
Personal Computer
Priport
Diagnostic Serial In
AppleTalk
Parallel In Digital Duplicator
Priport
Parallel In Digital Duplicator
Diagnostic
AppleTalk
Personal Computer
Serial In
Macintosh
Priport
Parallel In Digital Duplicator
Diagnostic Serial In
AppleTalk
FSM 6-23 VT2105