EasyManuals Logo

Ricoh MP C407 User Manual

Ricoh MP C407
1241 pages
To Next Page IconTo Next Page
To Previous Page IconTo Previous Page
Page #249 background imageLoading...
Page #249 background image
Scanner
243
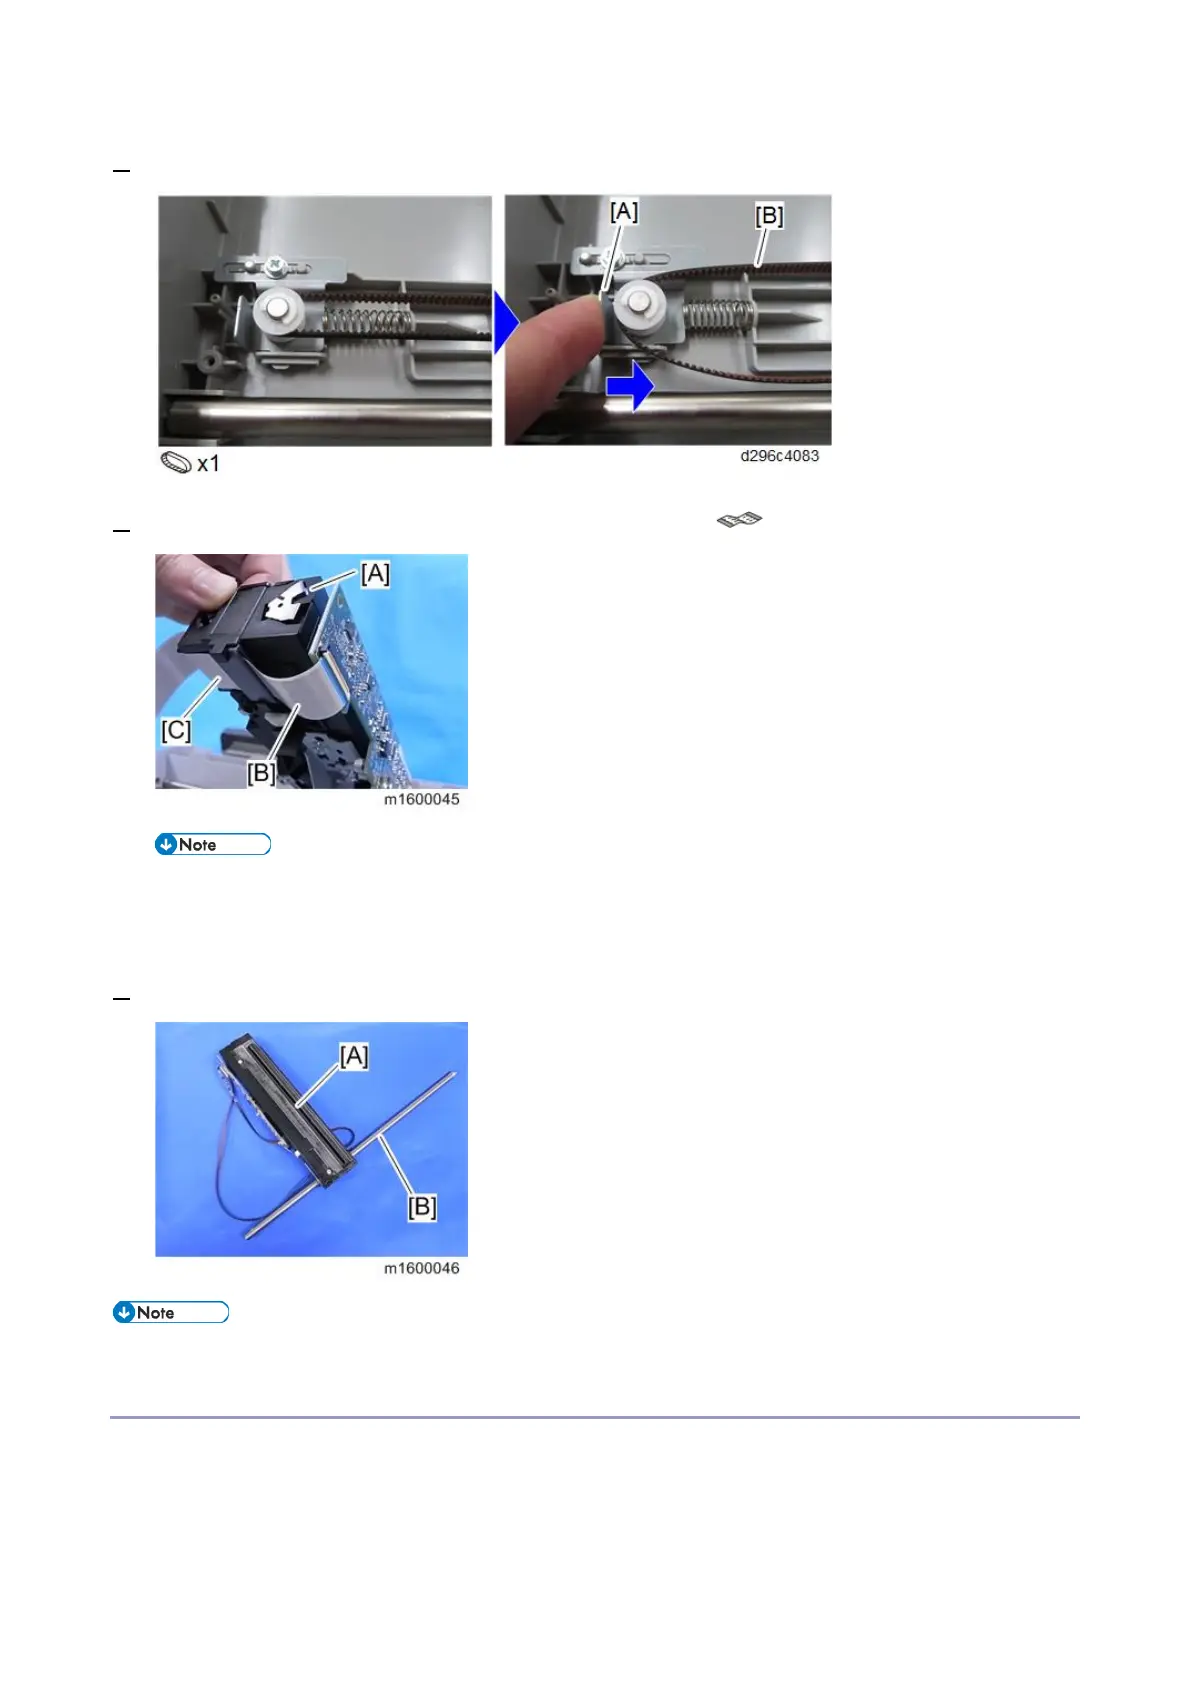
6. Slide the bracket [A] and then detach the carriage belt [B] from the pulley.
7. Disconnect the FFC [B] while lifting up the scanner carriage [A]. ( x1)
• In the area [C], the FFC is attached with double-sided tape. Do not try to strip the FFC [B] off by
force.
• When reassembling, be sure to align the tape position where originally attached.
8. Remove the shaft [B] from the carriage [A].
• Never wipe off the grease on the shaft of the scanner carriage.
Reinstalling the Scanner Carriage
Make sure that the FFC of the carriage is correctly connected and routed referring to the following points.
• The FFC [A] must be connected straight, and not at an angle.

Table of Contents

Questions and Answers:

Question and Answer IconNeed help?

Do you have a question about the Ricoh MP C407 and is the answer not in the manual?

Ricoh MP C407 Specifications

General IconGeneral
Print TechnologyLaser
FunctionsPrint, Copy, Scan, Fax
Print Speed (B/W)42 ppm
Print Speed (Color)42 ppm
Max Print Resolution1200 x 1200 dpi
Duplex PrintingYes
Monthly Duty Cycle150, 000 pages
Paper SizeA4, A5, B5
ConnectivityUSB, Ethernet, Wi-Fi
Mobile PrintingApple AirPrint, Google Cloud Print, Mopria
Operating System CompatibilityWindows, Mac OS, Linux

Related product manuals