EasyManuals Logo

Ricoh MP C407 User Manual

Ricoh MP C407
1241 pages
To Next Page IconTo Next Page
To Previous Page IconTo Previous Page
Page #330 background imageLoading...
Page #330 background image
Electrical Components
324
3. Cycle the power Off/On.
Controller Board
• Keep NVRAMs away from any objects that can cause static electricity. Static electricity can damage
NVRAM data.
1. Remove the rear cover. (Rear Cover)
2. Remove the left cover. (Left Cover)
3. Remove the FCU (if the machine has the fax unit) (Refer to the FSM for Fax Option)
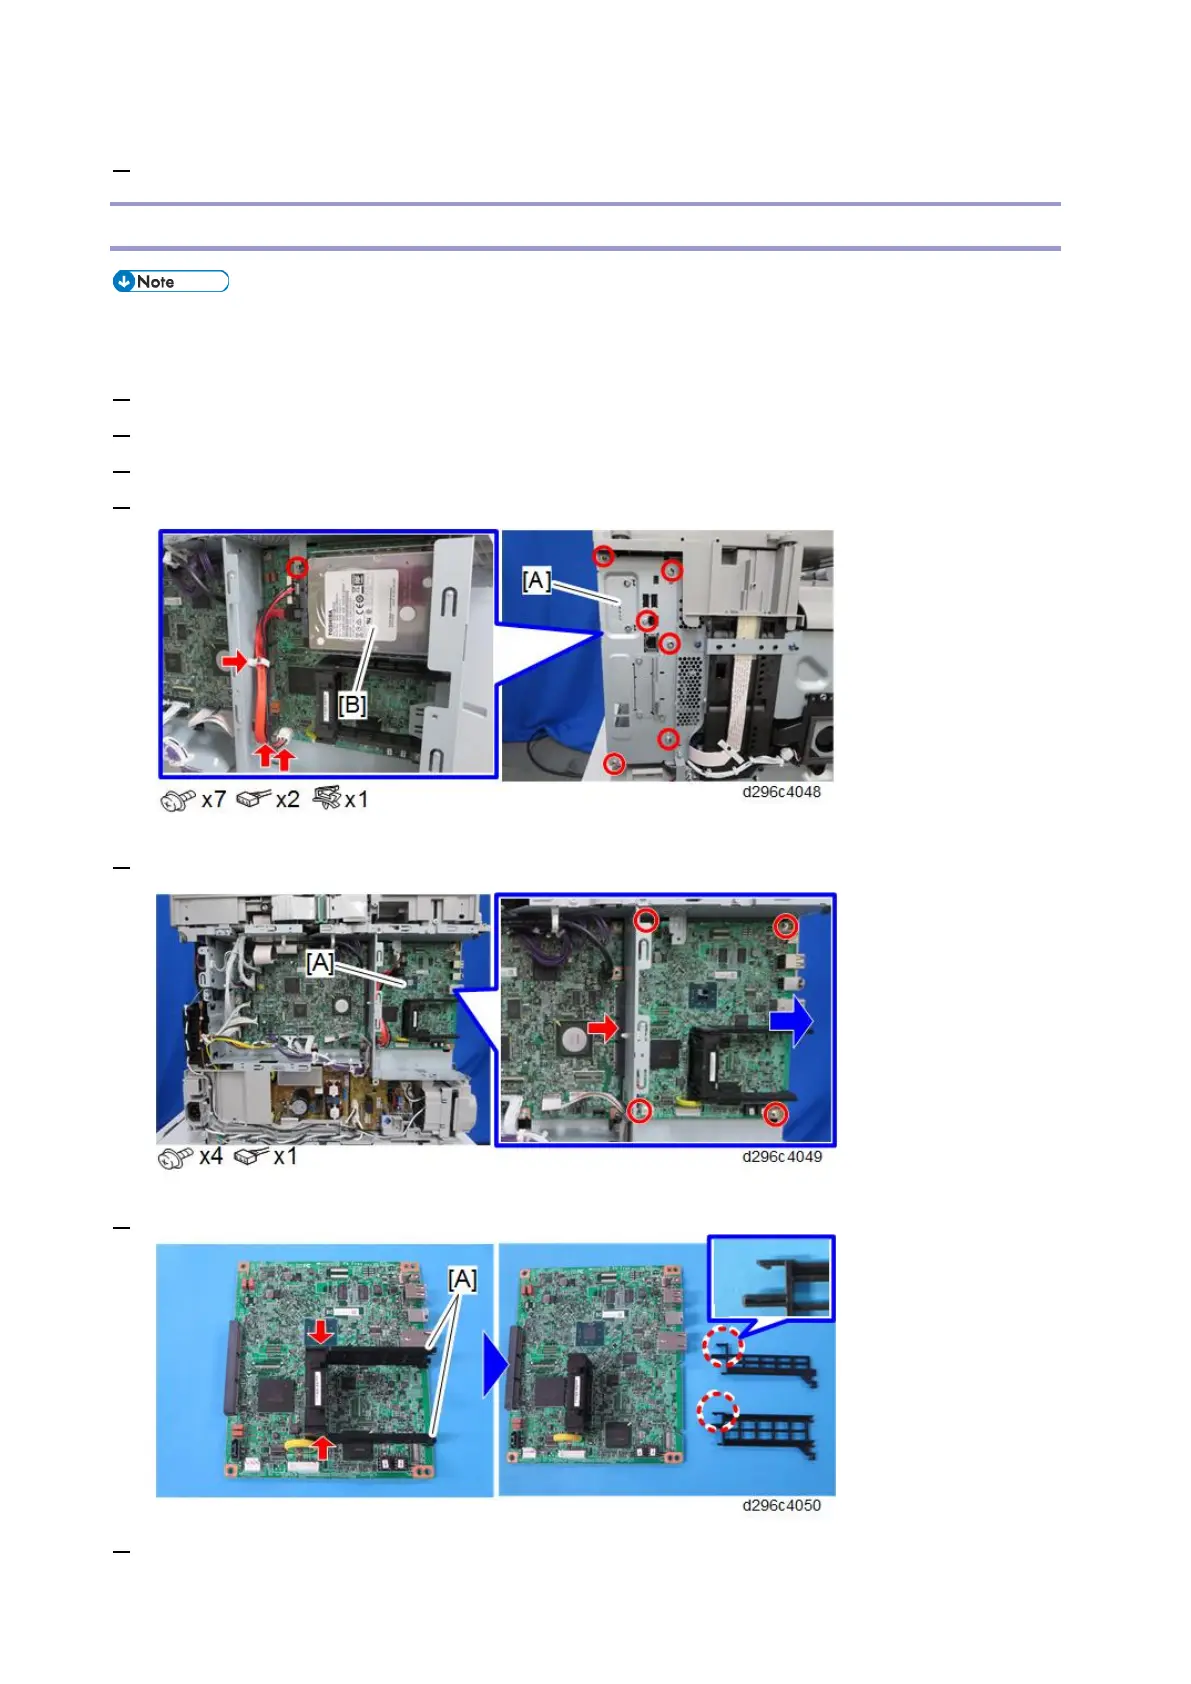
4. Remove the controller box cover [A] with the HDD [B].
5. Pull out the controller board [A].
6. Remove the guide rails [A] from the old controller board, and install them on the new controller board.
7. Remove the two used NVRAMs from the old controller board, and install them on the new controller

Table of Contents

Questions and Answers:

Question and Answer IconNeed help?

Do you have a question about the Ricoh MP C407 and is the answer not in the manual?

Ricoh MP C407 Specifications

General IconGeneral
Print TechnologyLaser
FunctionsPrint, Copy, Scan, Fax
Print Speed (B/W)42 ppm
Print Speed (Color)42 ppm
Max Print Resolution1200 x 1200 dpi
Duplex PrintingYes
Monthly Duty Cycle150, 000 pages
Paper SizeA4, A5, B5
ConnectivityUSB, Ethernet, Wi-Fi
Mobile PrintingApple AirPrint, Google Cloud Print, Mopria
Operating System CompatibilityWindows, Mac OS, Linux

Related product manuals