09/2016 Page 20 5IN2371 C
Assigning ID Numbers (Setting DIP Switches) for Bus Devices
When installing each bus device, you must set its DIP switches to match its
sequentially-assigned physical ID number before the device is powered up.
NOTE: If after power-up a device’s DIP switch(s) are changed, it will be necessary
to shut down the device’s power and then power it up again.
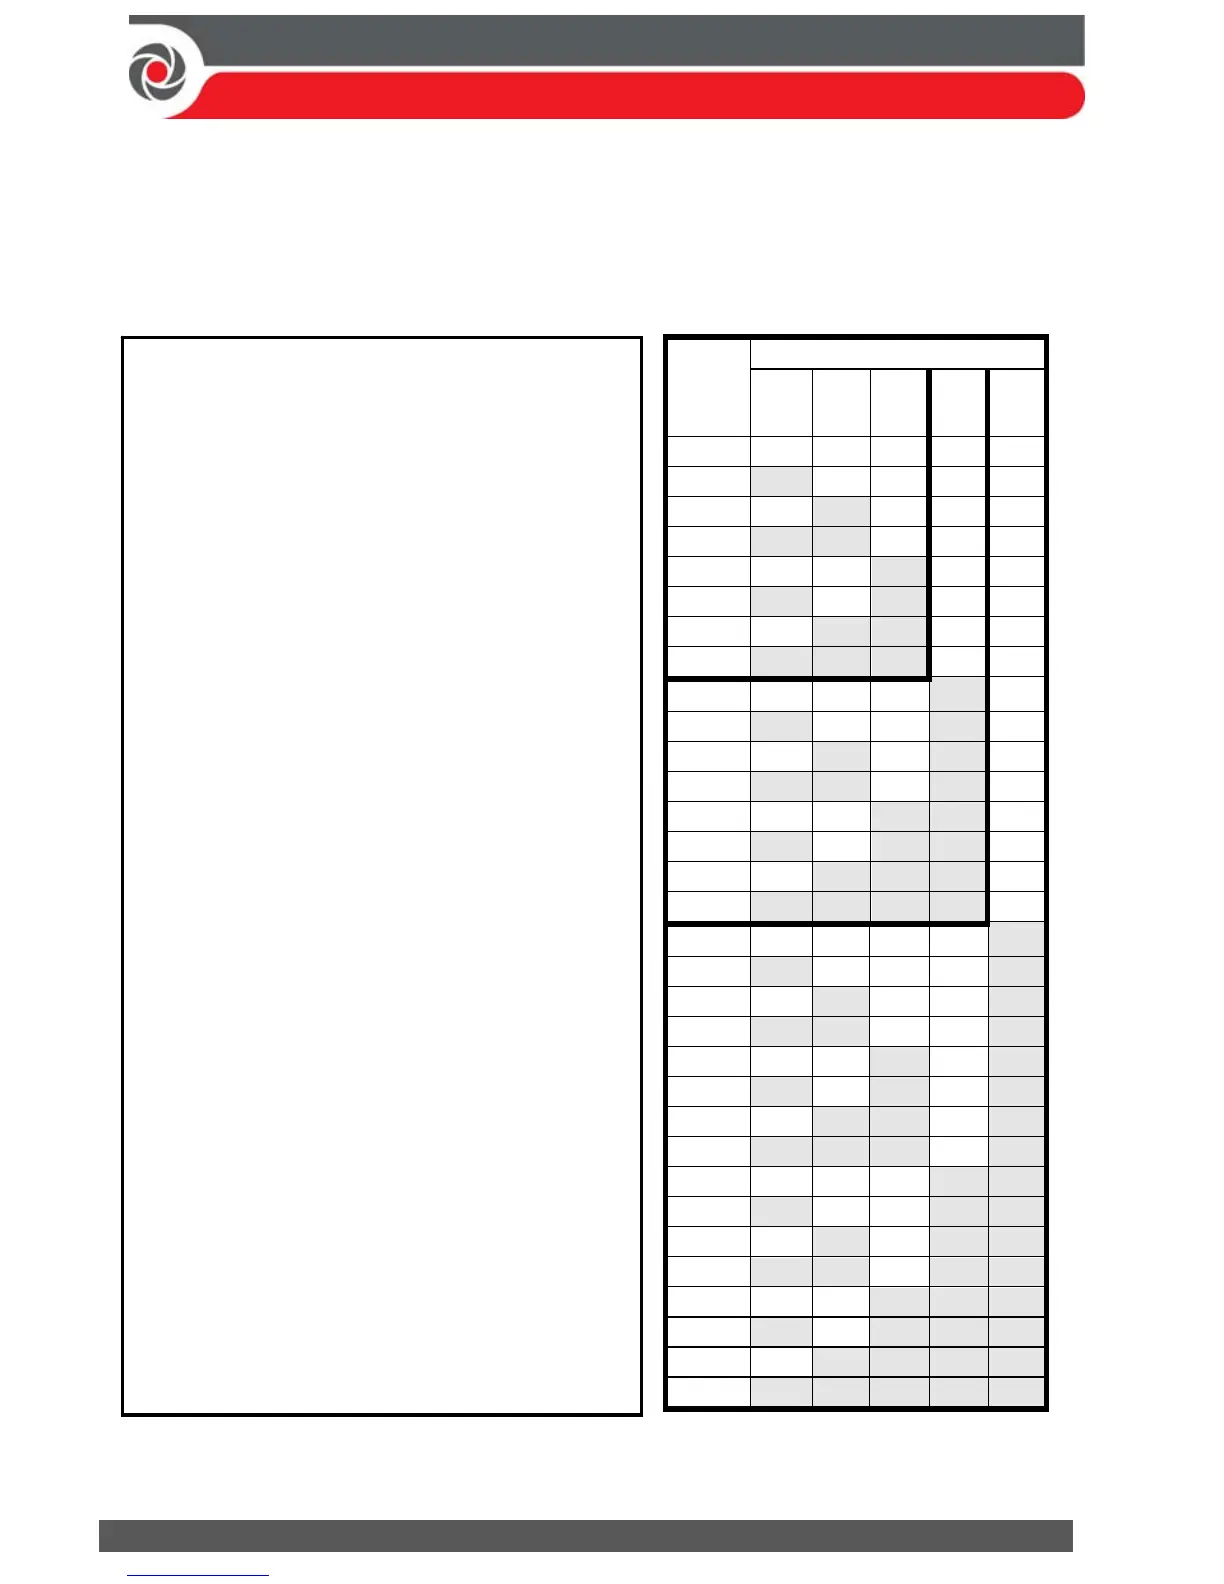
Bus
device
ID
DIP switches
12345
01 OFF OFF OFF OFF OFF
02 ON OFF OFF OFF OFF
03 OFF ON OFF OFF OFF
04 ON ON OFF OFF OFF
05 OFF OFF ON OFF OFF
06 ON OFF ON OFF OFF
0
OFF ON OFF ON ON
28 ON ON OFF ON ON
29 OFF OFF ON ON ON
30 ON OFF ON ON ON
31 OFF ON ON ON ON
32 ON ON ON ON ON
To set a bus device’s ID with its DIP
switches:
For each bus device, set its physical
ID number by placing its DIP
switches to ON or OFF according to
the table. Bus devices have between
3 and 5 DIP switches (check the
device’s packaged instructions for
details, as some bus devices may
have DIP switches that are not to be
used for setting the device ID).
NOTE: Categories of bus devices with 3 DIP
switches can be comprised of up to 8 IDs,
those with 4 DIP switches up to 16 IDs, and
those with 5 DIP switches up to 32 IDs. See
the following examples and the table:
EXAMPLE: For a bus device with 3 DIP
switches, to assign ID 02, DIP switch 1 needs
to be set to ON, and DIP switches 2 and 3
need to be set to OFF.
EXAMPLE: For a bus device with 4 DIP
switches, to assign ID 04, DIP switches 1 and
2 need to be set to ON, and switches 3 and 4
need to be OFF.
EXAMPLE: For a bus device with 5 DIP
switches, to assign ID 07, DIP switch 1 needs
to be set to OFF, DIP switches 2 and 3 need
to be ON, and DIP switches 4 and 5 need to
be OFF.