Riverstone Networks RS 3000/3100/3200 Switch Router Getting Started Guide 3-13
Hardware Installation Installing the Hardware
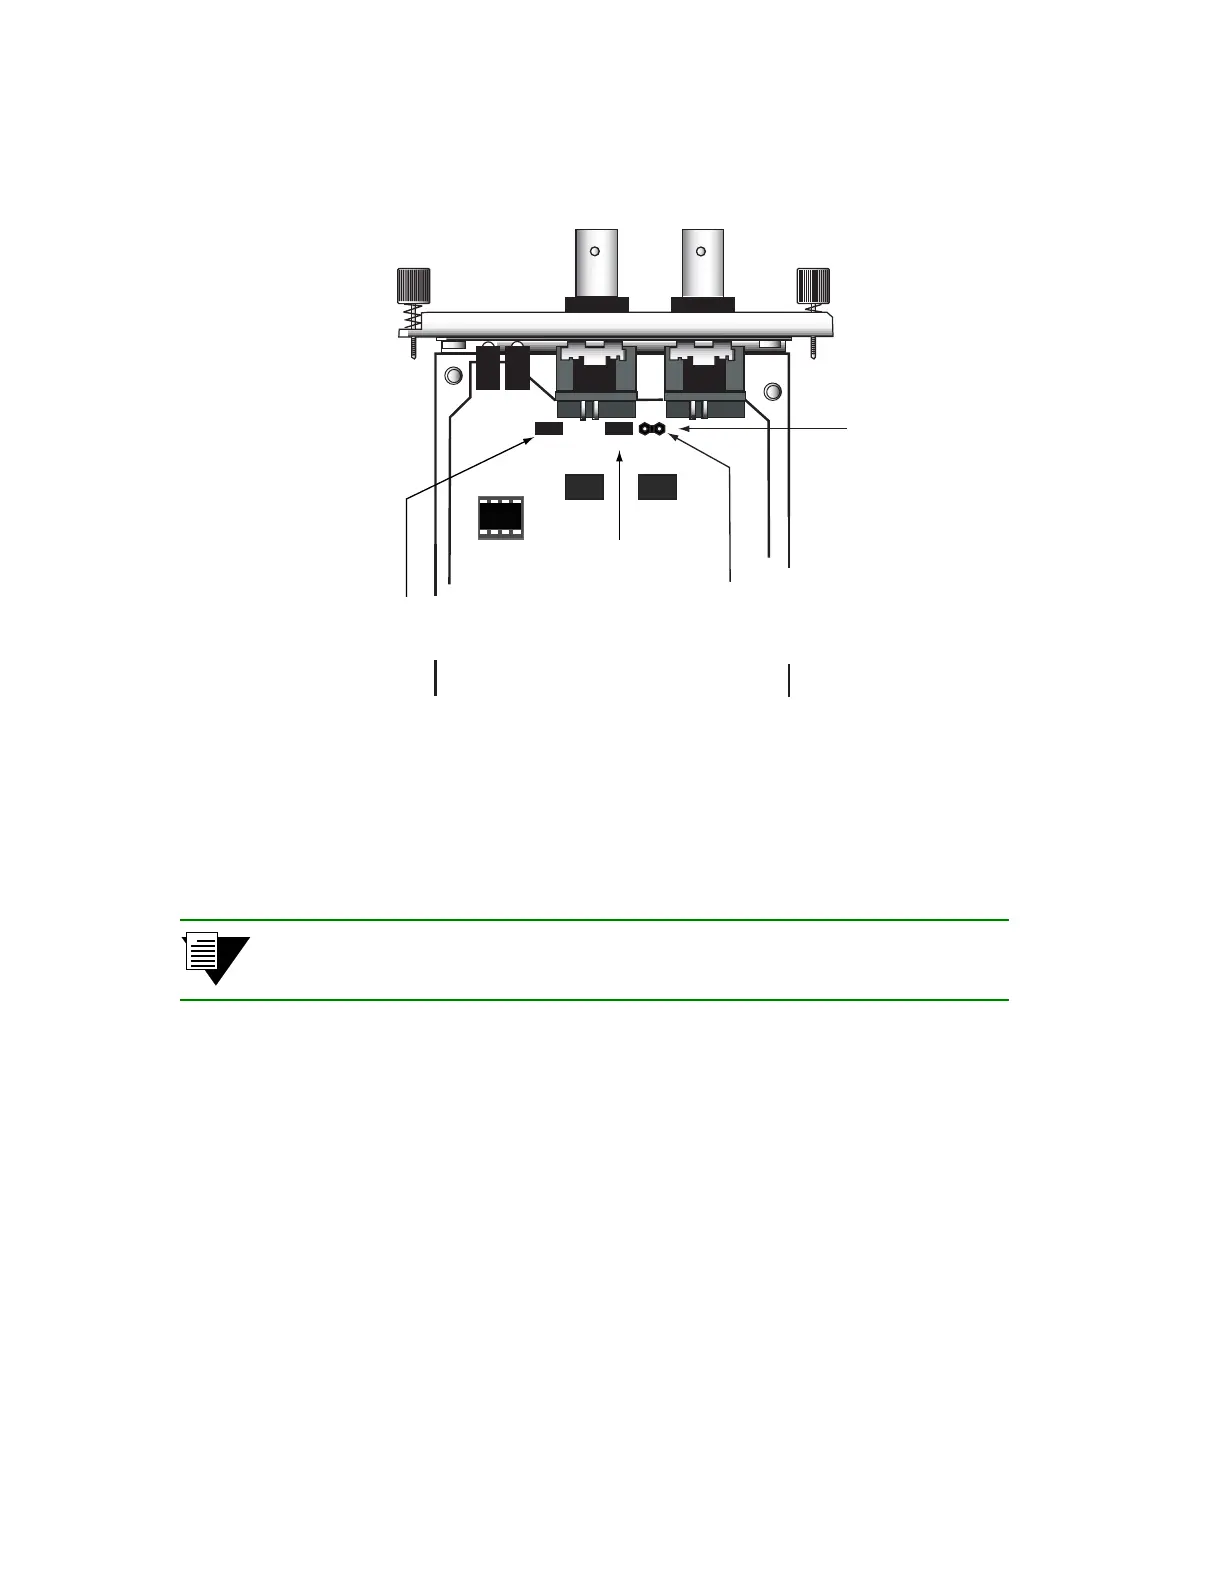
Figure 3-10 Jumper position on Clear Channel T3 and E3 WICs
Installing the Multi-rate Line card
Because of its design, the Multi-rate WAN line card requires a somewhat different installation procedure. The
following describes how to install a Multi-rate WAN line card and its WAN Interface Cards (WIC).
Note The Multi-rate WAN line card does not come with a separate face plate. The face
plate is integral to the Multi-rate WAN line card.
1. Make sure that the RS 3000, RS 3x00 or RS 3200 is powered off.
2. If rack mounted, remove the RS 3000, RS 3x00 or RS 3200 from the equipment rack.
3. If the RS 3000, RS 3x00 or RS 3200 is equipped for rack mounting, use the #2 Phillips-head
screwdriver to remove the mounting brackets from each side of the chassis.
4. Use the #2 Phillips-head screwdriver to remove the four mounting screws that hold the top cover on
the RS 3000, RS 3x00 or RS 3200 (see Figure 3-1).
5. Slide the cover away from the front of the RS 3000, RS 3x00 or RS 3200 about one-half inch
(1/2”), then lift the cover away. Be careful not to damage or remove any EMI gaskets around the
edges of the cover.
6. Use the #2 Phillips-head screwdriver to remove the four mounting screws that secure the cover plate
to the expansion slot (see Figure 3-2). Be careful not to damage or remove any EMI gaskets around
the edges of the expansion slot opening.
7. Use the #2 Phillips-head screwdriver to remove the expansion slot cover.
JP2 JP4
JP3
fhjdjdkkf
D f3454hjkjkk
789988yu99999
This is a chip
1134953 22
This is a chip
1134953 22
Front of Clear Channel T3/E3 WIC
Jumper Block is
Stored on JP4
To Ground the Rx Line
Shielding, Remove the
Jumper Block onJP4
and Place it on JP3
JP3
To un-ground the Tx Line
Shielding, Remove
Jumper Block from JP2
 Loading...