3-8 Riverstone Networks RS 3000/3100/3200 Switch Router Getting Started Guide
Installing the Hardware Hardware Installation
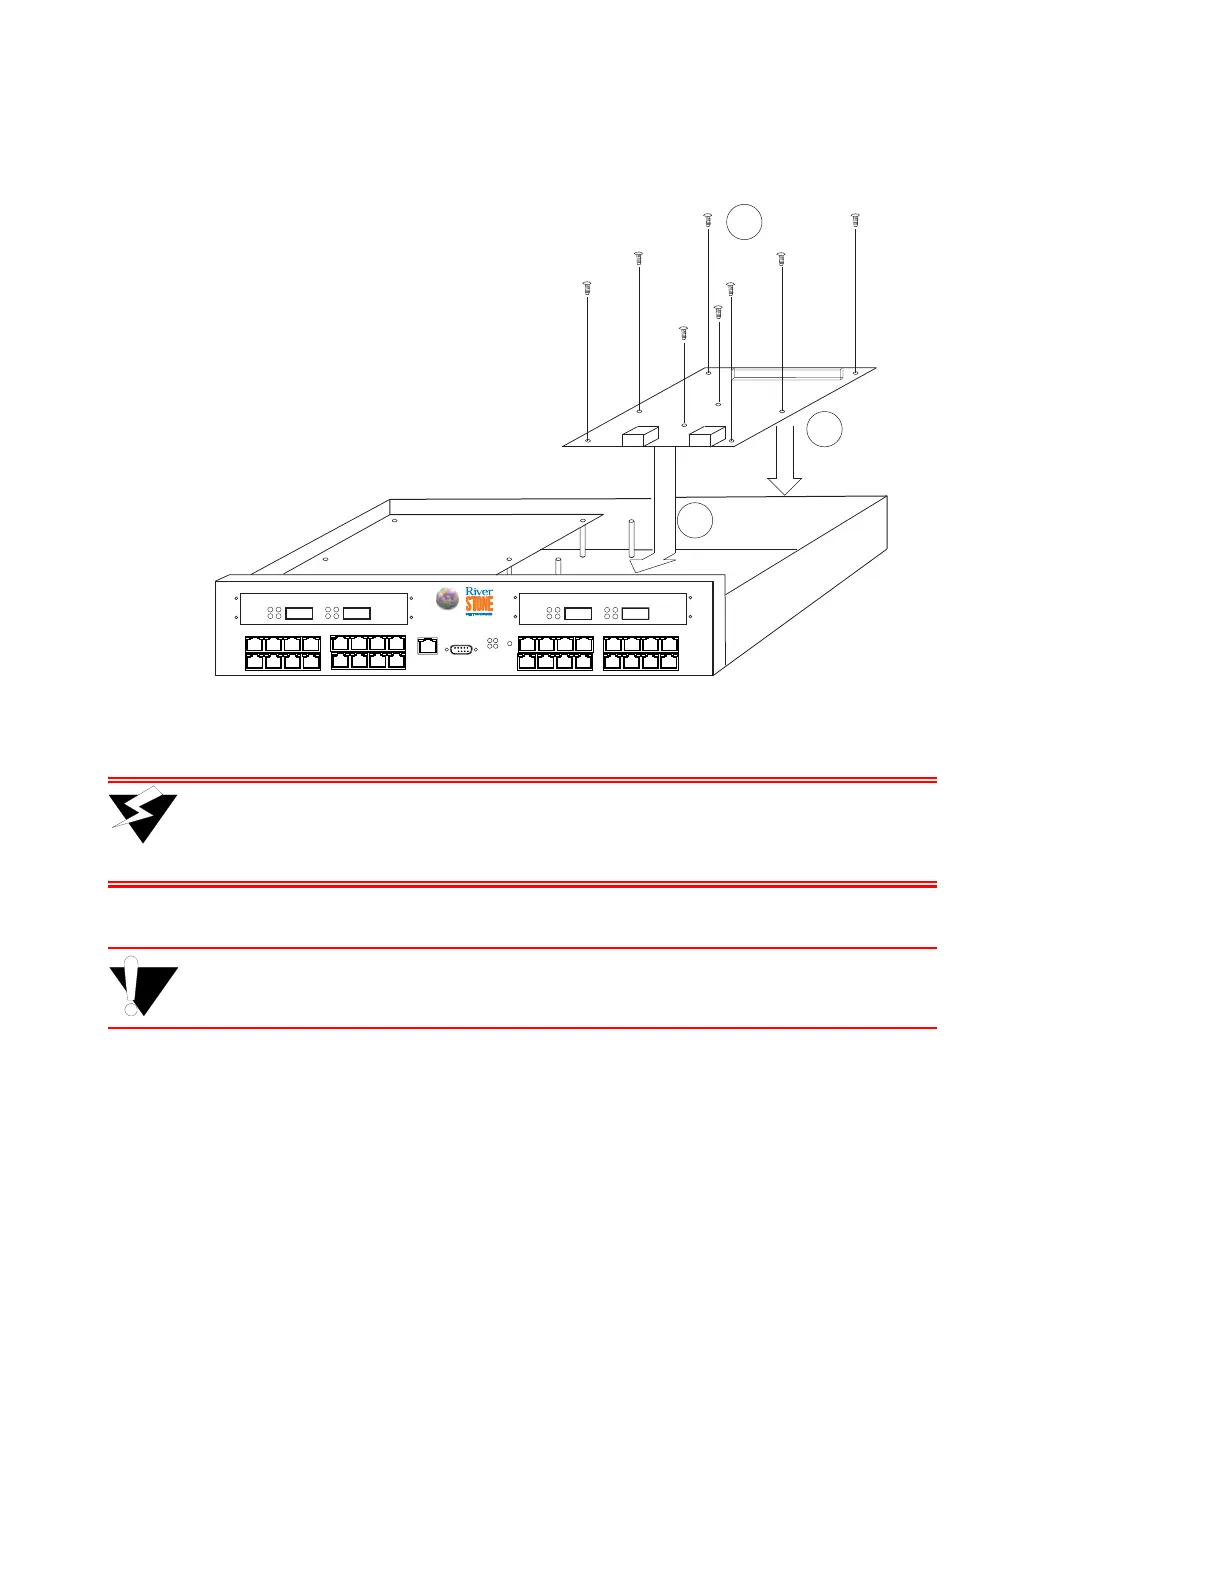
Figure 3-6 Installing the line card into the chassis
Warning The female and male connectors are not keyed, so it is possible to misalign
the connection. Ensure that all pins fit properly before applying power to the
RS 3000, RS 3x00 or RS 3200.
Caution When installing the Advanced Services Module (ASM) check carefully that the
line card is pushed in properly. If it is not, the ASM will not power-up.
10. Insert the six screws that hold the line card in place over the motherboard. Use the #2 Phillips-head
screwdriver to tighten the screws. If installing a line card that uses the extended EMI face plate,
insert and tighten the two additional screws that go through the center of the line card (see
Figure 3-6)
11. Replace the cover of the RS 3000, RS 3x00 or RS 3200, and secure it using the #2 Phillips-head
screwdriver and the four screws previously removed.
3.3.3 Installing GBIC Modules into GBIC MPLS Line Cards
GBIC line cards support two sockets for installing GBIC modules. One GBIC module can be installed into each
available socket.
21
1000BASE-SX
3
4
G2M-GSXA1-02
Tx
Rx AN
LinkTx
Rx AN
Link
8
9
7
*
*
*
These two screws are
used only with extended
EMI face plate
RS 3000
CONSOLE
10/100 MGMT
OK
ERR
DIAG
HBT
RST
21
1000BASE-SXG2M-GSXA1-02
Tx
Rx AN
LinkTx
Rx AN
Link
1
2
 Loading...