AX10 Palletizing Solution
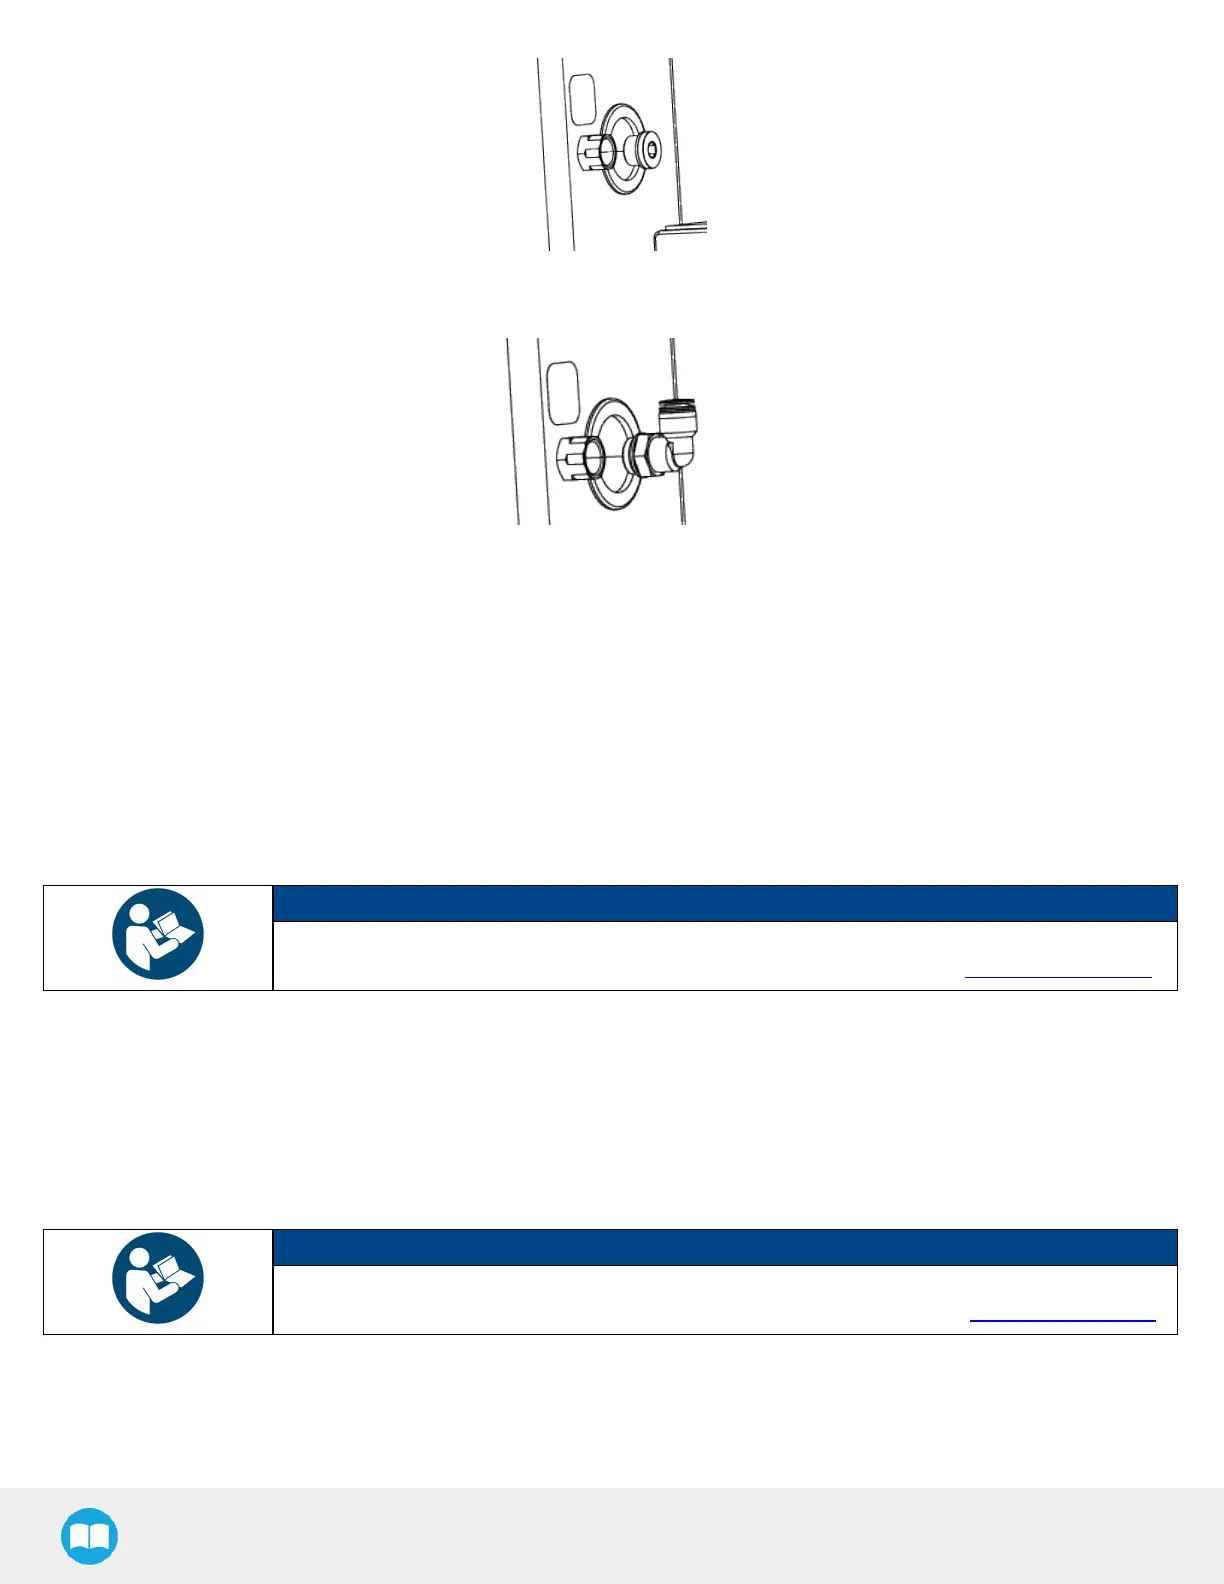
5. On the bulkhead fitting, install the 1/2 BSPP to 12 mm tube pneumatic elbow fitting provided using the 21 mm / 24 mm
double ended wrench. The required torque is 26 Nm.
6. Insert the end of the 12 mm air tube (providing pneumatic pressure to the Vacuum Generation Unit) into the elbow fitting.
7. Push the air tube until it stops.
8. Remove the grommet on hole #2 and discard it.
9. Run the open end of the M12-12 pin I/O cable through hole #2.
10. Pull the M12-12 pin I/O cable out via hole #3.
11. Route the M12-12 pin I/O cable inside the UR control box.
12. Plug hole #2 using the pre-perforated grommet attached to the I/O cable.
13. Tuck any excess cable inside the column.
NOTICE
To complete the electrical connection of the PowerPick10 Vacuum Generation Unit, please refer to
the Electrical Installation section of the PowerPick10 user manual available at robotiq.com/support.
TCP and Center of Mass
1. In the PolyScope interface, go to Installation > General.
2. Expand the TCP dropdown menu, then select Payload.
3. Enter the appropriate center of mass and TCP of the gripper.
NOTICE
The TCP and center of mass of the PowerPick10 Vacuum Gripper can be found at section Tool
Center Point and Center of Mass of the PowerPick10 user manual available at robotiq.com/support.
52