AX10 Palletizing Solution
l
Slide the two 10 mm grommets on both 10 mm air tubes.
l
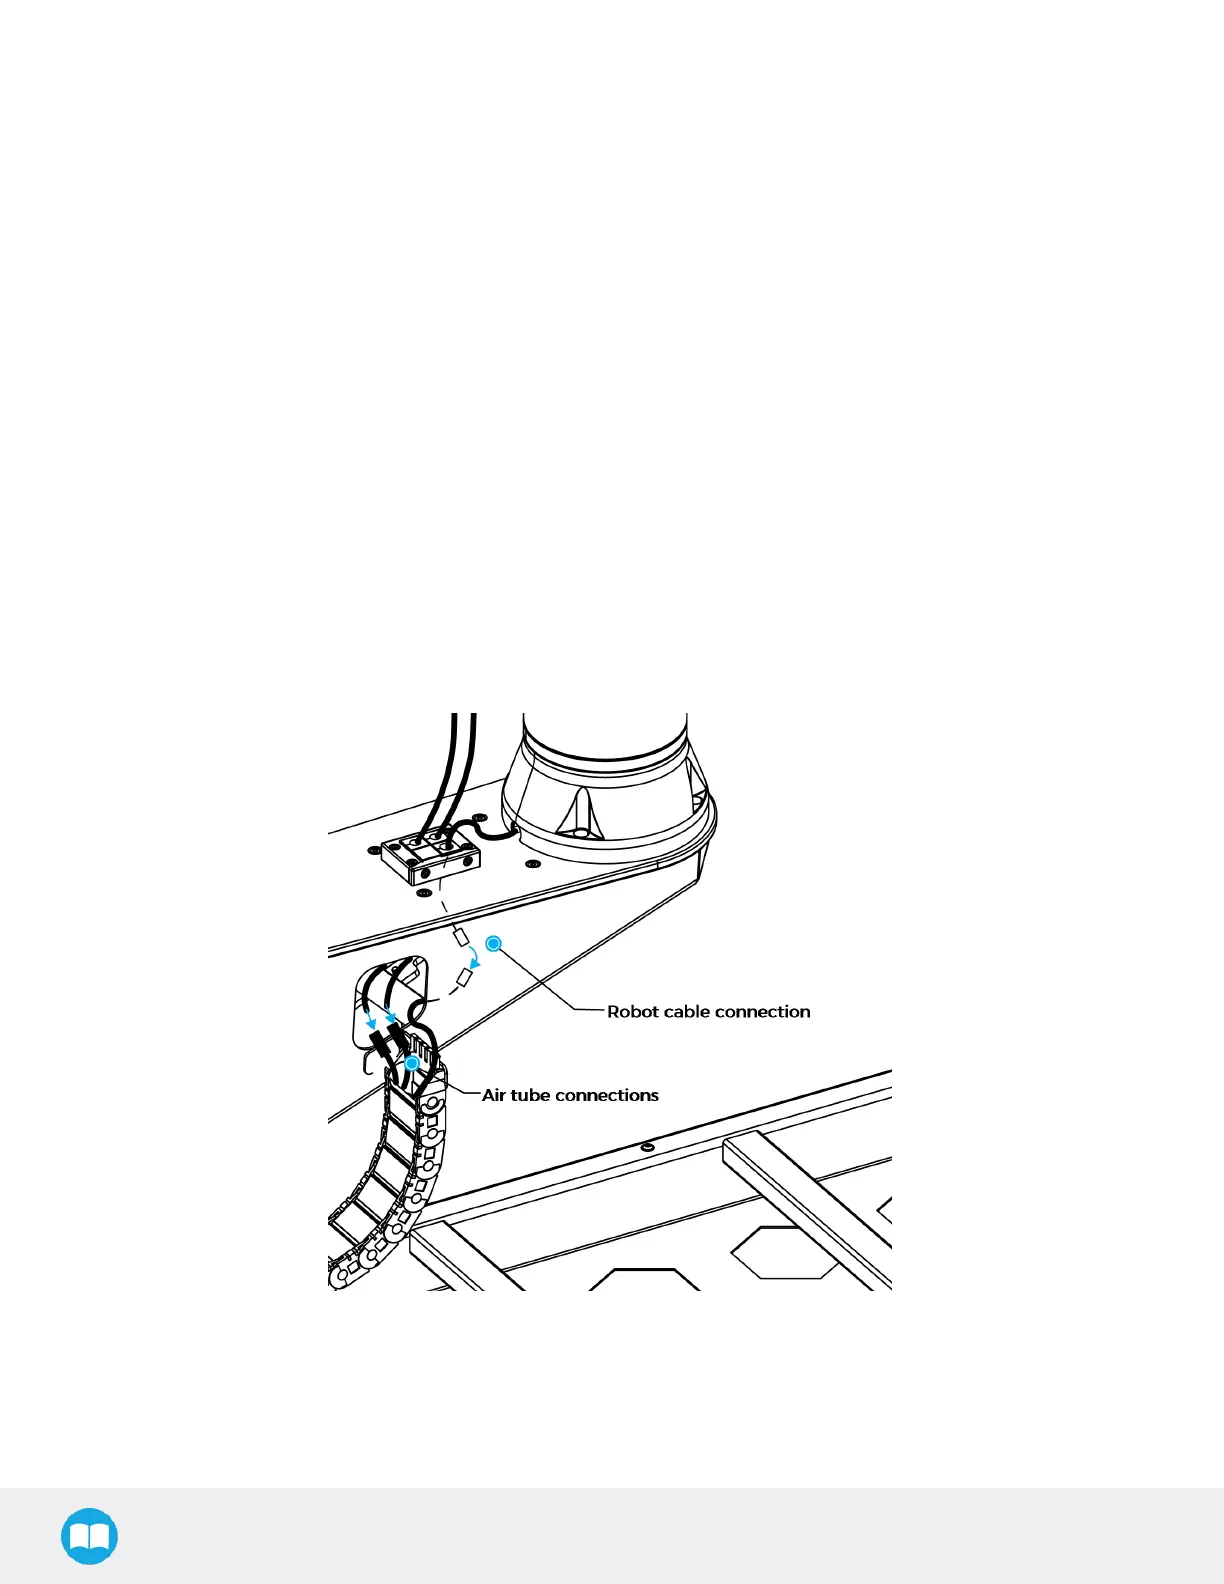
Run the end of the 10 mm air tubes through the hole in the robot base plate and pull them out of the hole on the side of
the carriage.
l
Slide the 10 mm grommets back into the cable entry frame, in the positions shown above.
l
Slide the 12 mm grommet around the robot cable.
l
Complete the robot cable connection by running the cable from the cable carrier through the hole on the side of the
carriage.
l
Slide the 12 mm grommet back into the cable entry frame, in the position shown above.
l
Slide the blank grommet into the cable entry frame, in the position shown above.
l
Assemble the cable entry frame with the side piece and two (2) screws. Do not tighten the screws completely.
l
Reinstall the cable entry frame on the robot base plate in the same orientation shown previously with four (4) screws. Do
not tighten the screws completely.
l
Align the last metallic mark on the 10 mm air tubes with the top surface of the cable entry frame.
l
Tighten all the screws of the cable entry frame.
l
Remove the 2 pneumatic plugs from the union fittings at the end of the cable carrier.
l
Connect the end of the 10 mm air tubes labeled BASE SIDE to the union fittings.
l
Push the air tube until fully seated.
l
Back at the top of the column, remove the two (2) pneumatic plugs from the end of the 10 mm pneumatic tubes coming
out of hole #1.
56